Start Trips, and build its first view in the canvas
Xcode previews
You will buildThe first piece of the Trips app: a card that shows one trip. You build it in Xcode's canvas, with a preview for each state the card can be in, and you do not launch the simulator until the last step.
TimeAbout 90 minutes
WhyIn UIKit, seeing a change meant build, run, and tap your way back to the screen. SwiftUI replaces most of that with previews: a view is drawn beside its code, and drawn again as you type. In this lesson you start the app that the rest of the course builds, and you make its first view the way SwiftUI views are meant to be made — a small view, fed sample data, with a preview for every state it can be in. That habit is also what makes a view testable later.
Open the starter
Trips is the app you will build for the rest of this course. It begins as a little app you download: a new project, as lesson 1 made one, with a first screen of its own. From the next lesson on, it grows from lesson to lesson.
Download Trips-starter.zip, this lesson's starting point. Double-click it in Finder to unzip it, then double-click
Trips.xcodeprojto open it in Xcode.Run it before changing anything. In the toolbar, open the run destination menu and pick an iPhone simulator — iPhone 17, for example. Choose Product ▸ Run (⌘R). Device Hub opens with the app:
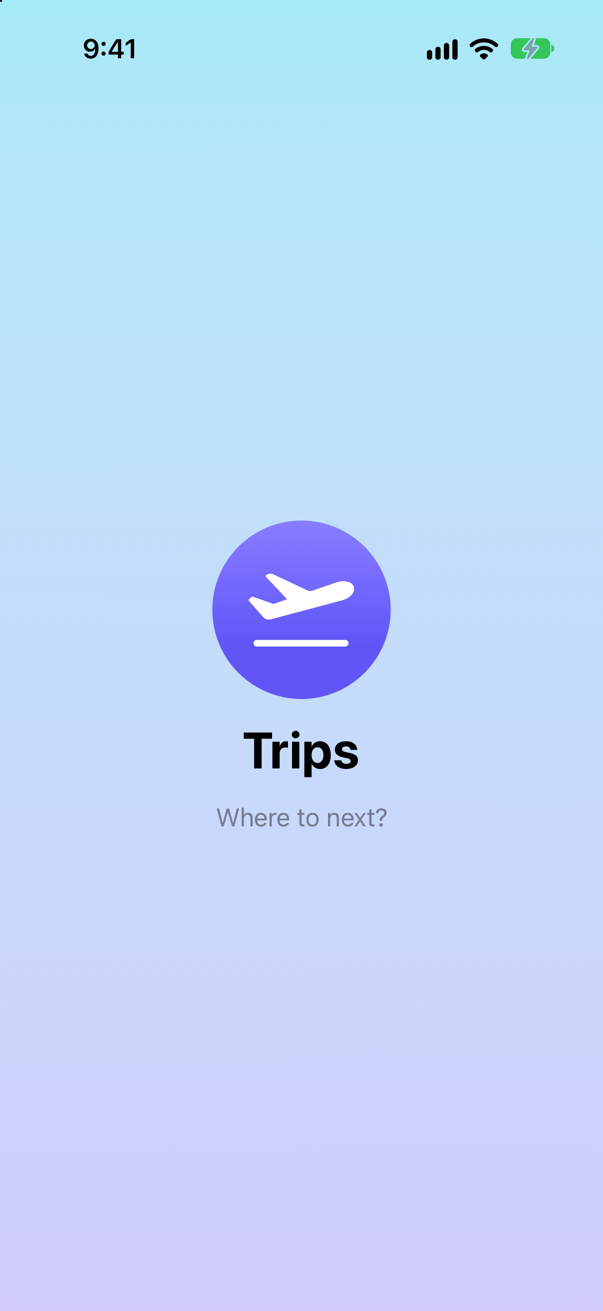
The starter's screen, running in the iPhone 17 simulatorScreenshot · iPhone 17, iOS 27.0
That is the last you will see of the simulator until step 12. Stop the app (Product ▸ Stop, ⌘.).
Meet the canvas
Click
ContentView.swiftin the Project navigator. Beside the code is the canvas. If it is not showing, click Show Canvas in the upper-right corner of the window's toolbar, or press ⌥⌘↩.If the canvas says that it is paused, click its Restart button. After a moment it shows the screen that the simulator showed. This time nothing was launched by you: the canvas drew it from the code.
Now change the code, and do not build or run. In the last
Text, replaceWhere to next?withPick a city. Pack a bag.:struct ContentView: View { var body: some View { ZStack { LinearGradient(colors: [.cyan.opacity(0.35), .indigo.opacity(0.3)], startPoint: .top, endPoint: .bottom) .ignoresSafeArea() VStack(spacing: 14) { Image(systemName: "airplane.departure") .font(.system(size: 56)) .foregroundStyle(.white) .padding(30) .background(.indigo.gradient, in: .circle) Text("Trips") .font(.largeTitle.bold())Text("Where to next?")Text("Pick a city. Pack a bag.") .foregroundStyle(.secondary) } } }}struct ContentView: View { var body: some View { ZStack { LinearGradient(colors: [.cyan.opacity(0.35), .indigo.opacity(0.3)], startPoint: .top, endPoint: .bottom) .ignoresSafeArea() VStack(spacing: 14) { Image(systemName: "airplane.departure") .font(.system(size: 56)) .foregroundStyle(.white) .padding(30) .background(.indigo.gradient, in: .circle) Text("Trips") .font(.largeTitle.bold()) Text("Pick a city. Pack a bag.") .foregroundStyle(.secondary) } } } }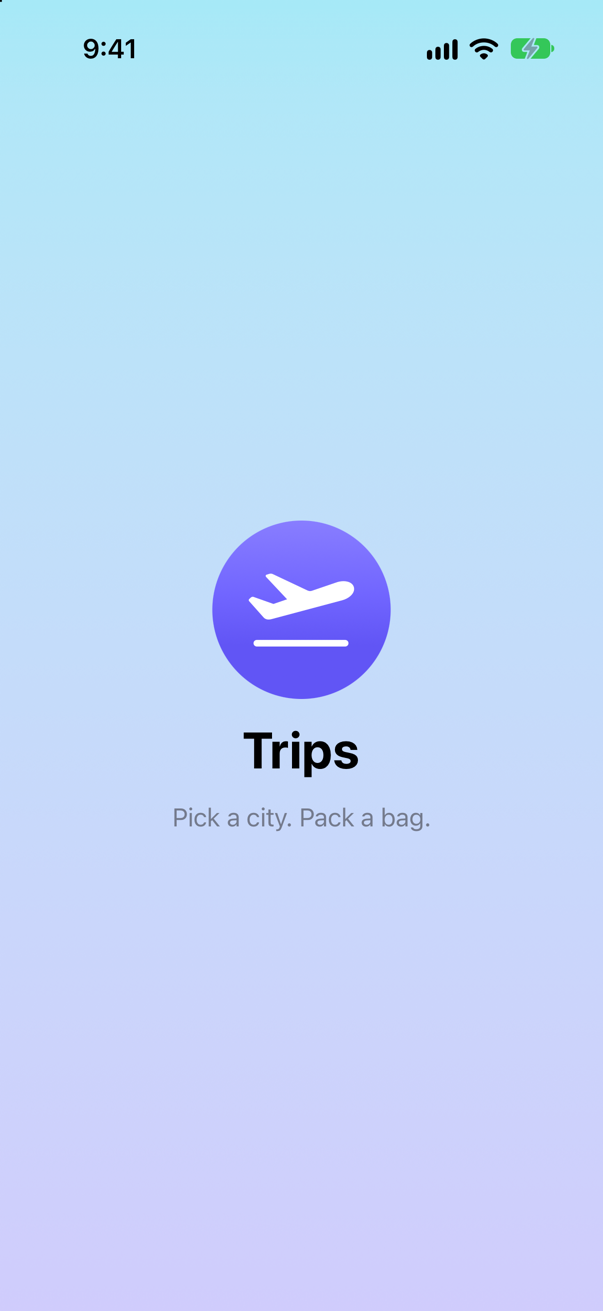
The canvas, a moment after you stop typingScreenshot · iPhone 17, iOS 27.0
What the canvas shows is decided by the four lines at the bottom of the file:
#Preview {
    ContentView()
}
#Preview is a macro: code that writes code while your app is compiled. It is the freestanding kind, written with a #, and lesson 12 takes one apart. Its braces hold the code that makes the view to show. Xcode finds every #Preview in the file you are editing and draws it. A preview is only for you: it has no effect on what the app does when it runs.
A preview can only be drawn from code that compiles. While you are in the middle of typing, the canvas waits. If it stays paused after the code is right again, choose Editor ▸ Canvas ▸ Refresh Canvas (⌥⌘P).
Sample data first
A preview can only show a view that it is able to create. So before the view, make the data that a preview will create it from. Choose File ▸ New ▸ File from Template… (⌘N), select Swift File under Source, and name it Trip. Then add the model:
struct Trip: Identifiable {
    let id: Int
    var city: String
    var country: String
    var nights: Int
    var isFavorite: Bool
}
And a few values of it, as static constants on the type itself:
extension Trip {
    static let seattle = Trip(id: 1, city: "Seattle", country: "United States",
                              nights: 5, isFavorite: true)
    static let vancouver = Trip(id: 2, city: "Vancouver", country: "Canada",
                                nights: 3, isFavorite: false)
    static let atacama = Trip(id: 3, city: "San Pedro de Atacama", country: "Chile",
                              nights: 12, isFavorite: true)

    static let samples = [seattle, vancouver, atacama]
}
Because they are static members of Trip, anything that expects a Trip can be given one as .seattle. The third sample is there on purpose: a long name and a two-digit number, to see what they do to a layout.
A view of its own
Choose File ▸ New ▸ File from Template… (⌘N) again. This time, under User Interface, select SwiftUI View. Click Next, name it
TripCard, and click Create.Xcode writes a view and a preview of it:
import SwiftUI

struct TripCard: View {
    var body: some View {
        Text("Hello, World!")
    }
}

#Preview {
    TripCard()
}
The canvas for TripCard.swiftScreenshot · iPhone 17, iOS 27.0
The canvas now shows this file's preview, not the app's first screen. That is the point of it: you look at one view, alone, without making your way to it through the app.
Give the card a trip
The card should show a trip that it is given. Add a property, and show the city:
struct TripCard: View { let trip: Trip var body: some View { Text("Hello, World!") Text(trip.city) }}struct TripCard: View {
let trip: Trip
var body: some View {
Text(trip.city)
}
}The canvas stops, and Xcode reports an error — not in the view, but in the preview below it
missing argument for parameter 'trip' in callA preview is code. It is compiled together with the rest of the app, so when a view's initializer changes, the preview has to change with it. Give the preview a trip to show, and a name while you are there:
#Preview { TripCard()#Preview("Favorite") { TripCard(trip: .seattle)}#Preview("Favorite") {
TripCard(trip: .seattle)
}
.seattle is the sample from step 3. This is the pattern for every view from here on: the view is given what it shows, and its previews give it sample data. A view that fetched its own trip from a server could not be previewed like this.
Build it up, watching the canvas
Now make it a card, a few lines at a time. Keep an eye on the canvas after each change. First the country, under the city:
struct TripCard: View { let trip: Trip var body: some View { Text(trip.city) VStack(alignment: .leading) { Text(trip.city) .font(.headline) Text(trip.country) .foregroundStyle(.secondary) } }}struct TripCard: View {
let trip: Trip
var body: some View {
VStack(alignment: .leading) {
Text(trip.city)
.font(.headline)
Text(trip.country)
.foregroundStyle(.secondary)
}
}
}
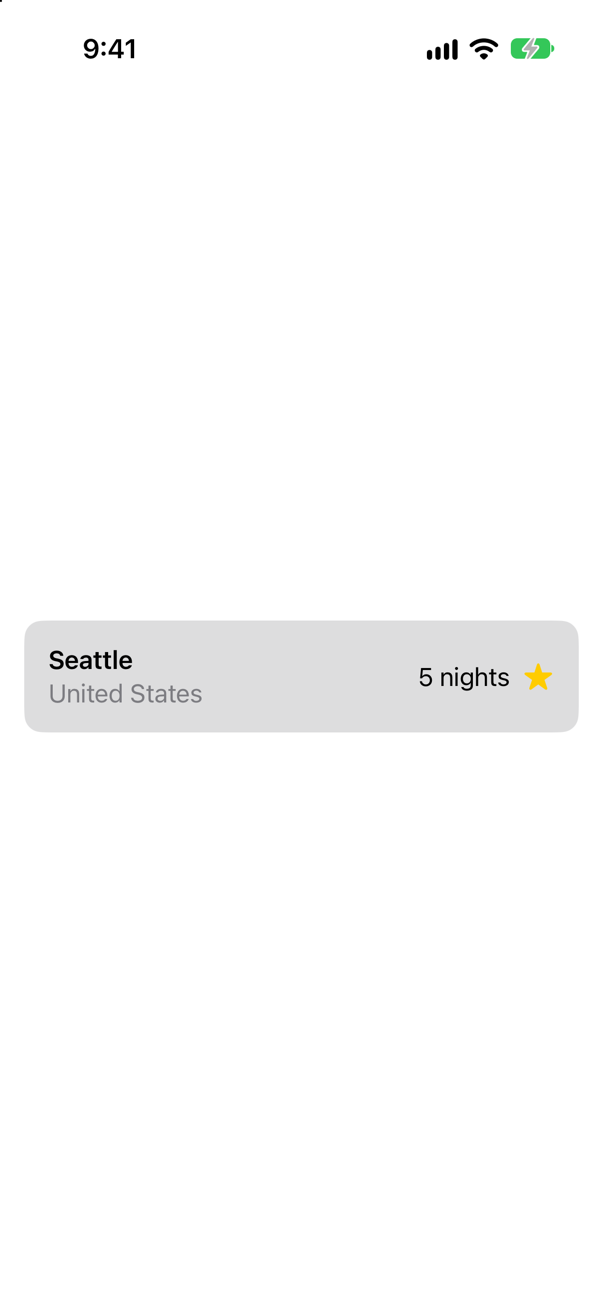
Then the nights and the star at the right, some space inside, and a background:
struct TripCard: View { let trip: Trip var body: some View { VStack(alignment: .leading) { Text(trip.city) .font(.headline) Text(trip.country) .foregroundStyle(.secondary) HStack { VStack(alignment: .leading) { Text(trip.city) .font(.headline) Text(trip.country) .foregroundStyle(.secondary) } Spacer() Text("\(trip.nights) nights") if trip.isFavorite { Image(systemName: "star.fill") .foregroundStyle(.yellow) } } .padding() .background(.quaternary, in: RoundedRectangle(cornerRadius: 12)) .padding(.horizontal) }}struct TripCard: View {
let trip: Trip
var body: some View {
HStack {
VStack(alignment: .leading) {
Text(trip.city)
.font(.headline)
Text(trip.country)
.foregroundStyle(.secondary)
}
Spacer()
Text("\(trip.nights) nights")
if trip.isFavorite {
Image(systemName: "star.fill")
.foregroundStyle(.yellow)
}
}
.padding()
.background(.quaternary, in: RoundedRectangle(cornerRadius: 12))
.padding(.horizontal)
}
}
Do not worry yet about why each line does what it does. VStack, HStack and Spacer are lesson 9. .font, .foregroundStyle and the SF Symbol in Image(systemName:) are lesson 8. The modifiers at the end, and why their order matters, are lesson 11. Here the point is the way of working: type a line, look at the canvas.
One piece you do know. if trip.isFavorite { … } in the middle of the block is the if you gave your own builder on lesson 4.
A preview for every state
The canvas shows a favorite trip with a short name. A card has other states, and each deserves a look. Add two more previews at the bottom of TripCard.swift:
#Preview("Not a favorite") {
    TripCard(trip: .vancouver)
}#Preview("Long name") {
TripCard(trip: .atacama)
}Each #Preview becomes a tab at the top of the canvas, labelled with the name you gave it. Click through them:
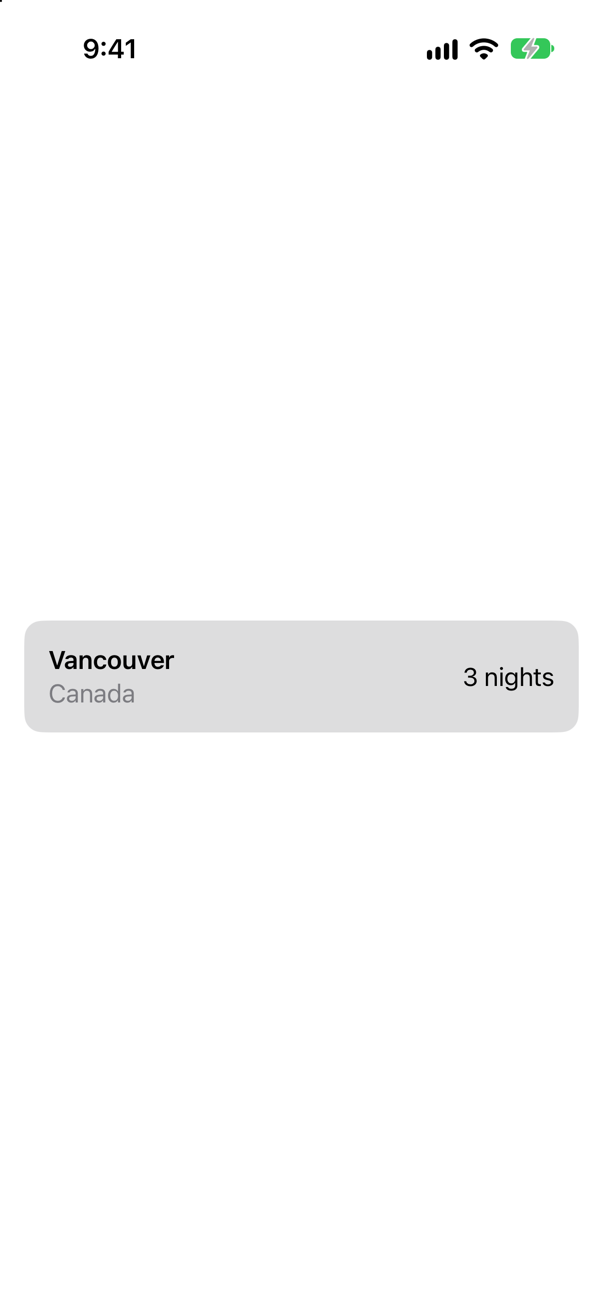
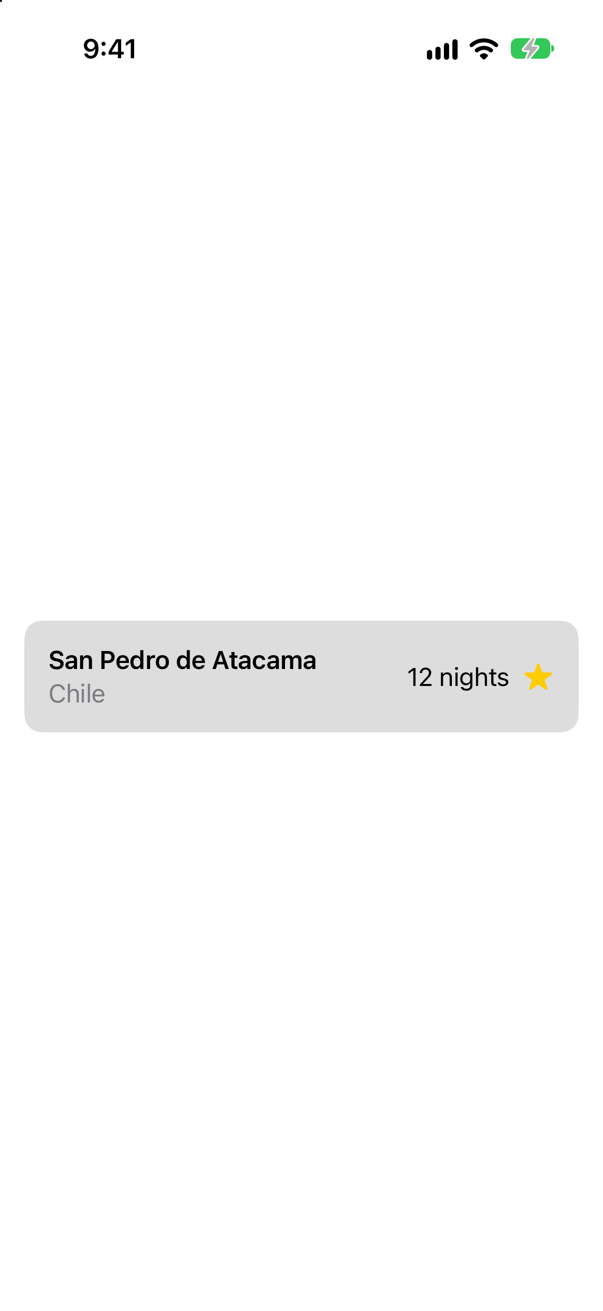
In UIKit, checking these three states meant three runs, or a debug menu. Here they are three tabs, and they stay in the file as a record of what the view is supposed to handle.
Dark mode and large text, from the canvas
The canvas can also change the conditions a view is shown under, without any code. The controls are along its bottom edge.
Click the Long name tab.
Click Device Settings, in the lower-right corner of the canvas.
Switch Color Scheme on and select Dark Appearance.
Switch Dynamic Type on, and move the Dynamic Type slider all the way to the right — the largest of the accessibility text sizes.
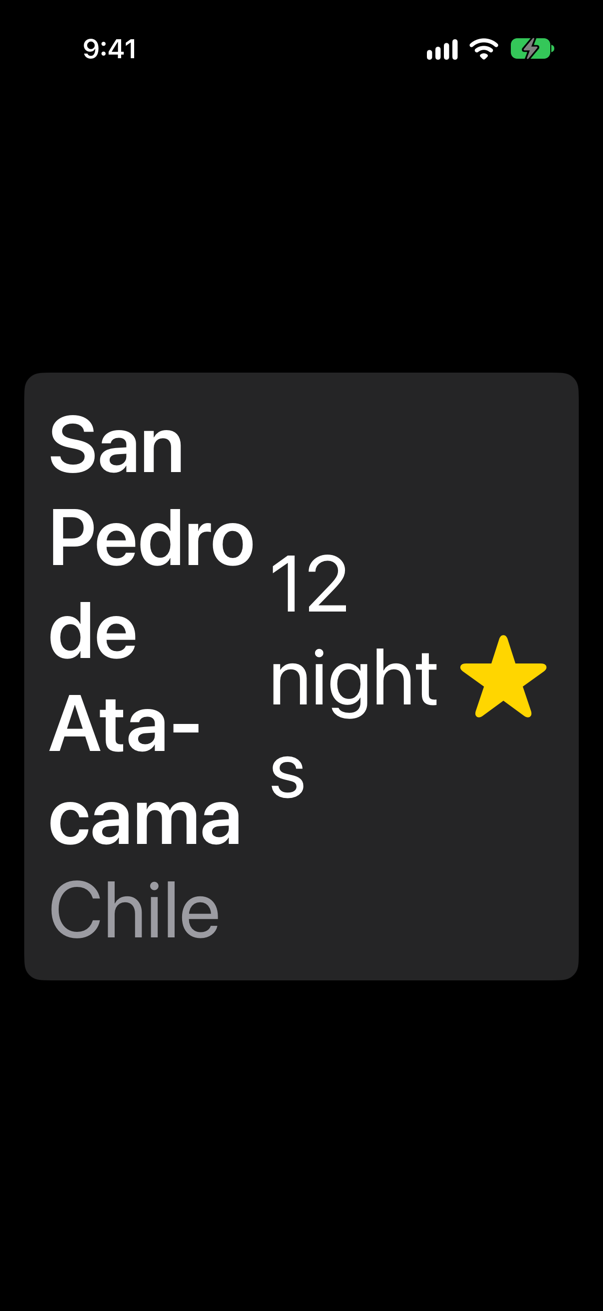
“Long name”, in dark appearance, at the largest text sizeScreenshot · iPhone 17, iOS 27.0
The dark appearance needed nothing from you: .secondary and .quaternary are colors that adapt. The text size is another matter. The name is squeezed into a narrow column and broken across five lines, and the word “nights” is split in two. You have found a real layout bug, and you found it without running the app. It is fixed in lesson 9, when you know how; leave it for now.
Switch both settings off again. Two more controls are worth a click. Variant, in the lower-left corner, shows one preview in every text size at once (Dynamic Type Variants), or light and dark side by side (Color Scheme Variants). And Selectable, beside it, lets you click a part of the picture to find the code that drew it.
A condition that you want to keep can be written into a preview instead:
#Preview("Dark, largest text") {
    TripCard(trip: .atacama)
        .preferredColorScheme(.dark)
        .dynamicTypeSize(.accessibility5)
}
That tab shows the same picture as above, every time, with no settings to remember.
A view that changes: @Previewable
Every preview so far showed a view that only displays. Now a view that the user changes: a star that can be tapped. Make another file from the SwiftUI View template, named FavoriteButton, and replace its struct:
struct FavoriteButton: View { @Binding var isFavorite: Bool var body: some View { Text("Hello, World!") Button("Favorite", systemImage: isFavorite ? "star.fill" : "star") { isFavorite.toggle() } .labelStyle(.iconOnly) .font(.largeTitle) }}struct FavoriteButton: View {
@Binding var isFavorite: Bool
var body: some View {
Button("Favorite", systemImage: isFavorite ? "star.fill" : "star") {
isFavorite.toggle()
}
.labelStyle(.iconOnly)
.font(.largeTitle)
}
}The button does not own the value it changes. @Binding says: someone else owns this Bool; I have been given the means to read and write it. It is the Ref you built on lesson 2. So to preview the button, the preview has to own a Bool and hand over a binding to it:
#Preview { FavoriteButton() @Previewable @State var isFavorite = false FavoriteButton(isFavorite: $isFavorite)}#Preview {
@Previewable @State var isFavorite = false
FavoriteButton(isFavorite: $isFavorite)
}
The canvas is live: its previews respond to clicks as the app would to taps. Click the star.

@State gives the preview a value that can change, and $isFavorite hands the button a binding to it — the $ you built on lesson 2. @Previewable is what allows a @State inside a preview. Leave it out and the code still compiles, with a warning that it will not work; that is one of this lesson's flash cards.
Many previews from one line
Three trips needed three previews. Xcode 27 can make them from a list. Add this to TripCard.swift:
#Preview("All samples", arguments: Trip.samples) { trip in
    TripCard(trip: trip)
}
The canvas shows the All samples tab as a grid: one preview of the card for each trip in Trip.samples. Click one of them to open it on its own. When you add a fourth sample, it appears in the grid without another line of preview code.
#Playground: try code that is not a view
On lessons 2 to 4 you tried code out by running the app and reading the console. For code that draws nothing there is a quicker way, in the same canvas. Go to Trip.swift.
import Foundationimport Playgroundsstruct Trip: Identifiable { let id: Int var city: String var country: String var nights: Int var isFavorite: Bool}extension Trip { static let seattle = Trip(id: 1, city: "Seattle", country: "United States", nights: 5, isFavorite: true) static let vancouver = Trip(id: 2, city: "Vancouver", country: "Canada", nights: 3, isFavorite: false) static let atacama = Trip(id: 3, city: "San Pedro de Atacama", country: "Chile", nights: 12, isFavorite: true) static let samples = [seattle, vancouver, atacama]}#Playground { let nights = Trip.samples.map(\.nights) let total = nights.reduce(0, +) let longest = Trip.samples.max { $0.nights < $1.nights } print("\(total) nights in all. The longest stay is in \(longest?.city ?? "nowhere").")}import Foundation
import Playgrounds
struct Trip: Identifiable {
let id: Int
var city: String
var country: String
var nights: Int
var isFavorite: Bool
}
extension Trip {
static let seattle = Trip(id: 1, city: "Seattle", country: "United States",
nights: 5, isFavorite: true)
static let vancouver = Trip(id: 2, city: "Vancouver", country: "Canada",
nights: 3, isFavorite: false)
static let atacama = Trip(id: 3, city: "San Pedro de Atacama", country: "Chile",
nights: 12, isFavorite: true)
static let samples = [seattle, vancouver, atacama]
}
#Playground {
let nights = Trip.samples.map(\.nights)
let total = nights.reduce(0, +)
let longest = Trip.samples.max { $0.nights < $1.nights }
print("\(total) nights in all. The longest stay is in \(longest?.city ?? "nowhere").")
}The canvas gets a new tab, marked with a beaker instead of an eye. It runs the code in the braces and shows the result of each line under it: the array of nights, the total, the longest trip, and the line that print wrote. Change a number in the samples and the results change. Nothing in a #Playground runs when the app runs.
On the screen, and in the simulator at last
The card is finished without ever having been part of the app. Put it there. In ContentView.swift, show a card for each sample:
struct ContentView: View { var body: some View { ZStack { LinearGradient(colors: [.cyan.opacity(0.35), .indigo.opacity(0.3)], startPoint: .top, endPoint: .bottom) .ignoresSafeArea() VStack(spacing: 14) { Image(systemName: "airplane.departure") .font(.system(size: 56)) .foregroundStyle(.white) .padding(30) .background(.indigo.gradient, in: .circle) Text("Trips") .font(.largeTitle.bold()) Text("Pick a city. Pack a bag.") .foregroundStyle(.secondary) ScrollView { VStack { ForEach(Trip.samples) { trip in TripCard(trip: trip) } } } }}struct ContentView: View {
var body: some View {
ScrollView {
VStack {
ForEach(Trip.samples) { trip in
TripCard(trip: trip)
}
}
}
}
}The canvas for ContentView.swift shows the three cards. ForEach is the one you used on lesson 4; it needs no id: here, because Trip is Identifiable. Now, for the first time since step 1, run the app:
Run it (⌘R). The simulator shows

It is exactly what the canvas showed. That is the whole method, and the rest of the course uses it: build a view in the canvas from sample data, give it a preview for each state, and run the app when you want to see the pieces together.
What you built
- The Trips project, with a
Tripmodel and sample values of it. TripCard, a view that is given the trip it shows, with previews for a favorite, a plain trip, a long name, and dark mode at the largest text size.FavoriteButton, a view that changes a value it does not own, previewed with@Previewable @State.
Next: what happens before the first view appears. @main, App, scenes and WindowGroup — what replaced AppDelegate, and how the app learns that it has gone to the background.
The finished project
Stuck, or want to compare with your own? This is the project as it stands at the end of this lesson, built and run before it was put here.
- Trips-lesson-05.zip — unzip it, then open
Trips.xcodeprojin Xcode.
Flash cards
13 cards for this lesson, each labelled with its topic. 8 ask how you would write something; the other 5 are trick questions, written to catch a misunderstanding. Answer in your head first, then tap the card.
Syntax · PreviewsDeclare a preview of TripCard, showing the sample trip .seattle.

#Preview { … }, anywhere at the top level of a file. The braces hold the code that makes the view. Xcode draws it in the canvas while you edit that file.
Syntax · PreviewsGive a preview a name.

The name is the first argument. It is the label of that preview's tab at the top of the canvas.
Syntax · PreviewsWrite a preview that always shows the view in dark mode, with very large text.

Apply the modifiers to the view inside the preview: .preferredColorScheme(.dark) and .dynamicTypeSize(…). For a quick look, the canvas's Device Settings does the same without code.
Syntax · PreviewsWrite a preview that shows the view in landscape.
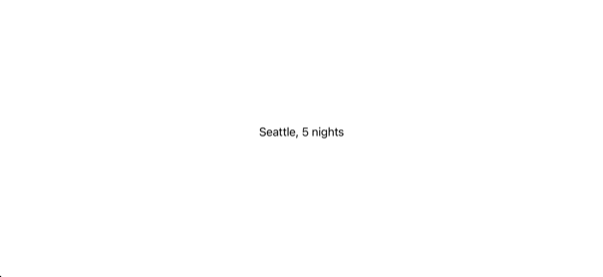
Pass a trait: traits: .landscapeLeft. Traits describe the preview itself — its orientation, or a fixed size with .fixedLayout(width:height:) — and not the view.
Syntax · PreviewsPreview a view that takes a Binding<Bool>, so that the value really changes when you click.

Declare the state in the preview with @Previewable @State, and pass $isFavorite. The preview owns the value; the view gets a binding to it.
Syntax · PreviewsMake one preview of TripCard for each trip in Trip.samples.
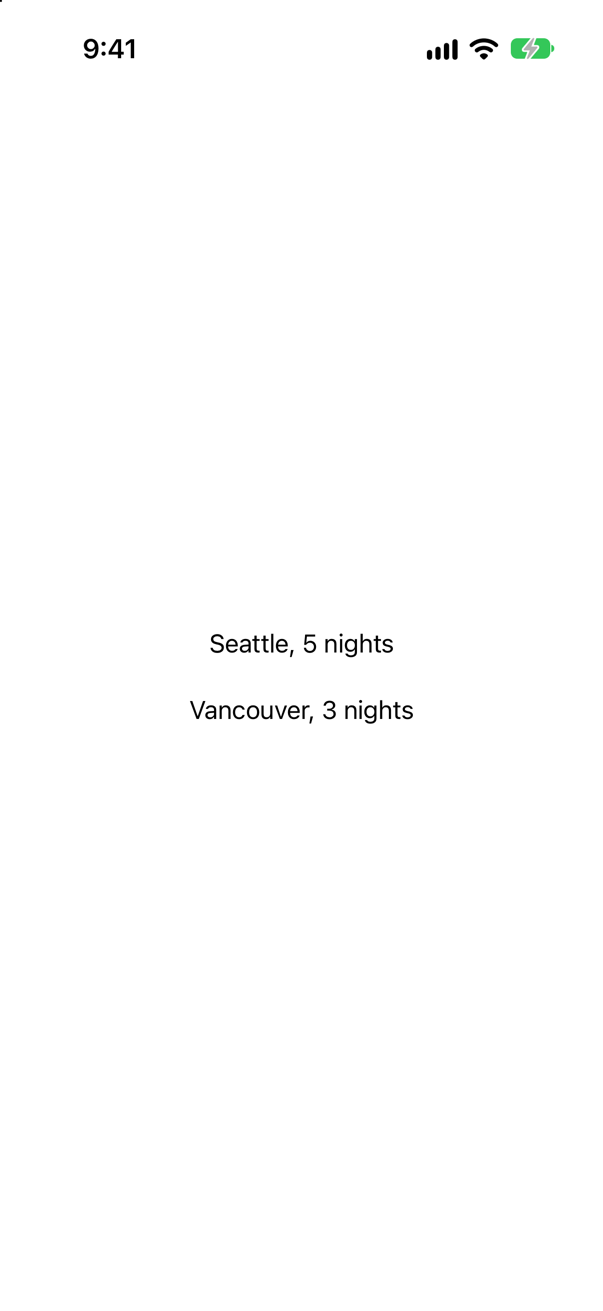
#Preview(arguments:), new in Xcode 27. The closure is called once for each element, and the canvas shows the results as a grid.
Syntax · PreviewsGive a model sample values that any preview can use as .seattle.

Static constants in an extension of the type. Wherever a Trip is expected, .seattle is enough: Swift looks for the name among Trip's static members.
Syntax · PlaygroundsRun a few lines of ordinary code in the canvas, without running the app.

#Playground { … }, a macro of the Playgrounds framework, which the file imports. The canvas runs the code and shows each line's result. It is for trying out code that is not a view.
Trick question · PreviewsInside #Preview { … }, does a plain @State var isFavorite = false work?

No. It compiles, with the warning '@State' used inline will not work unless tagged with '@Previewable' (from macro 'Preview') @State only works as a property of a view. @Previewable tells the macro to build a small view around your preview and make the variable a property of it.
Trick question · PreviewsCan you use @Previewable in an ordinary view, to say that a property is only for previews?
No. '@Previewable' can only be used in a SwiftUI #Preview body closure (from macro 'Previewable ') It has one job: inside the braces of a #Preview.
Trick question · PreviewsYou add a property to a view and update every place the app creates it. Can the build still fail?
Yes — in the previews. missing argument for parameter 'city' in call A preview is compiled with the rest of the target, so a preview that is out of date stops the build like any other code.
Trick question · PreviewsA preview makes a constant and then a view. Does it need return?

No. The braces of a #Preview are a builder block, like a body: declarations are allowed, and the view is collected without return.
Trick question · PreviewsDoes a preview change what the app does when a user runs it?
No. A #Preview is only drawn by Xcode's canvas. Nothing in the app refers to it, and it is left out of the app that is built for release (one of this lesson's edge cases measures that).
Edge cases and tricky questions
5 questions of the kind an interviewer uses to find out whether you really know this — the corners, the traps, and the things that changed recently. Each has its source. Wherever the answer is what some code does, that code was compiled and run, and what you see under “Show the answer” is what it really did. Say your answer aloud before you open it.
The text in this preview appears nowhere else in the project. You build the app for release. Is that text inside the app you send to the App Store?
Show the answer

No. This was measured, not assumed: the project above was built twice with Xcode 27, and the app bundles searched for that text. In the Debug build it is there. In the Release build it is not, and neither is the type that the #Preview macro generates.
The reason is in what the macro writes. Expand a #Preview and you find a small struct with a method, makePreview(), that holds your braces. Nothing in your app ever calls it; only Xcode's canvas does. An optimized build leaves out code that nothing can reach.
Two cautions. First, a preview is left out of the product, not out of the build: it is still compiled, so a preview that no longer compiles stops a Release build too. Second, this is about code. A picture or a JSON file that only your previews use is a resource, and it ships unless you list it under Development Assets in the target's General tab.
Where this comes from: Adding previews to your interface files · Previews in Xcode — Apple, “Adding previews to your interface files”: development assets give previews resources "without shipping them in the final version of your app".
Two previews of the same button. In the first the binding is .constant(false). In the second it comes from @Previewable @State. You click the star in each. What happens?
Show the answer
With .constant(false) nothing happens. The button's action runs and calls toggle(), but a constant binding has nowhere to store a new value: it always reads false. Each was shown in the simulator and tapped once:

.constant(false): still emptyScreenshot · iPhone 17, iOS 27.0
@Previewable @State: filledScreenshot · iPhone 17, iOS 27.0.constant is the right tool for a preview that shows one fixed state — "the button when it is on". To try the behavior of a view, the preview must own real state. Before Xcode 16 that meant writing a small wrapper view in every such preview file; @Previewable writes that wrapper for you.
Where this comes from: Previewable() · Adding previews to your interface files — Apple: tagging a property with Previewable "eliminates the need to create wrapper views in previews".
You open a project from 2021 and find this at the bottom of every view file. What is it — and what does Xcode 27 say about it?
Show the answer

It compiles, with a warning
'previewDisplayName' was deprecated in any Apple OS 27.0: Use #Preview("name") instead.It is how previews were written before the #Preview macro arrived in Xcode 15: a type that conforms to PreviewProvider, with a static previews property, and modifiers such as previewDisplayName and previewDevice to configure it.
It still compiles, and the canvas still draws it. But Xcode 27 deprecates the whole family. The compiler says, of the modifier above: 'previewDisplayName' was deprecated in any Apple OS 27.0: Use #Preview("name") instead.
The conversion is mechanical, and worth doing as you touch each file:

Beyond being shorter, the macro can do things the protocol never could: @Previewable state, traits, #Preview(arguments:), and previews of UIKit views and view controllers.
Where this comes from: Apple: Xcode 27 release notes · PreviewProvider (deprecated) · Previews in Xcode — Xcode 27 release notes, Previews, Deprecations: "PreviewProvider and its family of preview modifiers."
On lesson 4 you printed the type of a view's body and got a long, exact type. The same line, run inside a preview, prints DebugReplaceableView. Why?
Show the answer
Run it. The console shows
ModifiedContent<VStack<TupleContent<Pack{Text, Text}>>, _PaddingLayout>Because the canvas compiles the file you are editing in a special way. Built as a Run builds it, the line above prints the real type. Built with the setting that previews switch on (SWIFT_ENABLE_OPAQUE_TYPE_ERASURE), the very same code prints this:
The same code, compiled the way the canvas compiles it
DebugReplaceableViewWith that setting, every some View you return is wrapped in one fixed type, DebugReplaceableView. It is what lets the canvas update while you type. If the type of body is always the same, Xcode can swap in a new body without rebuilding everything that depends on it. If the exact type showed through, changing one line would change the type, and the whole app would have to be rebuilt.
Two things follow for an interview. If you see DebugReplaceableView in the view debugger or in Instruments, it is this machinery, not your code. And the wrapper behaves like AnyView, so it costs something: Apple's documentation says it "can impact performance, especially when dealing with dynamic content", and that "any performance testing should be done in release mode".
The history is worth one sentence. Xcode 16.0 did this in every debug build, and scrolling in lists got slower in development. Since Xcode 16.3 it is done only for the file being previewed.
Where this comes from: DebugReplaceableView · Apple: Xcode 16.3 release notes (type erasure only when previewing) · Apple: Xcode 16.2 release notes (type erasure in debug builds) — Xcode 16.3 release notes: the setting "is now off by default for all debug builds… Previews now enables this selectively and recompiles the edited file with this setting only when running a preview."
A preview is left out of the Release build. So if a preview no longer compiles, does the Release build still succeed?
Show the answer
It does not compile. Xcode reports
missing argument for parameter 'city' in callNo. Compiled with optimization, as a Release build is, it fails with the same error as a Debug build: missing argument for parameter 'city' in call
"Not shipped" and "not compiled" are different things. A #Preview expands to ordinary Swift in your target. It is type-checked in every configuration, and removed from the product only afterwards. So a stale preview breaks the release build, the archive, and the build that your tests run on.
That is the argument against the old habit of wrapping previews in #if DEBUG, which hides a broken preview from the release build but not from anyone opening the file. Keep previews compiling, keep them few and meaningful, and keep the sample data they share in one place, so that a change to the model is one fix and not thirty.
Where this comes from: Previews in Xcode · Adding previews to your interface files — The compiler's own expansion of #Preview shows why: a struct with a makePreview() method, in your target like any other code.