Bigger screens, and screens on top
Split views and adapting to screen size · Sheets, alerts, and popovers
You will buildOn an iPad, the list of trips beside the trip it opened; a planner that uses the width it has; a trip edited in a sheet with Cancel and Save; and an alert that asks before a trip is deleted.
TimeAbout 110 minutes
WhyTwo subjects in this lesson, and one idea under both: the screen follows the state. A split view shows one column or three depending on the space, from the same code. A sheet or an alert is not presented by a call, as in UIKit; it is shown while a piece of state says so, and goes when the state changes. Interviewers ask about both — "how does this look on an iPad?" and "how do you present an editor for one item?" — and about the bugs that come from getting the state slightly wrong.
Open your project
Open your
Tripsproject as lesson 22 left it: double-clickTrips.xcodeprojin Finder, or use File ▸ Open… (⌘O) in Xcode.If you did not finish lesson 22, or would rather start from a known state, download Trips-lesson-22.zip instead. It is the project exactly as it stood at the end of lesson 22. Unzip it and open
Trips.xcodeproj.Run it (⌘R) to check that it builds. You should see where lesson 22 ended:
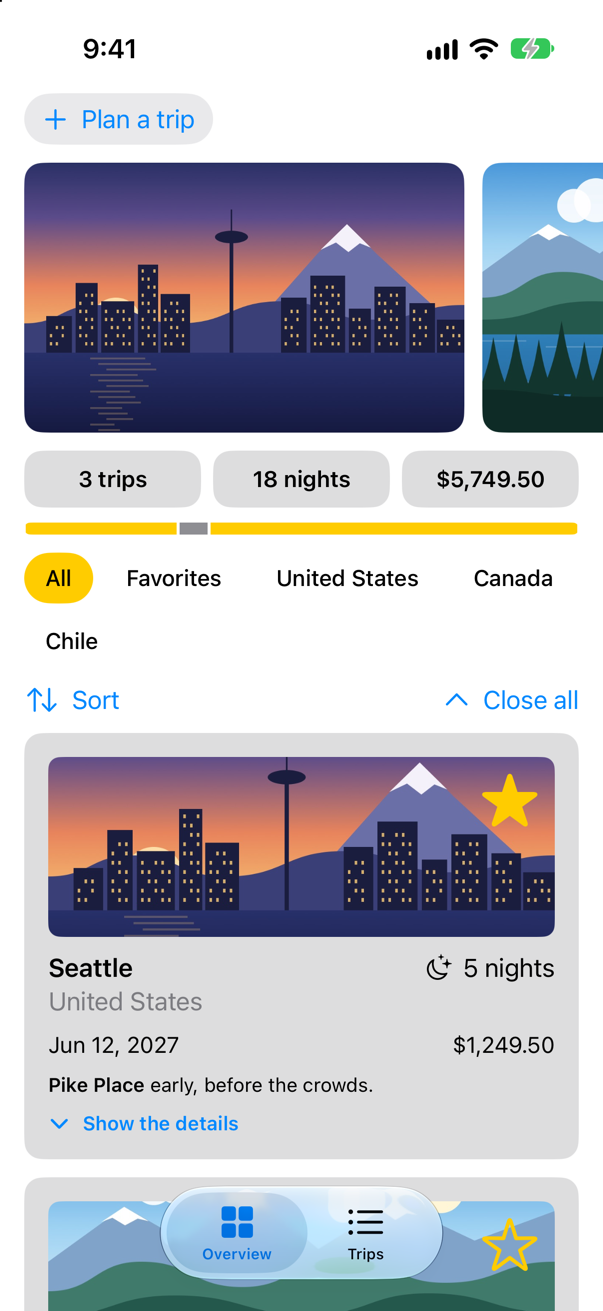
Trips, as it stood at the end of lesson 22Screenshot · iPhone 17, iOS 27.0
The list beside its trip
On an iPhone the list fills the screen and a trip replaces it. An iPad has room for both, side by side, and NavigationSplitView gives you that from one description: a sidebar column and a detail column. The pattern Apple describes is that the sidebar's selection chooses what the detail shows: "the navigation split view coordinates with the List in its first column, so that when people make a selection, the detail view updates accordingly." So the list gets a selection, its rows' values become the selected trip's id, and the detail column shows that trip — or "Choose a trip" when there is none — inside the last lesson's NavigationStack, where the Next links still push. In TripList.swift:
struct TripList: View { @Environment(TripStore.self) private var store @Environment(\.highlight) private var highlight @State private var selection: Trip.ID? @State private var path: [Trip.ID] = [] var body: some View { NavigationStack(path: $path) { List { NavigationSplitView { List(selection: $selection) { ForEach(months, id: \.self) { month in let inMonth = trips(in: month) Section(month.formatted(.dateTime.month(.wide).year())) { ForEach(inMonth) { trip in NavigationLink(value: trip.id) { TripRow(trip: trip) } .swipeActions(edge: .leading) { Button(trip.isFavorite ? "Unfavorite" : "Favorite", systemImage: trip.isFavorite ? "star.slash" : "star") { store.toggleFavorite(trip) } .tint(highlight) } } .onDelete { offsets in store.delete(offsets.map { inMonth[$0] }) } } } } .navigationTitle("Trips") .navigationDestination(for: Trip.ID.self) { id in TripDetail(id: id, path: $path) } .toolbar { Button("Soonest", systemImage: "calendar") { if let soonest = store.trips.min(by: { $0.start < $1.start }) { path = [soonest.id] selection = store.trips.min(by: { $0.start < $1.start })?.id } } } detail: { NavigationStack(path: $path) { Group { if let selection { TripDetail(id: selection, selection: $selection) } else { ContentUnavailableView("Choose a trip", systemImage: "airplane", description: Text("Its details will appear here.")) } } .navigationDestination(for: Trip.ID.self) { id in TripDetail(id: id, selection: $selection) } } } .onChange(of: path) { print("path:", path) } } /// The first day of every month in which a trip starts, earliest first. private var months: [Date] { Set(store.trips.map(\.start.startOfMonth)).sorted() } /// The trips that start in that month, earliest first. private func trips(in month: Date) -> [Trip] { store.trips.filter { $0.start.startOfMonth == month }.sorted { $0.start < $1.start } }}struct TripList: View {
@Environment(TripStore.self) private var store
@Environment(\.highlight) private var highlight
@State private var selection: Trip.ID?
@State private var path: [Trip.ID] = []
var body: some View {
NavigationSplitView {
List(selection: $selection) {
ForEach(months, id: \.self) { month in
let inMonth = trips(in: month)
Section(month.formatted(.dateTime.month(.wide).year())) {
ForEach(inMonth) { trip in
NavigationLink(value: trip.id) {
TripRow(trip: trip)
}
.swipeActions(edge: .leading) {
Button(trip.isFavorite ? "Unfavorite" : "Favorite",
systemImage: trip.isFavorite ? "star.slash" : "star") {
store.toggleFavorite(trip)
}
.tint(highlight)
}
}
.onDelete { offsets in
store.delete(offsets.map { inMonth[$0] })
}
}
}
}
.navigationTitle("Trips")
.toolbar {
Button("Soonest", systemImage: "calendar") {
selection = store.trips.min(by: { $0.start < $1.start })?.id
}
}
} detail: {
NavigationStack(path: $path) {
Group {
if let selection {
TripDetail(id: selection, selection: $selection)
} else {
ContentUnavailableView("Choose a trip", systemImage: "airplane",
description: Text("Its details will appear here."))
}
}
.navigationDestination(for: Trip.ID.self) { id in
TripDetail(id: id, selection: $selection)
}
}
}
.onChange(of: path) {
print("path:", path)
}
}
/// The first day of every month in which a trip starts, earliest first.
private var months: [Date] {
Set(store.trips.map(\.start.startOfMonth)).sorted()
}
/// The trips that start in that month, earliest first.
private func trips(in month: Date) -> [Trip] {
store.trips.filter { $0.start.startOfMonth == month }.sorted { $0.start < $1.start }
}
}The detail now closes by clearing the selection rather than the path, so it takes a binding to that. In TripDetail.swift, path becomes selection, and All trips sets it to nil:
struct TripDetail: View { let id: Trip.ID @Binding var path: [Trip.ID] @Binding var selection: Trip.ID? @Environment(TripStore.self) private var store var body: some View { @Bindable var store = store if let index = store.trips.firstIndex(where: { $0.id == id }) { ScrollView { VStack(spacing: 16) { TripCard(trip: $store.trips[index]) if let next = next(after: store.trips[index]) { NavigationLink("Next: \(next.city)", value: next.id) } } } .navigationTitle(store.trips[index].city) .toolbar { Button("All trips", systemImage: "list.bullet") { path.removeAll() selection = nil } } } else { ContentUnavailableView("This trip is gone", systemImage: "airplane.departure") } } /// The trip that starts soonest after this one, if there is one. private func next(after trip: Trip) -> Trip? { store.trips.filter { $0.start > trip.start }.min { $0.start < $1.start } }}struct TripDetail: View {
let id: Trip.ID
@Binding var selection: Trip.ID?
@Environment(TripStore.self) private var store
var body: some View {
@Bindable var store = store
if let index = store.trips.firstIndex(where: { $0.id == id }) {
ScrollView {
VStack(spacing: 16) {
TripCard(trip: $store.trips[index])
if let next = next(after: store.trips[index]) {
NavigationLink("Next: \(next.city)", value: next.id)
}
}
}
.navigationTitle(store.trips[index].city)
.toolbar {
Button("All trips", systemImage: "list.bullet") {
selection = nil
}
}
} else {
ContentUnavailableView("This trip is gone", systemImage: "airplane.departure")
}
}
/// The trip that starts soonest after this one, if there is one.
private func next(after trip: Trip) -> Trip? {
store.trips.filter { $0.start > trip.start }.min { $0.start < $1.start }
}
}#Preview { NavigationStack { TripDetail(id: 1, path: .constant([1])) TripDetail(id: 1, selection: .constant(1)) } .environment(TripStore())}#Preview {
NavigationStack {
TripDetail(id: 1, selection: .constant(1))
}
.environment(TripStore())
}Run the app on the iPhone and tap Trips:
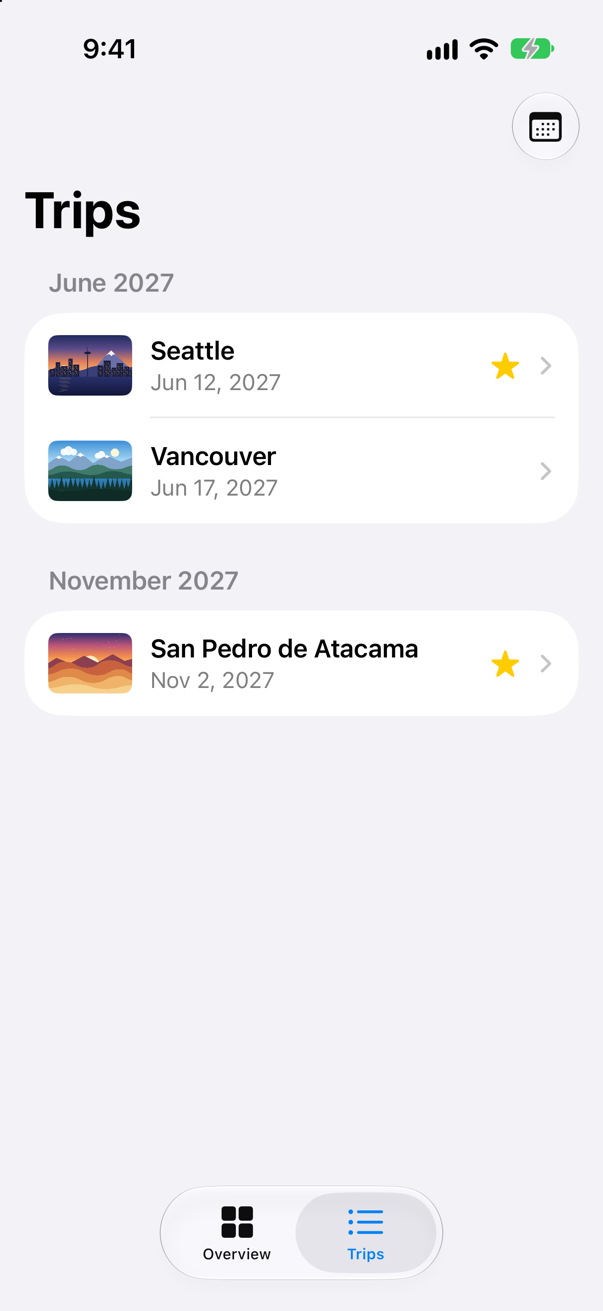
Seattle, Next and All trips behave as they did in the last lesson. (All trips closes two screens at once, and Xcode's console may show the last lesson's line from SwiftUI about its own glass effect. It comes and goes from one run to the next, and it is SwiftUI's, not yours.)
On the iPhone nothing looks different: "with narrow sizes like on iPhone … the navigation split view collapses all of its columns into a stack". To see the other half, run it on an iPad. In the run destination menu in Xcode's toolbar, choose an iPad simulator — iPad Air 11-inch (M4) — and run (⌘R):
Tap Trips:
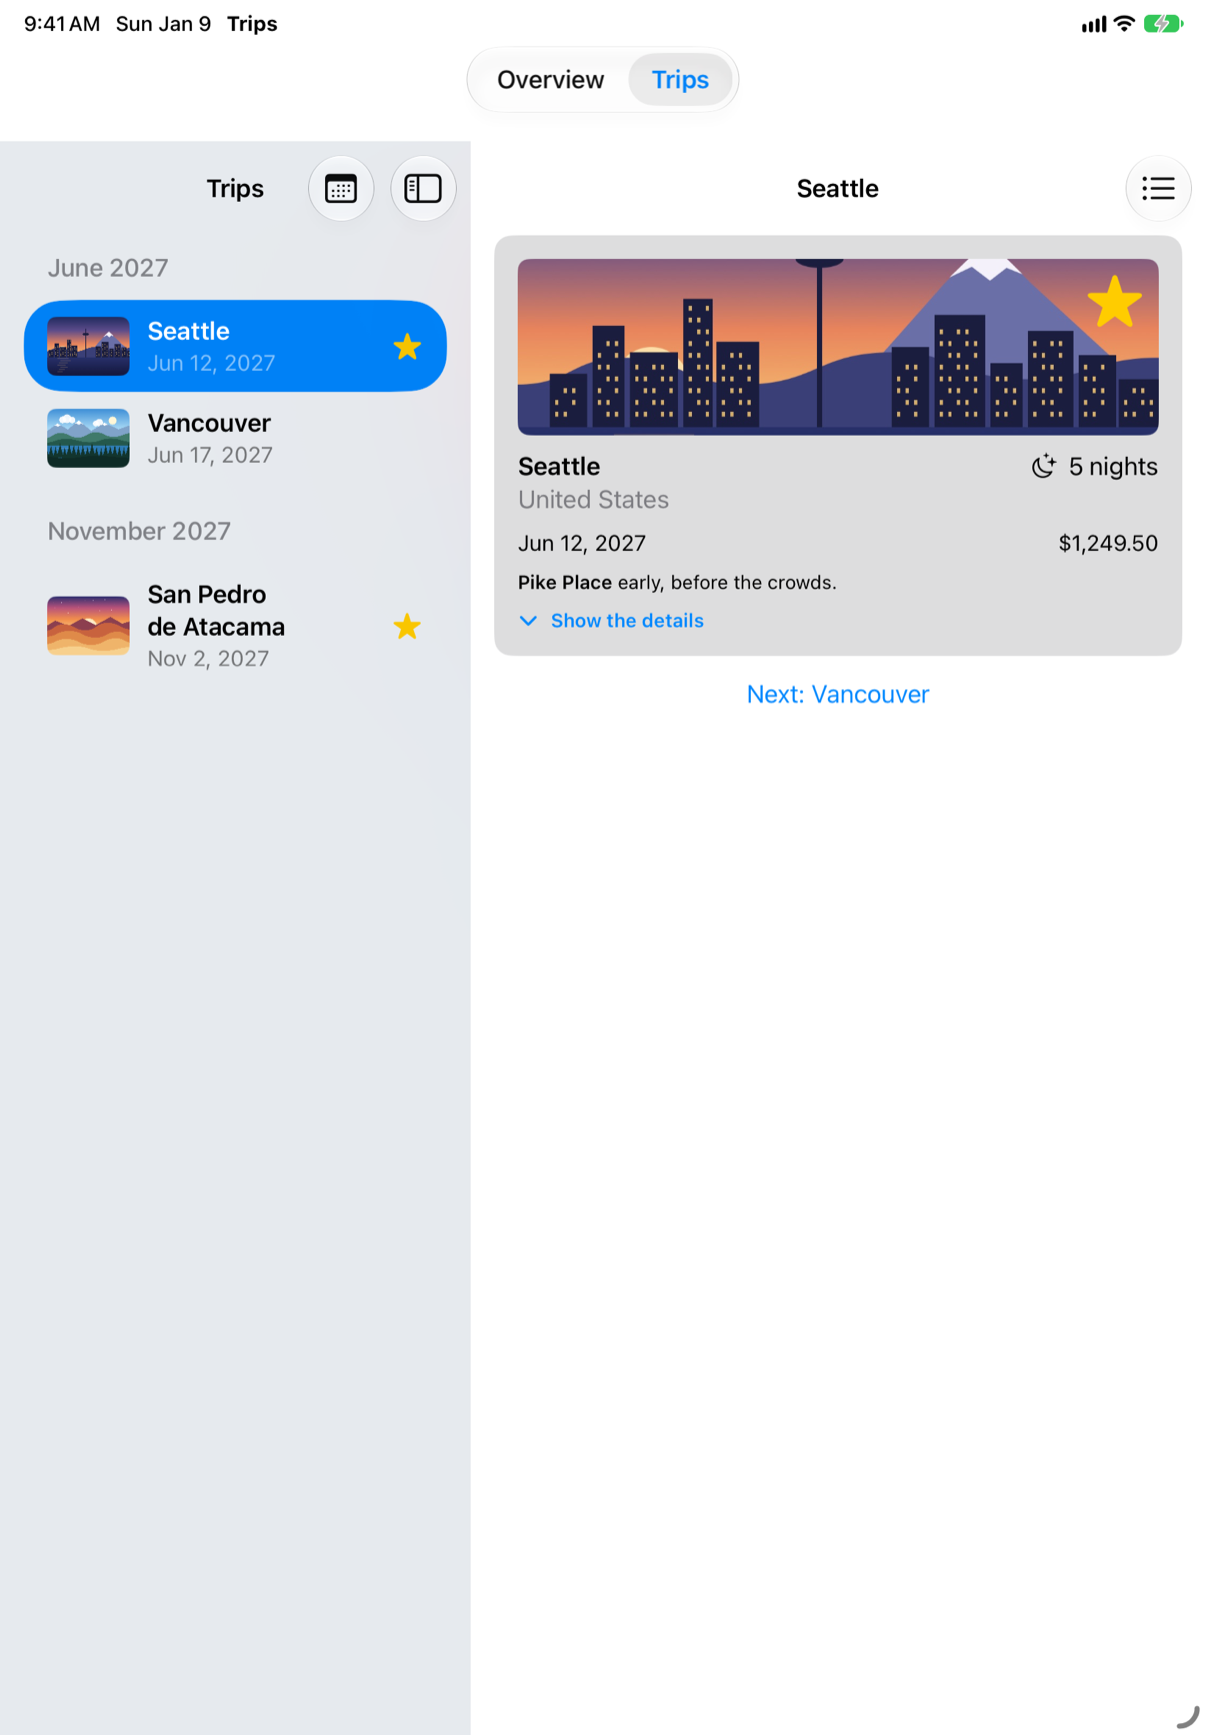
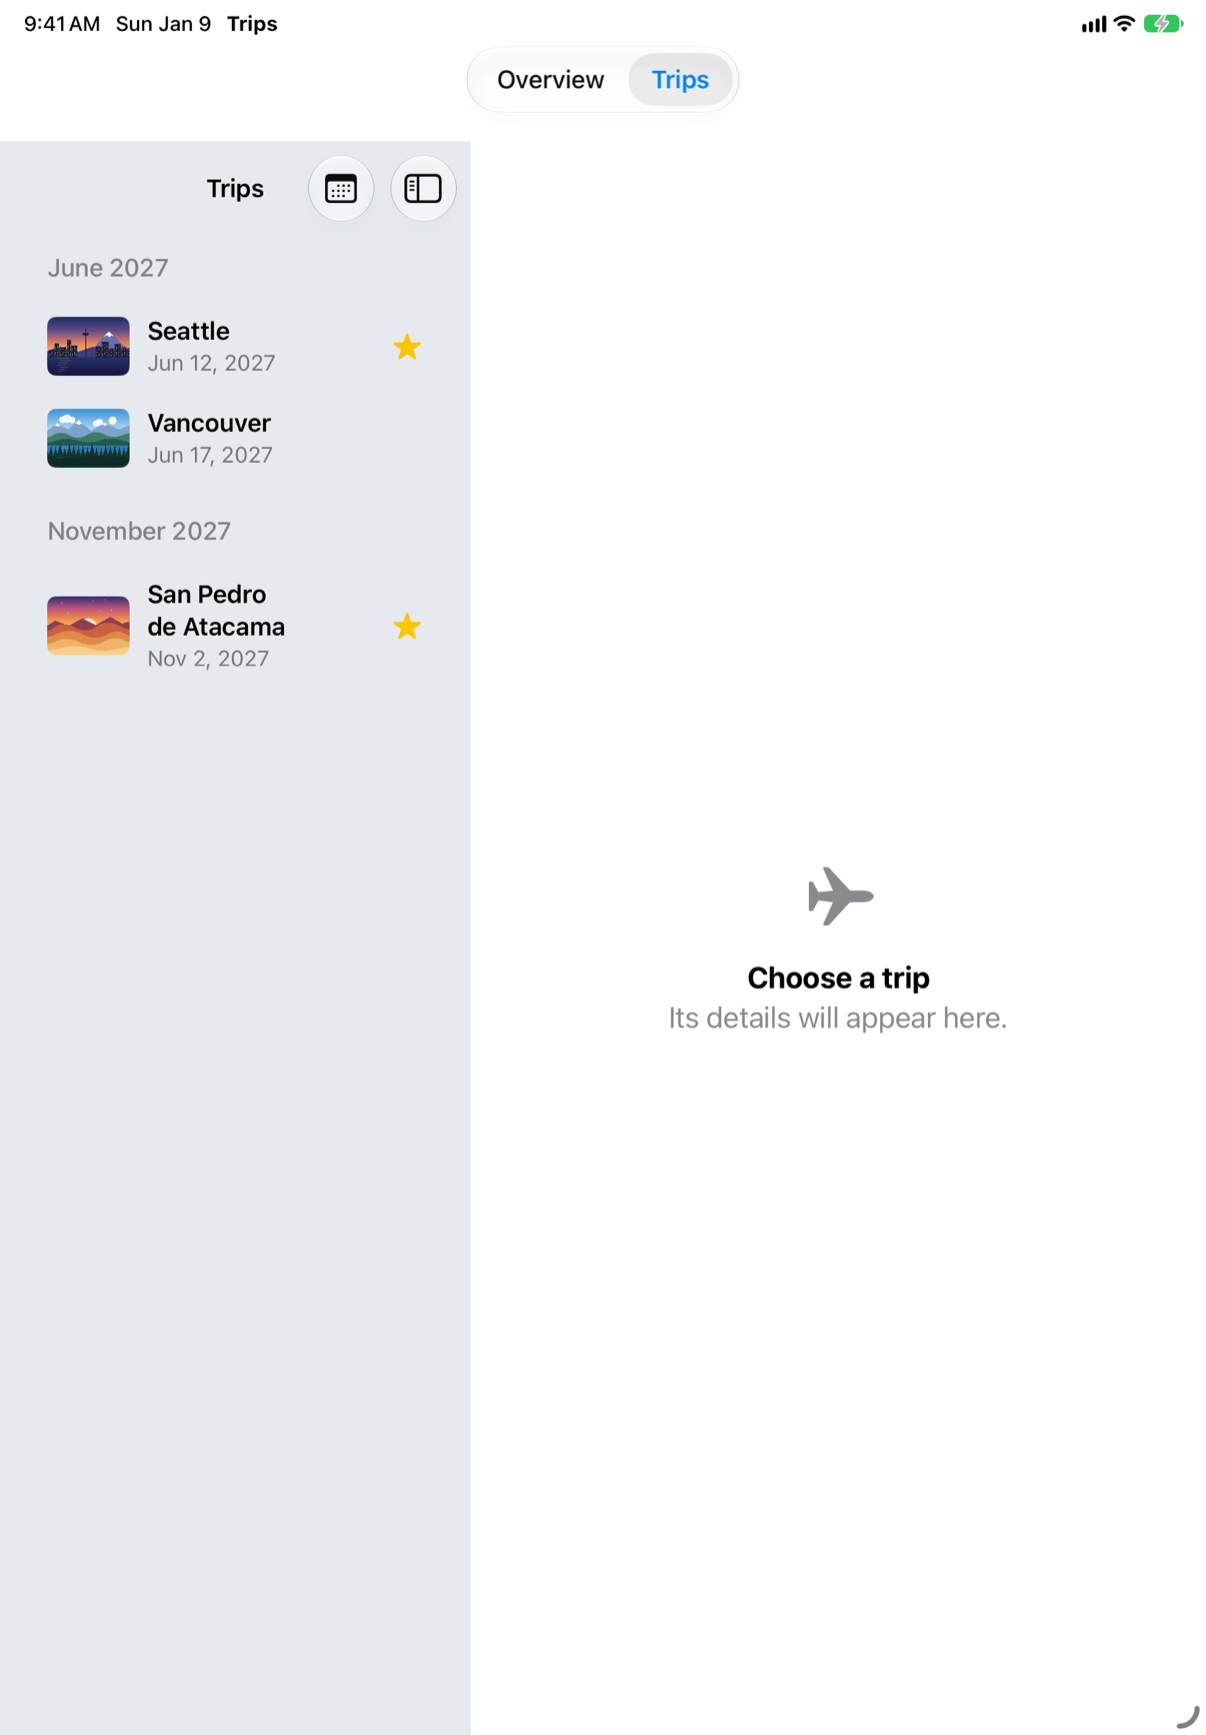
Tap Seattle — the picture at the top of this step: the list stays, and Seattle opens beside it. Then Next: Vancouver:
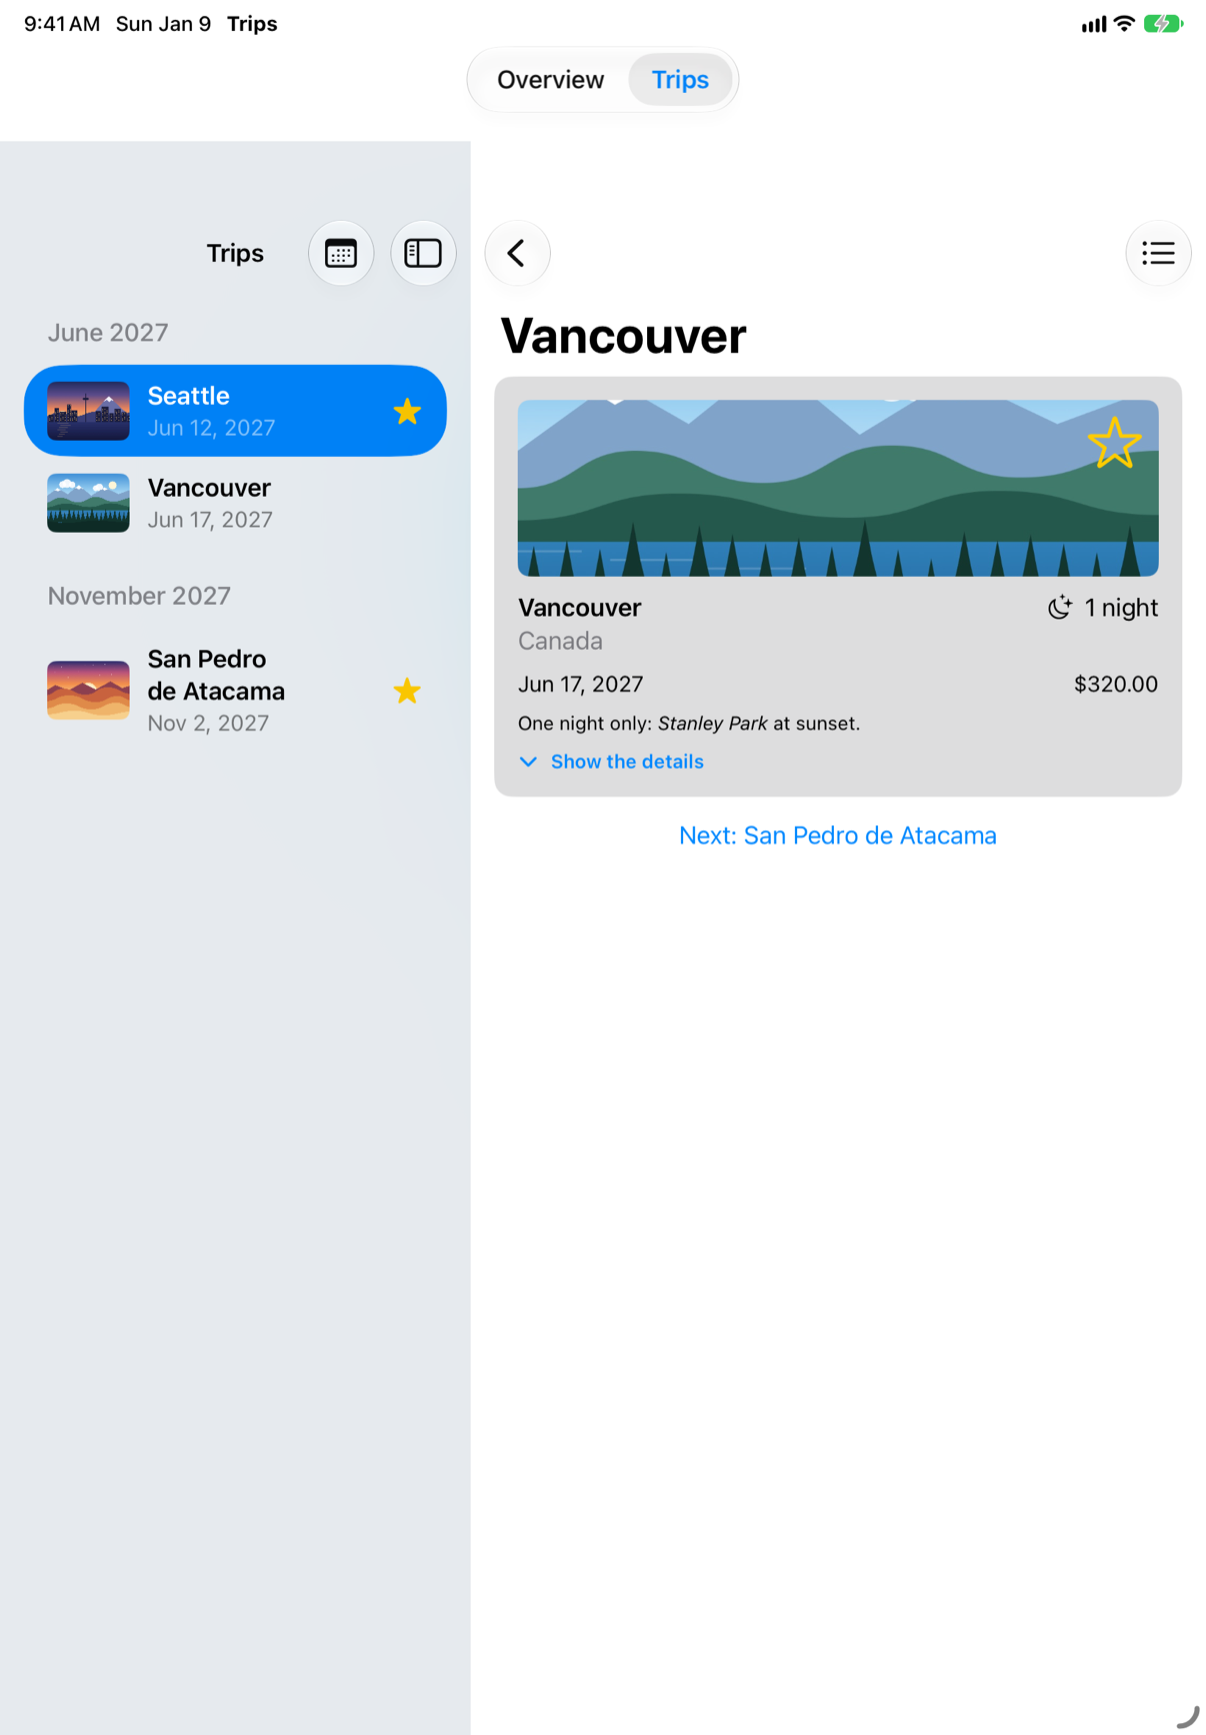
Now choose another trip in the list, San Pedro de Atacama, and watch the console:
path: []The path emptied by itself. Choosing a new trip in the sidebar replaced what the detail column's stack showed — Apple: a link in an earlier column "sets the view that the stack displays over its root view" — so Vancouver's page did not stay piled on top of Atacama. You wrote no code for that.
The same TripList and TripDetail as on the iPhone, and the system chose the layout. Why not the last lesson's value links all the way? Because a link looks for its destination in its own column: a link in the sidebar cannot see a destination declared in the detail column, and a link in the detail column cannot see one declared on the sidebar. SwiftUI logs exactly that when you try — one of this lesson's edge cases runs both. Selection for the sidebar, a stack for the detail, is the arrangement that works in both directions.
A layout that uses the width
Your own views can make the same choice. SwiftUI describes the space with two size classes, horizontal and vertical, each compact or regular, in the environment. An iPhone held upright is compact wide; an iPad is regular wide. On a regular width the planner's City and Country fields fit side by side. In TripPlanner.swift, read the size class and choose the container with lesson 11's AnyLayout:
struct TripPlanner: View { @Environment(TripStore.self) private var store @State private var isOpen = false @State private var draft = TripDraft() @Environment(\.horizontalSizeClass) private var sizeClass var body: some View { VStack(spacing: 12) { VStack(alignment: .leading, spacing: 12) { Button(isOpen ? "Close the planner" : "Plan a trip", systemImage: isOpen ? "xmark" : "plus") { isOpen.toggle() } .buttonStyle(.bordered) if isOpen { TextField("City", text: $draft.city) TextField("Country", text: $draft.country) let fields = sizeClass == .regular ? AnyLayout(HStackLayout()) : AnyLayout(VStackLayout(alignment: .leading)) fields { TextField("City", text: $draft.city) TextField("Country", text: $draft.country) } Stepper(value: $draft.nights, in: 1...60) { Text("^[\(draft.nights) night](inflect: true)") } Stepper(value: $draft.price, in: 0...20_000, step: 250) { Text(draft.price, format: .currency(code: "USD")) } HStack { PicturePicker(selection: $draft.imageName) Spacer() FavoriteButton(isFavorite: $draft.isFavorite) } Button("Add to my trips") { store.add(draft) draft = TripDraft() isOpen = false } .buttonStyle(.borderedProminent) .disabled(draft.city.isEmpty) } } .textFieldStyle(.roundedBorder) .frame(maxWidth: .infinity, alignment: .leading) .padding(.horizontal) if isOpen { TripCard(trip: Binding( get: { draft.trip(id: 0) }, set: { draft.isFavorite = $0.isFavorite } )) } } }}struct TripPlanner: View {
@Environment(TripStore.self) private var store
@State private var isOpen = false
@State private var draft = TripDraft()
@Environment(\.horizontalSizeClass) private var sizeClass
var body: some View {
VStack(spacing: 12) {
VStack(alignment: .leading, spacing: 12) {
Button(isOpen ? "Close the planner" : "Plan a trip", systemImage: isOpen ? "xmark" : "plus") {
isOpen.toggle()
}
.buttonStyle(.bordered)
if isOpen {
let fields = sizeClass == .regular ? AnyLayout(HStackLayout()) : AnyLayout(VStackLayout(alignment: .leading))
fields {
TextField("City", text: $draft.city)
TextField("Country", text: $draft.country)
}
Stepper(value: $draft.nights, in: 1...60) {
Text("^[\(draft.nights) night](inflect: true)")
}
Stepper(value: $draft.price, in: 0...20_000, step: 250) {
Text(draft.price, format: .currency(code: "USD"))
}
HStack {
PicturePicker(selection: $draft.imageName)
Spacer()
FavoriteButton(isFavorite: $draft.isFavorite)
}
Button("Add to my trips") {
store.add(draft)
draft = TripDraft()
isOpen = false
}
.buttonStyle(.borderedProminent)
.disabled(draft.city.isEmpty)
}
}
.textFieldStyle(.roundedBorder)
.frame(maxWidth: .infinity, alignment: .leading)
.padding(.horizontal)
if isOpen {
TripCard(trip: Binding(
get: { draft.trip(id: 0) },
set: { draft.isFavorite = $0.isFavorite }
))
}
}
}
}Run it on the iPad, and tap Plan a trip on the Overview:
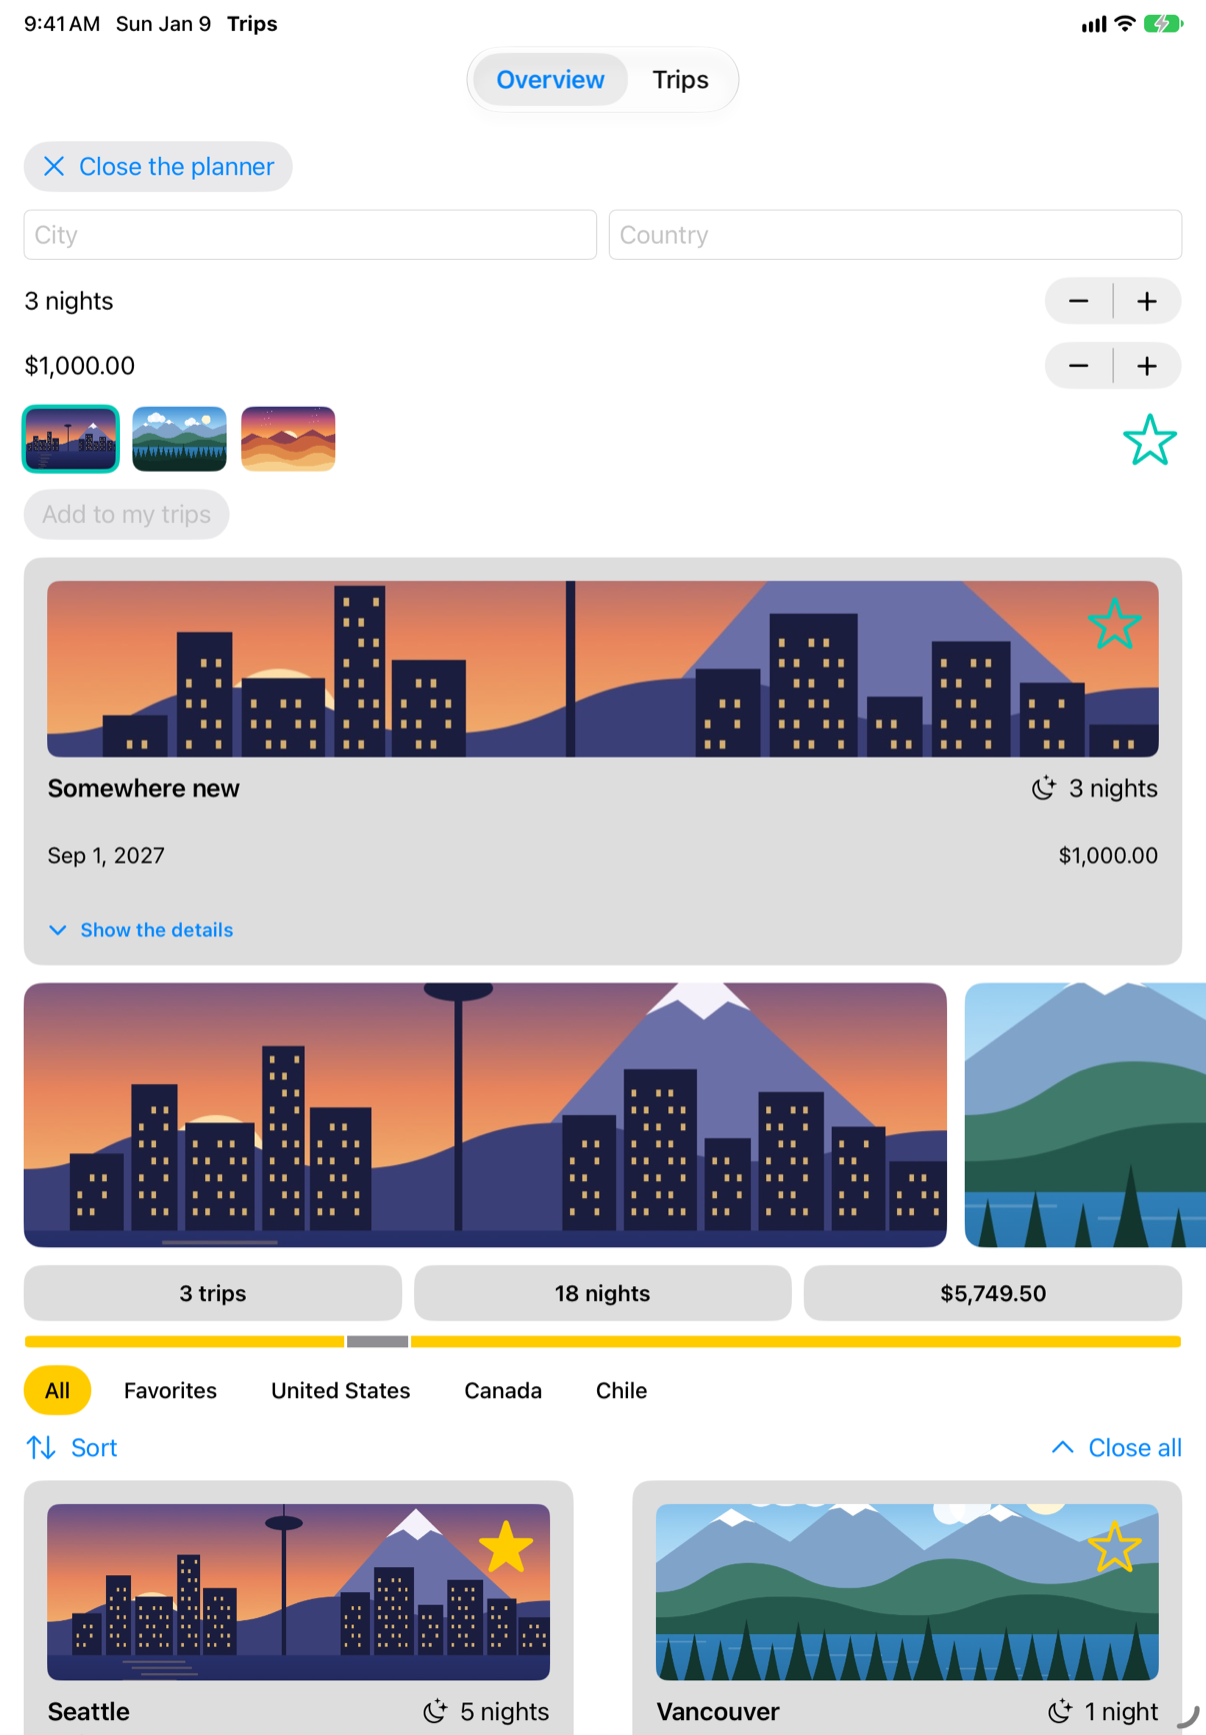
On the iPhone the fields stay one above the other. Read the size class, not the kind of device: Apple's documentation warns to "be prepared to handle size class changes while your app runs" — an iPad app can be resized, and since iOS 27 an iPhone app can be shown at many sizes too (lesson 23's notes). A layout keyed to the space is right on all of them; one keyed to "is this an iPad?" is right on few.
Editing in a sheet
Now the second lesson. A trip can be changed from its screen: tap Edit, and an editor slides up over it. The editor is a view of its own, holding a draft — a copy of the trip — so that Cancel can throw the changes away and only Save hands them back. Make a SwiftUI View named TripEditor:
struct TripEditor: View { @State private var draft: Trip let onSave: (Trip) -> Void @Environment(\.dismiss) private var dismiss init(trip: Trip, onSave: @escaping (Trip) -> Void) { _draft = State(initialValue: trip) self.onSave = onSave } var body: some View { Text("Hello, World!") NavigationStack { Form { TextField("City", text: $draft.city) TextField("Country", text: $draft.country) Stepper(value: $draft.nights, in: 1...60) { Text("^[\(draft.nights) night](inflect: true)") } } .navigationTitle("Edit trip") .navigationBarTitleDisplayMode(.inline) .toolbar { ToolbarItem(placement: .cancellationAction) { Button("Cancel") { dismiss() } } ToolbarItem(placement: .confirmationAction) { Button("Save") { onSave(draft) dismiss() } } } } }}struct TripEditor: View {
@State private var draft: Trip
let onSave: (Trip) -> Void
@Environment(\.dismiss) private var dismiss
init(trip: Trip, onSave: @escaping (Trip) -> Void) {
_draft = State(initialValue: trip)
self.onSave = onSave
}
var body: some View {
NavigationStack {
Form {
TextField("City", text: $draft.city)
TextField("Country", text: $draft.country)
Stepper(value: $draft.nights, in: 1...60) {
Text("^[\(draft.nights) night](inflect: true)")
}
}
.navigationTitle("Edit trip")
.navigationBarTitleDisplayMode(.inline)
.toolbar {
ToolbarItem(placement: .cancellationAction) {
Button("Cancel") { dismiss() }
}
ToolbarItem(placement: .confirmationAction) {
Button("Save") {
onSave(draft)
dismiss()
}
}
}
}
}
}#Preview { TripEditor() TripEditor(trip: .seattle) { _ in }}#Preview {
TripEditor(trip: .seattle) { _ in }
}Three things from earlier days: State(initialValue:) for a draft that starts from the trip and is the editor's own from then on (lesson 17 — here the "trap" is exactly what you want); @Environment(\.dismiss) to close itself (lesson 19); and toolbar placements that say what a button is — cancel, confirm — so that the system puts each where it belongs. The Form is lesson 30's, used here for its look. The store needs a way to replace a trip. In TripStore.swift:
/// The trips, for the whole app. `@MainActor`: the views read it, and the views/// are drawn on the main thread.@MainActor@Observablefinal class TripStore { var trips = Trip.samples /// Adds the trip a draft describes, with an id no other trip has. func add(_ draft: TripDraft) { let id = (trips.map(\.id).max() ?? 0) + 1 trips.append(draft.trip(id: id)) } /// Removes these trips, whatever order they are in. func delete(_ doomed: [Trip]) { let ids = Set(doomed.map(\.id)) trips.removeAll { ids.contains($0.id) } } /// Makes a trip a favorite, or not. func toggleFavorite(_ trip: Trip) { if let index = trips.firstIndex(where: { $0.id == trip.id }) { trips[index].isFavorite.toggle() } } /// Replaces the trip with the same id. func update(_ trip: Trip) { if let index = trips.firstIndex(where: { $0.id == trip.id }) { trips[index] = trip } } func save() { print("Saving \(trips.count) trips") // a real save comes in Part 10 }}/// The trips, for the whole app. `@MainActor`: the views read it, and the views
/// are drawn on the main thread.
@MainActor
@Observable
final class TripStore {
var trips = Trip.samples
/// Adds the trip a draft describes, with an id no other trip has.
func add(_ draft: TripDraft) {
let id = (trips.map(\.id).max() ?? 0) + 1
trips.append(draft.trip(id: id))
}
/// Removes these trips, whatever order they are in.
func delete(_ doomed: [Trip]) {
let ids = Set(doomed.map(\.id))
trips.removeAll { ids.contains($0.id) }
}
/// Makes a trip a favorite, or not.
func toggleFavorite(_ trip: Trip) {
if let index = trips.firstIndex(where: { $0.id == trip.id }) {
trips[index].isFavorite.toggle()
}
}
/// Replaces the trip with the same id.
func update(_ trip: Trip) {
if let index = trips.firstIndex(where: { $0.id == trip.id }) {
trips[index] = trip
}
}
func save() {
print("Saving \(trips.count) trips") // a real save comes in Part 10
}
}And the detail shows the editor. The sheet is presented with .sheet(item:): it appears while editing holds a trip, is handed that trip, and goes when editing is nil again — which SwiftUI sets when the sheet closes. .presentationDetents([.medium, .large]) lets it rest at half height. In TripDetail.swift:
struct TripDetail: View { let id: Trip.ID @Binding var selection: Trip.ID? @Environment(TripStore.self) private var store @State private var editing: Trip? var body: some View { @Bindable var store = store if let index = store.trips.firstIndex(where: { $0.id == id }) { ScrollView { VStack(spacing: 16) { TripCard(trip: $store.trips[index]) if let next = next(after: store.trips[index]) { NavigationLink("Next: \(next.city)", value: next.id) } } } .navigationTitle(store.trips[index].city) .toolbar { Button("All trips", systemImage: "list.bullet") { selection = nil } Button("Edit") { editing = store.trips[index] } } .sheet(item: $editing) { trip in TripEditor(trip: trip) { edited in store.update(edited) } .presentationDetents([.medium, .large]) } } else { ContentUnavailableView("This trip is gone", systemImage: "airplane.departure") } } /// The trip that starts soonest after this one, if there is one. private func next(after trip: Trip) -> Trip? { store.trips.filter { $0.start > trip.start }.min { $0.start < $1.start } }}struct TripDetail: View {
let id: Trip.ID
@Binding var selection: Trip.ID?
@Environment(TripStore.self) private var store
@State private var editing: Trip?
var body: some View {
@Bindable var store = store
if let index = store.trips.firstIndex(where: { $0.id == id }) {
ScrollView {
VStack(spacing: 16) {
TripCard(trip: $store.trips[index])
if let next = next(after: store.trips[index]) {
NavigationLink("Next: \(next.city)", value: next.id)
}
}
}
.navigationTitle(store.trips[index].city)
.toolbar {
Button("All trips", systemImage: "list.bullet") {
selection = nil
}
Button("Edit") {
editing = store.trips[index]
}
}
.sheet(item: $editing) { trip in
TripEditor(trip: trip) { edited in
store.update(edited)
}
.presentationDetents([.medium, .large])
}
} else {
ContentUnavailableView("This trip is gone", systemImage: "airplane.departure")
}
}
/// The trip that starts soonest after this one, if there is one.
private func next(after trip: Trip) -> Trip? {
store.trips.filter { $0.start > trip.start }.min { $0.start < $1.start }
}
}Run the app on the iPhone. Open Seattle and tap Edit:
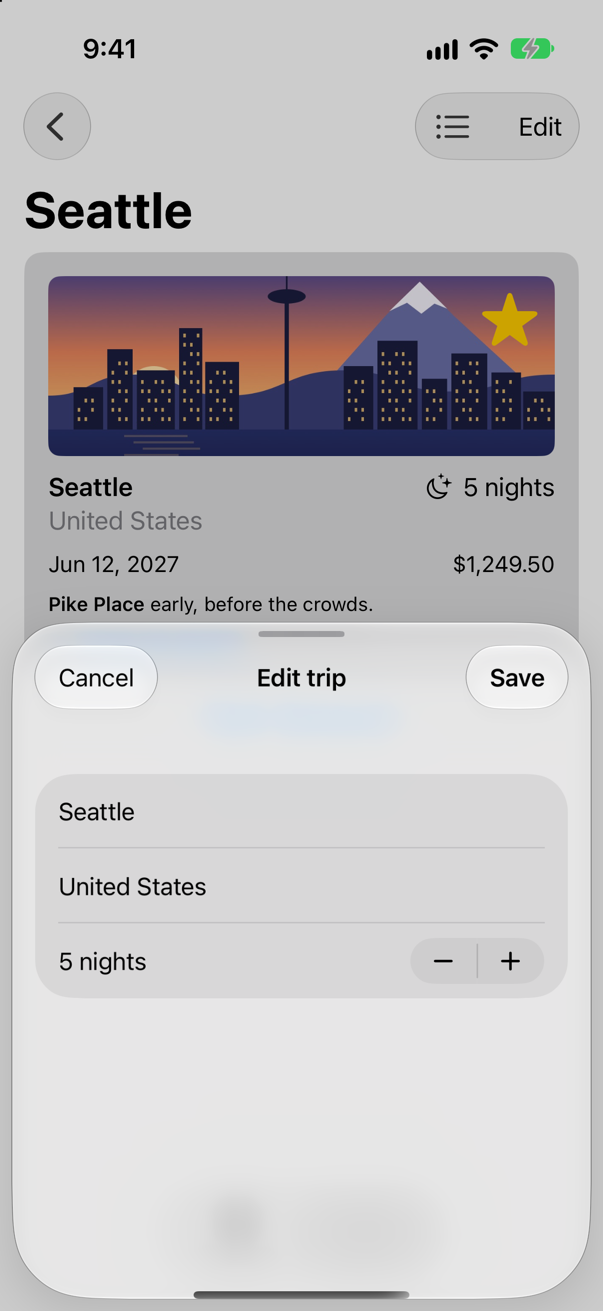
Tap + once, and Save:
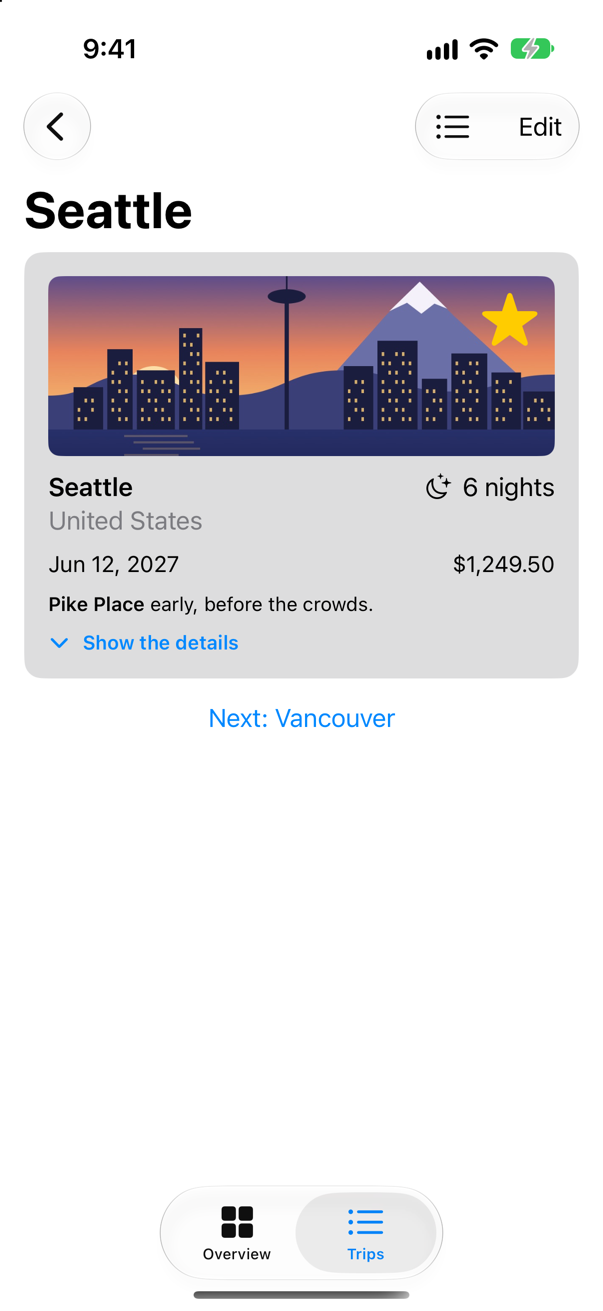
The sheet closed, and Seattle says 6 nights. update changed the trip in the store, so every view that reads Seattle's nights follows, the Overview's card included. Cancel calls only dismiss(), so the draft goes with the sheet and the store never hears of it.
Are you sure?
Deleting a trip from its screen deserves a question first. An alert is presented the same way as a sheet: it shows while a Boolean is true. Its buttons have roles — .destructive draws Delete in red, .cancel marks the safe way out — and either one closes the alert. In TripDetail.swift:
struct TripDetail: View { let id: Trip.ID @Binding var selection: Trip.ID? @Environment(TripStore.self) private var store @State private var editing: Trip? @State private var isConfirmingDelete = false var body: some View { @Bindable var store = store if let index = store.trips.firstIndex(where: { $0.id == id }) { ScrollView { VStack(spacing: 16) { TripCard(trip: $store.trips[index]) if let next = next(after: store.trips[index]) { NavigationLink("Next: \(next.city)", value: next.id) } } } .navigationTitle(store.trips[index].city) .toolbar { Button("All trips", systemImage: "list.bullet") { selection = nil } Button("Edit") { editing = store.trips[index] } Button("Delete trip", systemImage: "trash", role: .destructive) { isConfirmingDelete = true } } .alert("Delete \(store.trips[index].city)?", isPresented: $isConfirmingDelete) { Button("Delete", role: .destructive) { store.delete([store.trips[index]]) } Button("Cancel", role: .cancel) { } } message: { Text("This cannot be undone.") } .sheet(item: $editing) { trip in TripEditor(trip: trip) { edited in store.update(edited) } .presentationDetents([.medium, .large]) } } else { ContentUnavailableView("This trip is gone", systemImage: "airplane.departure") } } /// The trip that starts soonest after this one, if there is one. private func next(after trip: Trip) -> Trip? { store.trips.filter { $0.start > trip.start }.min { $0.start < $1.start } }}struct TripDetail: View {
let id: Trip.ID
@Binding var selection: Trip.ID?
@Environment(TripStore.self) private var store
@State private var editing: Trip?
@State private var isConfirmingDelete = false
var body: some View {
@Bindable var store = store
if let index = store.trips.firstIndex(where: { $0.id == id }) {
ScrollView {
VStack(spacing: 16) {
TripCard(trip: $store.trips[index])
if let next = next(after: store.trips[index]) {
NavigationLink("Next: \(next.city)", value: next.id)
}
}
}
.navigationTitle(store.trips[index].city)
.toolbar {
Button("All trips", systemImage: "list.bullet") {
selection = nil
}
Button("Edit") {
editing = store.trips[index]
}
Button("Delete trip", systemImage: "trash", role: .destructive) {
isConfirmingDelete = true
}
}
.alert("Delete \(store.trips[index].city)?", isPresented: $isConfirmingDelete) {
Button("Delete", role: .destructive) {
store.delete([store.trips[index]])
}
Button("Cancel", role: .cancel) { }
} message: {
Text("This cannot be undone.")
}
.sheet(item: $editing) { trip in
TripEditor(trip: trip) { edited in
store.update(edited)
}
.presentationDetents([.medium, .large])
}
} else {
ContentUnavailableView("This trip is gone", systemImage: "airplane.departure")
}
}
/// The trip that starts soonest after this one, if there is one.
private func next(after trip: Trip) -> Trip? {
store.trips.filter { $0.start > trip.start }.min { $0.start < $1.start }
}
}Run the app, open Seattle, and tap the trash can:
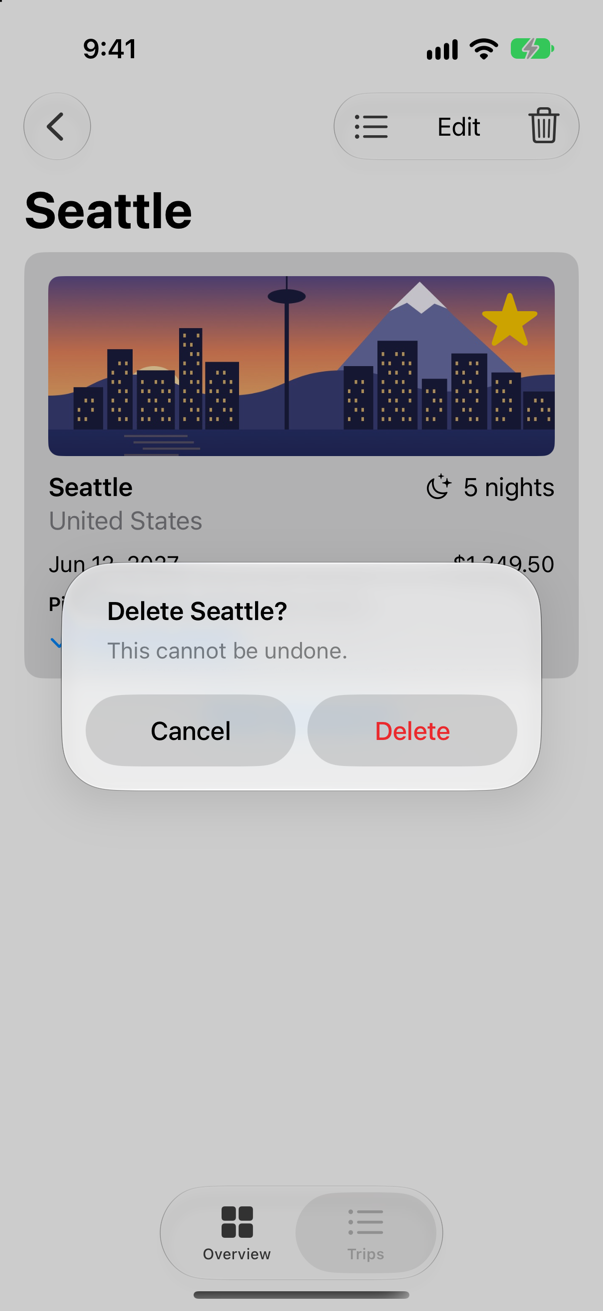
Tap Delete in the alert:
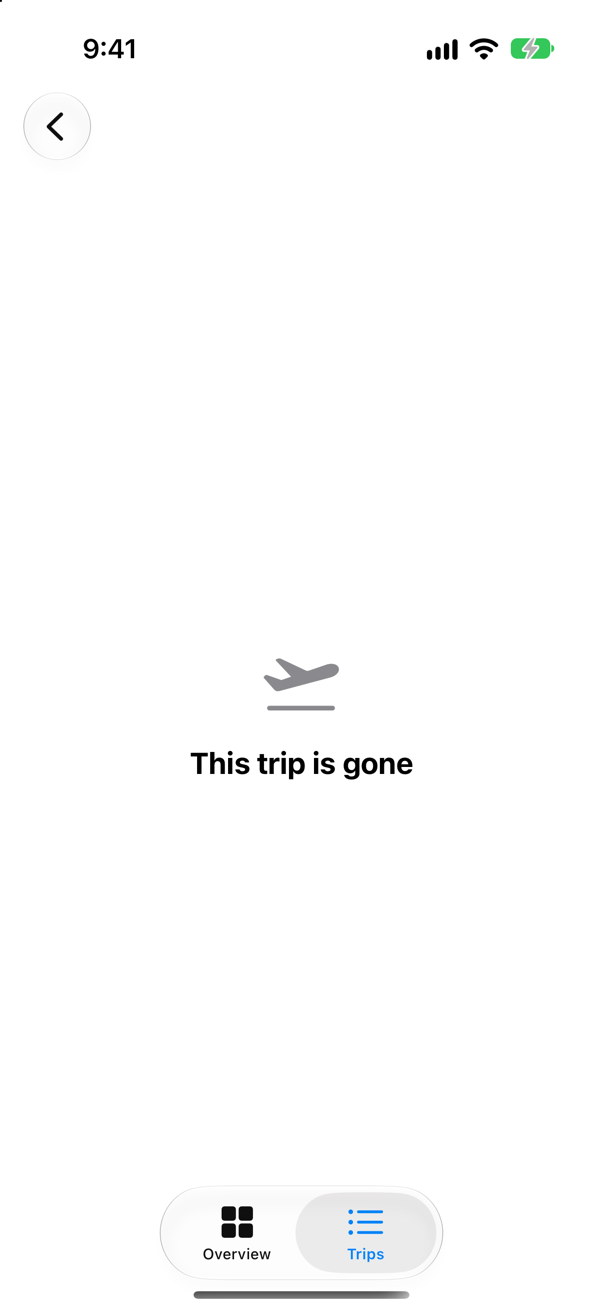
The screen did not have to be closed by hand. TripDetail looks its trip up by id, found none, and showed "This trip is gone" — lesson 22's design paying for itself. A tap on the Trips tab returns to the list, where Seattle is no longer there.
What you built
- A
NavigationSplitView: on an iPad the list beside the trip, on an iPhone one stack, from the same code. - A planner that reads the horizontal size class and puts two fields side by side when there is room.
- An editor in a sheet, presented with
.sheet(item:), with a draft, two detents, Cancel and Save. - An alert with a destructive button before a trip is deleted.
Next, Part 7 ends with toolbars, menus and search: the Trips tab gets a search field that filters as you type — and the part's interview problem, a deep link into the navigation you built in this lesson and the last.
The finished project
Stuck, or want to compare with your own? This is the project as it stands at the end of this lesson, built and run before it was put here.
- Trips-lesson-23.zip — unzip it, then open
Trips.xcodeprojin Xcode.
Flash cards
18 cards for this lesson, each labelled with its topic. 10 ask how you would write something; the other 8 are trick questions, written to catch a misunderstanding. Answer in your head first, then tap the card.
Syntax · Split viewsA list in one column, and the item chosen in it beside it — on an iPad.
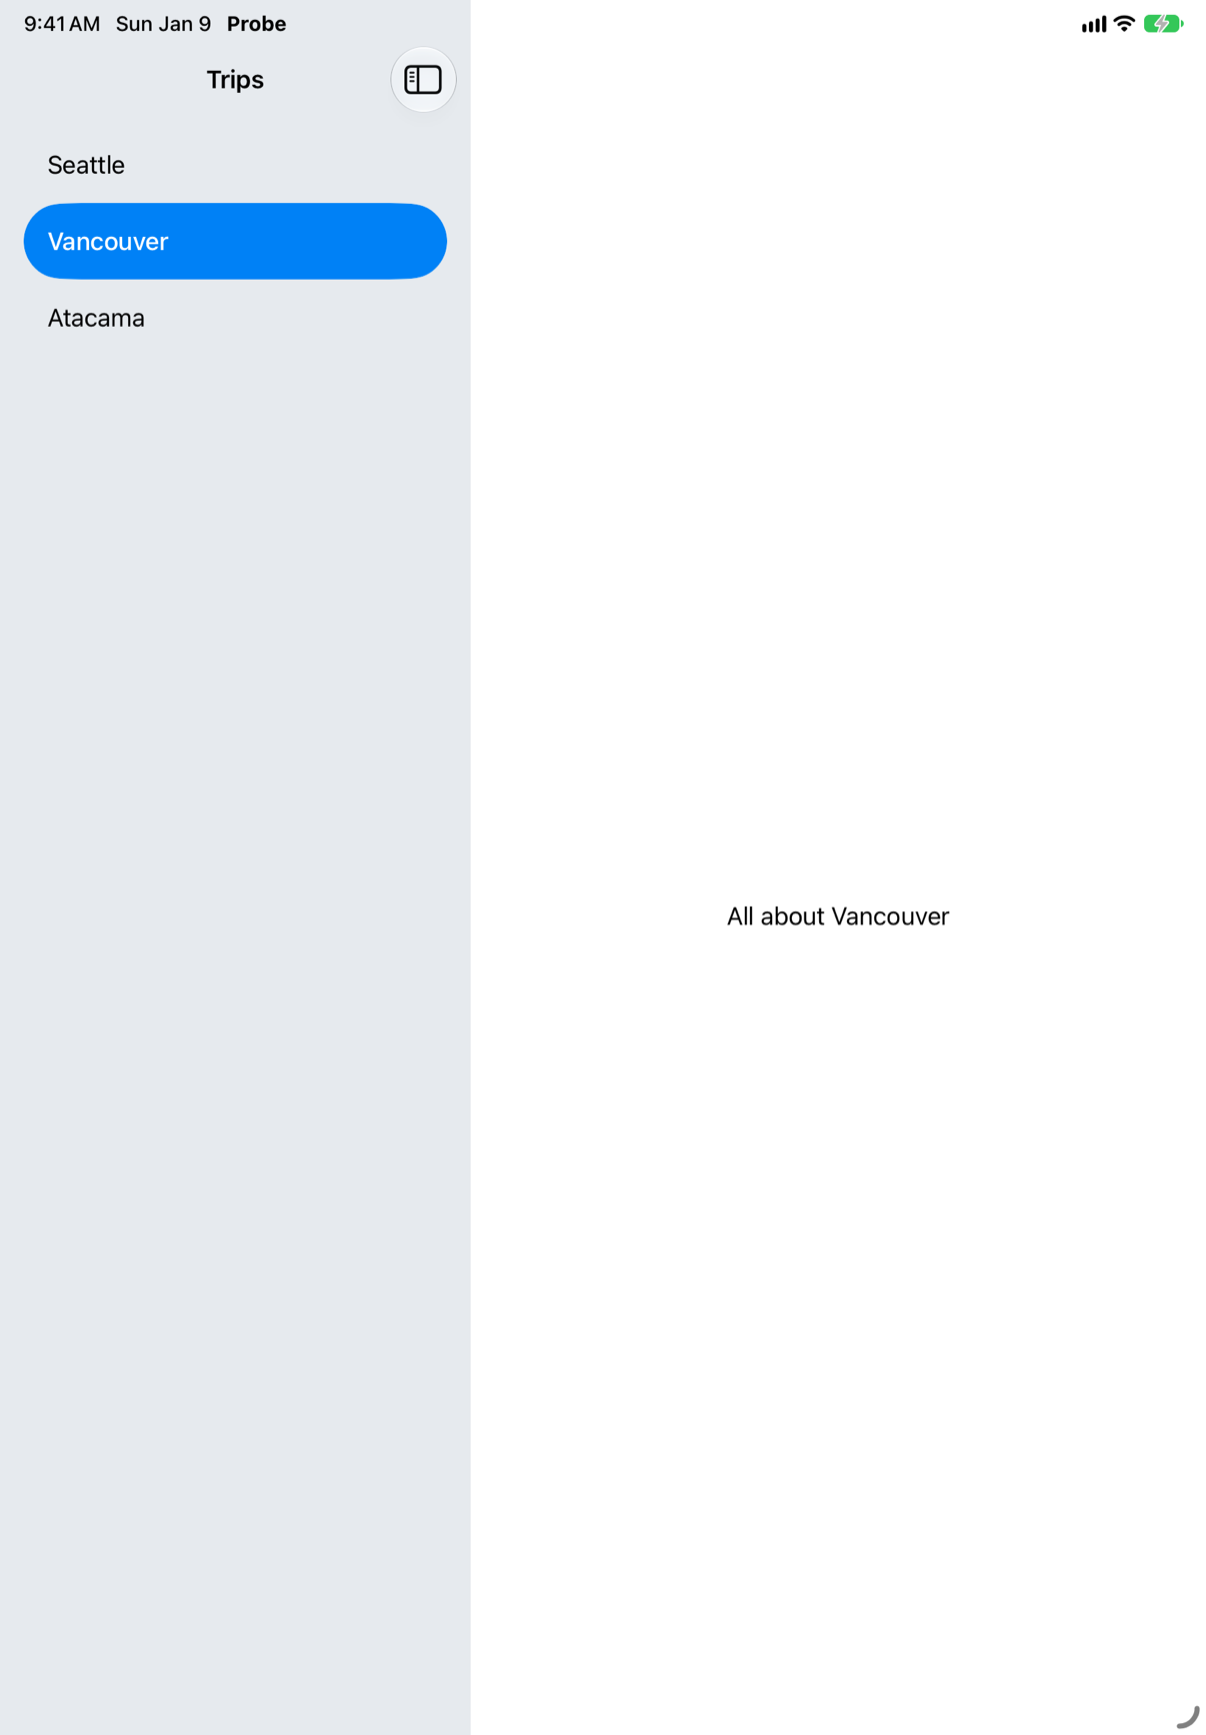
NavigationSplitView { sidebar } detail: { … }, with the sidebar's List bound to a selection that the detail reads. The picture is an iPad after a tap on Vancouver; on an iPhone the same code is one stack.
Syntax · Split viewsThree columns: countries, the cities of the chosen country, and the chosen city.
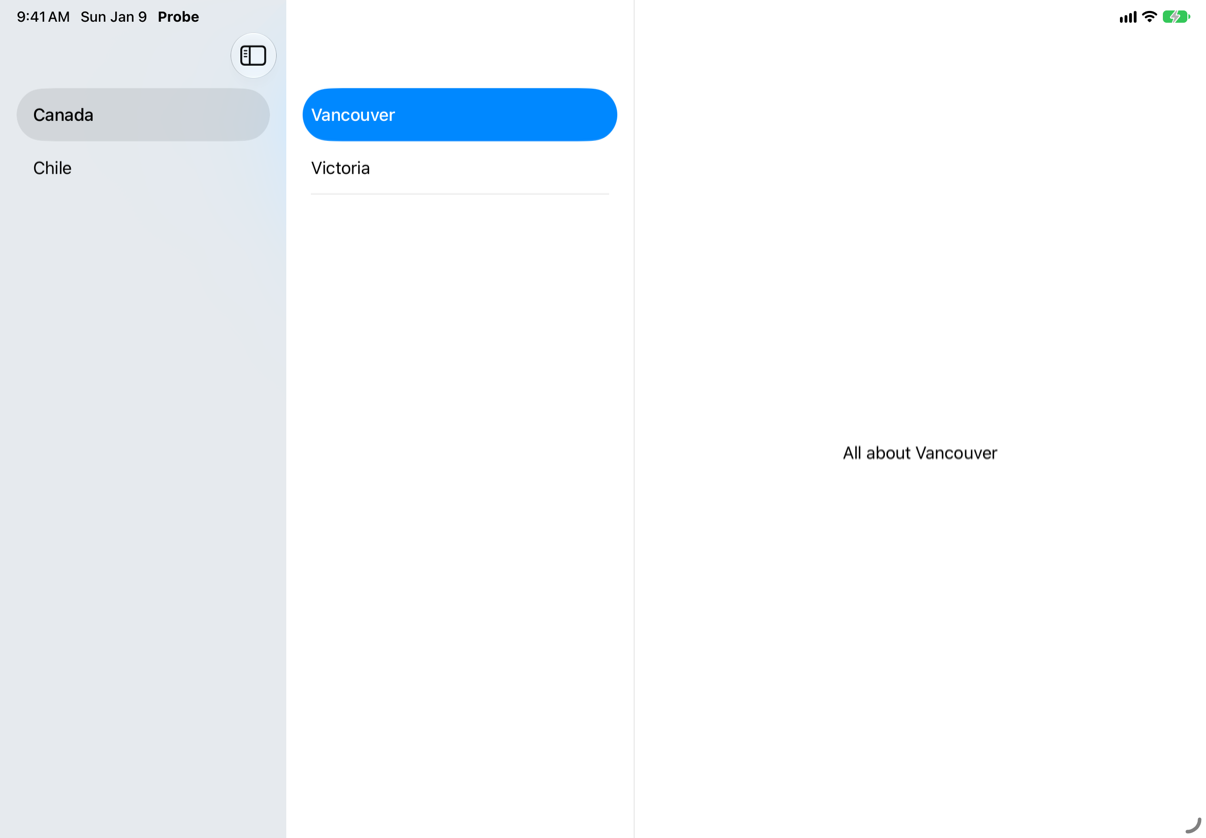
NavigationSplitView { } content: { } detail: { }. The sidebar's selection drives the middle column, and the middle column's drives the detail. The picture is an iPad held sideways, after Canada, then Vancouver — held upright, it hides the first column (one of this lesson's edge cases).
Syntax · SizeFind out whether the screen is wide or narrow, the way SwiftUI describes it.

@Environment(\.horizontalSizeClass): .compact or .regular. An iPhone held upright is compact wide — the picture; an iPad is regular. verticalSizeClass is the other direction.
Syntax · SizeShow the first of several layouts that fits the space — wide if it can, narrow if it must.

ViewThatFits tries its children in order and shows the first that fits — so put the most generous first. No size class needed; it measures the space it is actually given.
Syntax · SheetsShow a sheet while a Boolean is true.

.sheet(isPresented:). Set the Boolean to show it; SwiftUI sets it back to false when the sheet goes, however it goes.
Syntax · SheetsShow a sheet for one particular item, and hand the item to it.

.sheet(item:) with an optional Identifiable value: the sheet shows while it is not nil, and its closure is handed the value itself. Use it whenever a sheet is about one thing.
Syntax · SheetsA sheet that can rest at half height.
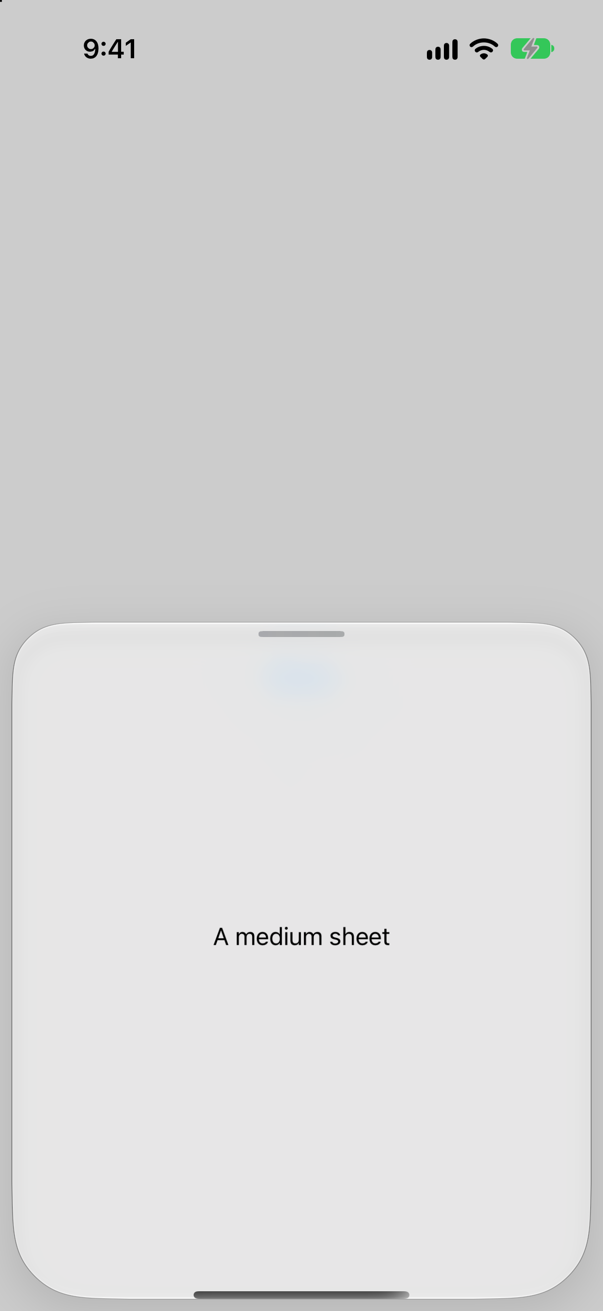
.presentationDetents([.medium, .large]), on the sheet's content. Apple: "By default, sheets support the large detent." The picture is the sheet as it first appeared, at half height; dragging its top edge moves it between the two.
Syntax · AlertsAsk before deleting, with a red Delete and a Cancel.
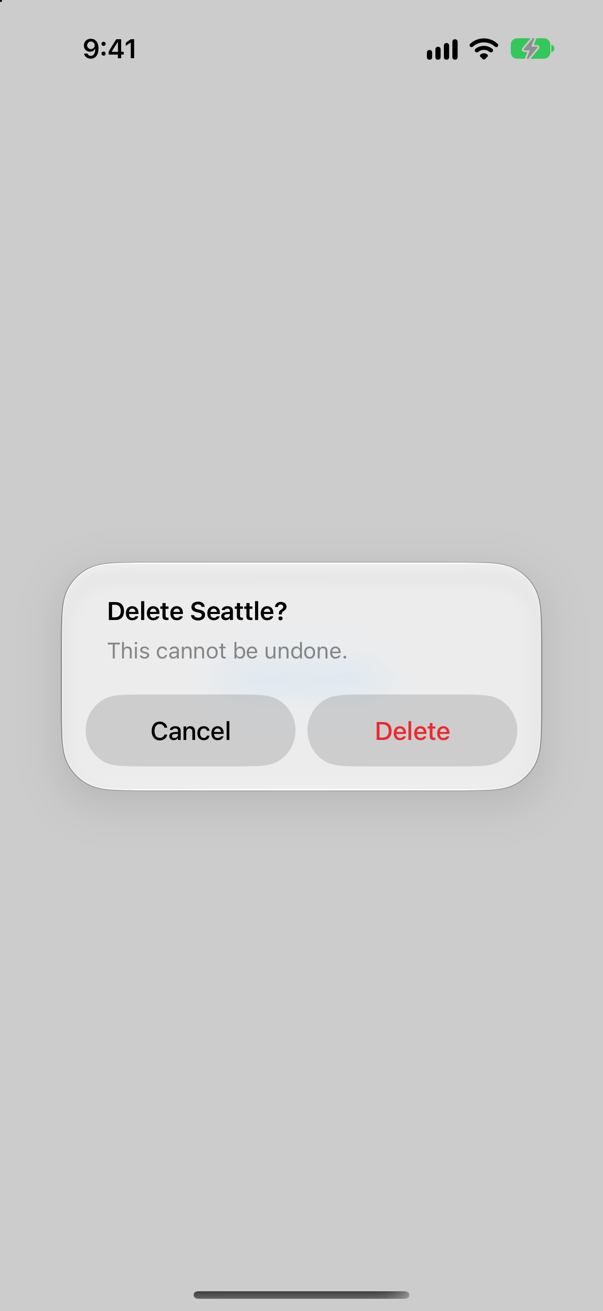
.alert(_:isPresented:actions:message:). Roles do the styling: .destructive is red, .cancel is the safe way out. Any button closes the alert; there is nothing to dismiss by hand.
Syntax · SheetsA screen that covers everything, with no swipe to close it.

.fullScreenCover(isPresented:). It takes the whole screen and cannot be dragged away, so it must offer its own way out — here, Done.
Syntax · SheetsA sheet that cannot be swiped away until the user decides.
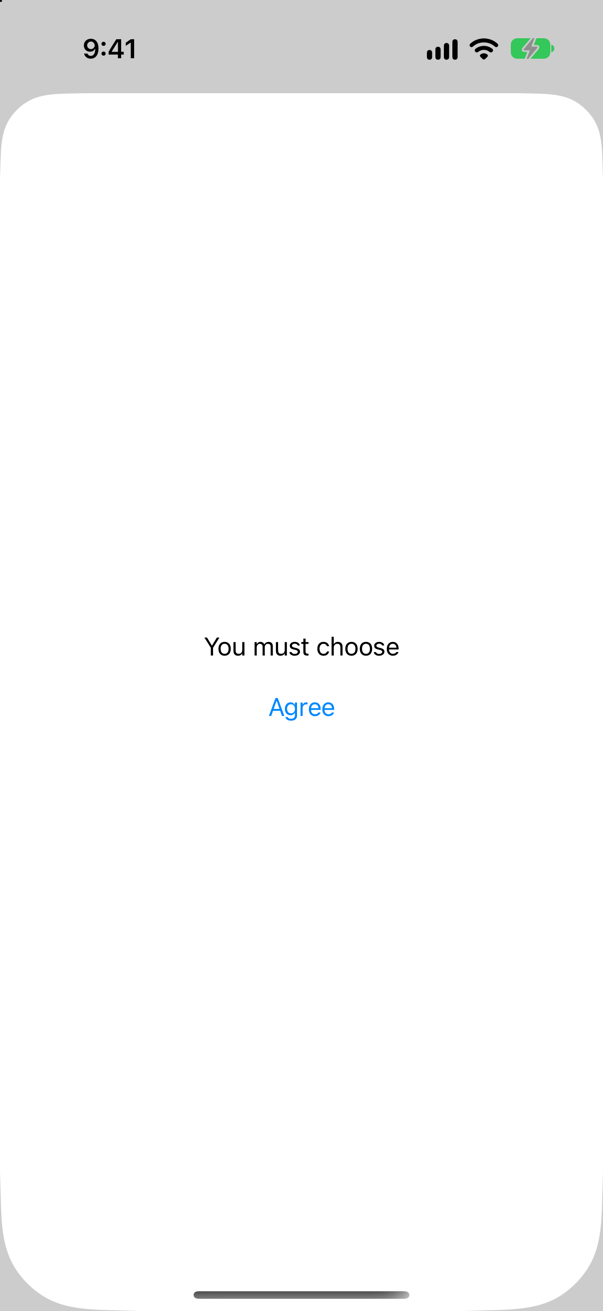
.interactiveDismissDisabled() on the sheet's content: dragging it down does nothing (the picture is after a drag). Offer a button that closes it.
Trick question · SheetsA row's button sets chosen = city and then isShown = true; the .sheet(isPresented:) shows Editing \(chosen). The user taps Edit Vancouver. What does the sheet say?

"Editing nothing." The sheet's closure was made the last time body ran, when chosen was still "nothing" — and body itself never reads chosen, so setting it did not make body run again. Use .sheet(item:): the sheet is handed the item itself.
Trick question · SheetsA sheet holds a NavigationStack. On its second screen, a Close button calls dismiss(). What closes?
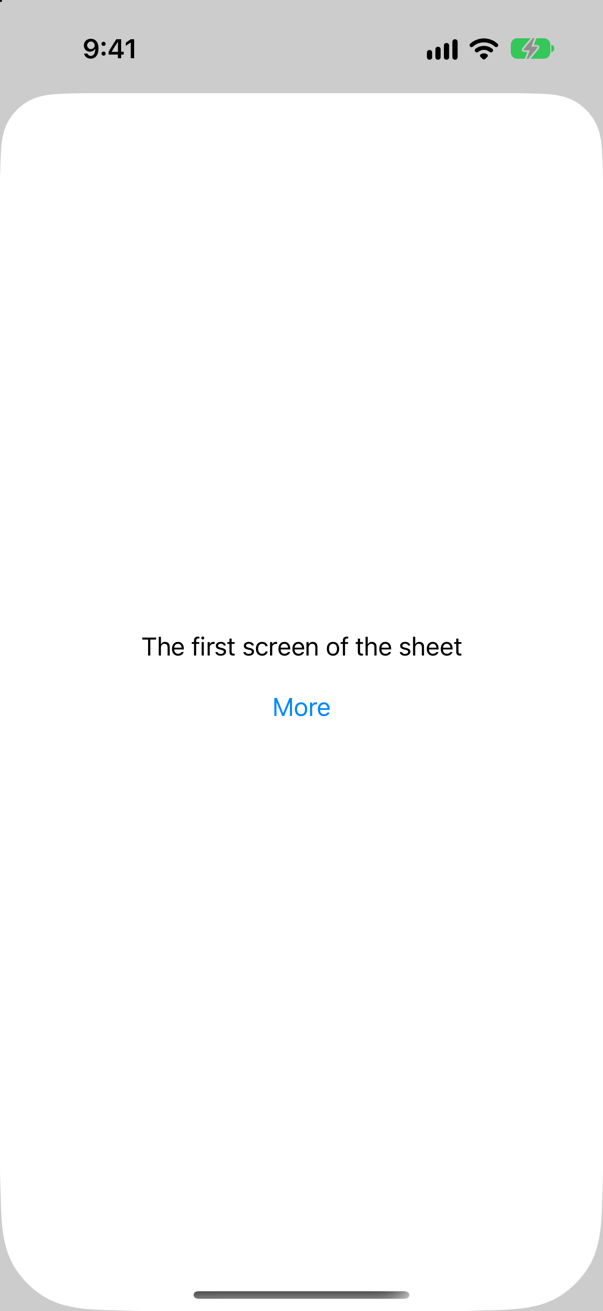
Only the second screen — the sheet stays up, on its first screen (the picture). dismiss undoes the presentation nearest to where it is read, and for a pushed screen that is the push. To close the whole sheet from deeper in, hand the screen the sheet's own Boolean.
Trick question · SheetsA sheet with .presentationDetents([.medium, .large]) is shown on an iPhone held sideways. How tall is it?
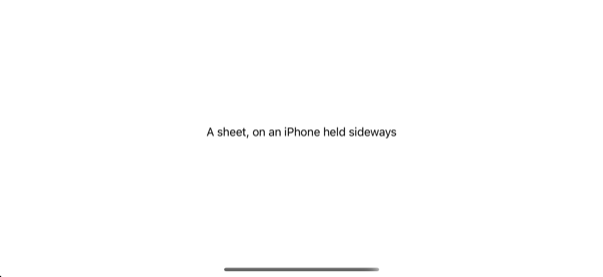
The whole screen. Apple: "In vertically compact environments, such as iPhone in landscape orientation, a sheet presentation automatically adapts to appear as a full-screen cover." Give such a sheet a button that closes it.
Trick question · Sheets.popover(isPresented:) on an iPhone. What appears?

A sheet. Apple: "On iPhone, popovers adapt into sheets." To keep the bubble, add .presentationCompactAdaptation(.popover) to the popover's content — one of this lesson's edge cases shows both.
Trick question · AlertsA confirmationDialog with one destructive button, on an iPhone with iOS 27. Where does it appear, and where is its Cancel button?

In a bubble beside the button that opened it, with no Cancel button — a tap anywhere outside it is the no. Apple's reference describes that bubble for regular size classes, an iPad; on iOS 27 an iPhone shows it too. Write the buttons by role and let the system choose the look.
Trick question · SizeAn iPhone 17 is held sideways, so it is wider than it is tall. What are its horizontal and vertical size classes?
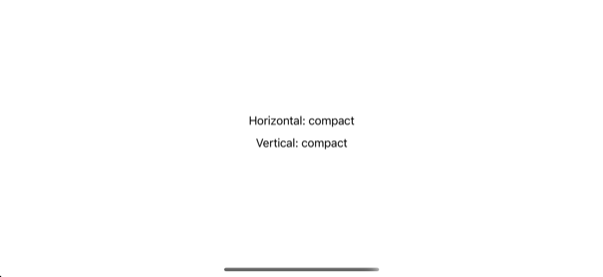
Compact and compact. Sideways, this iPhone is compact in both directions — which is why a split view stays one column on it and a sheet fills the screen. A size class describes the kind of space, not its number of points.
Trick question · Split viewsOn an iPad: a sidebar row NavigationLink(city, value: city), and the matching navigationDestination inside the detail column's NavigationStack. A row is tapped. What happens?
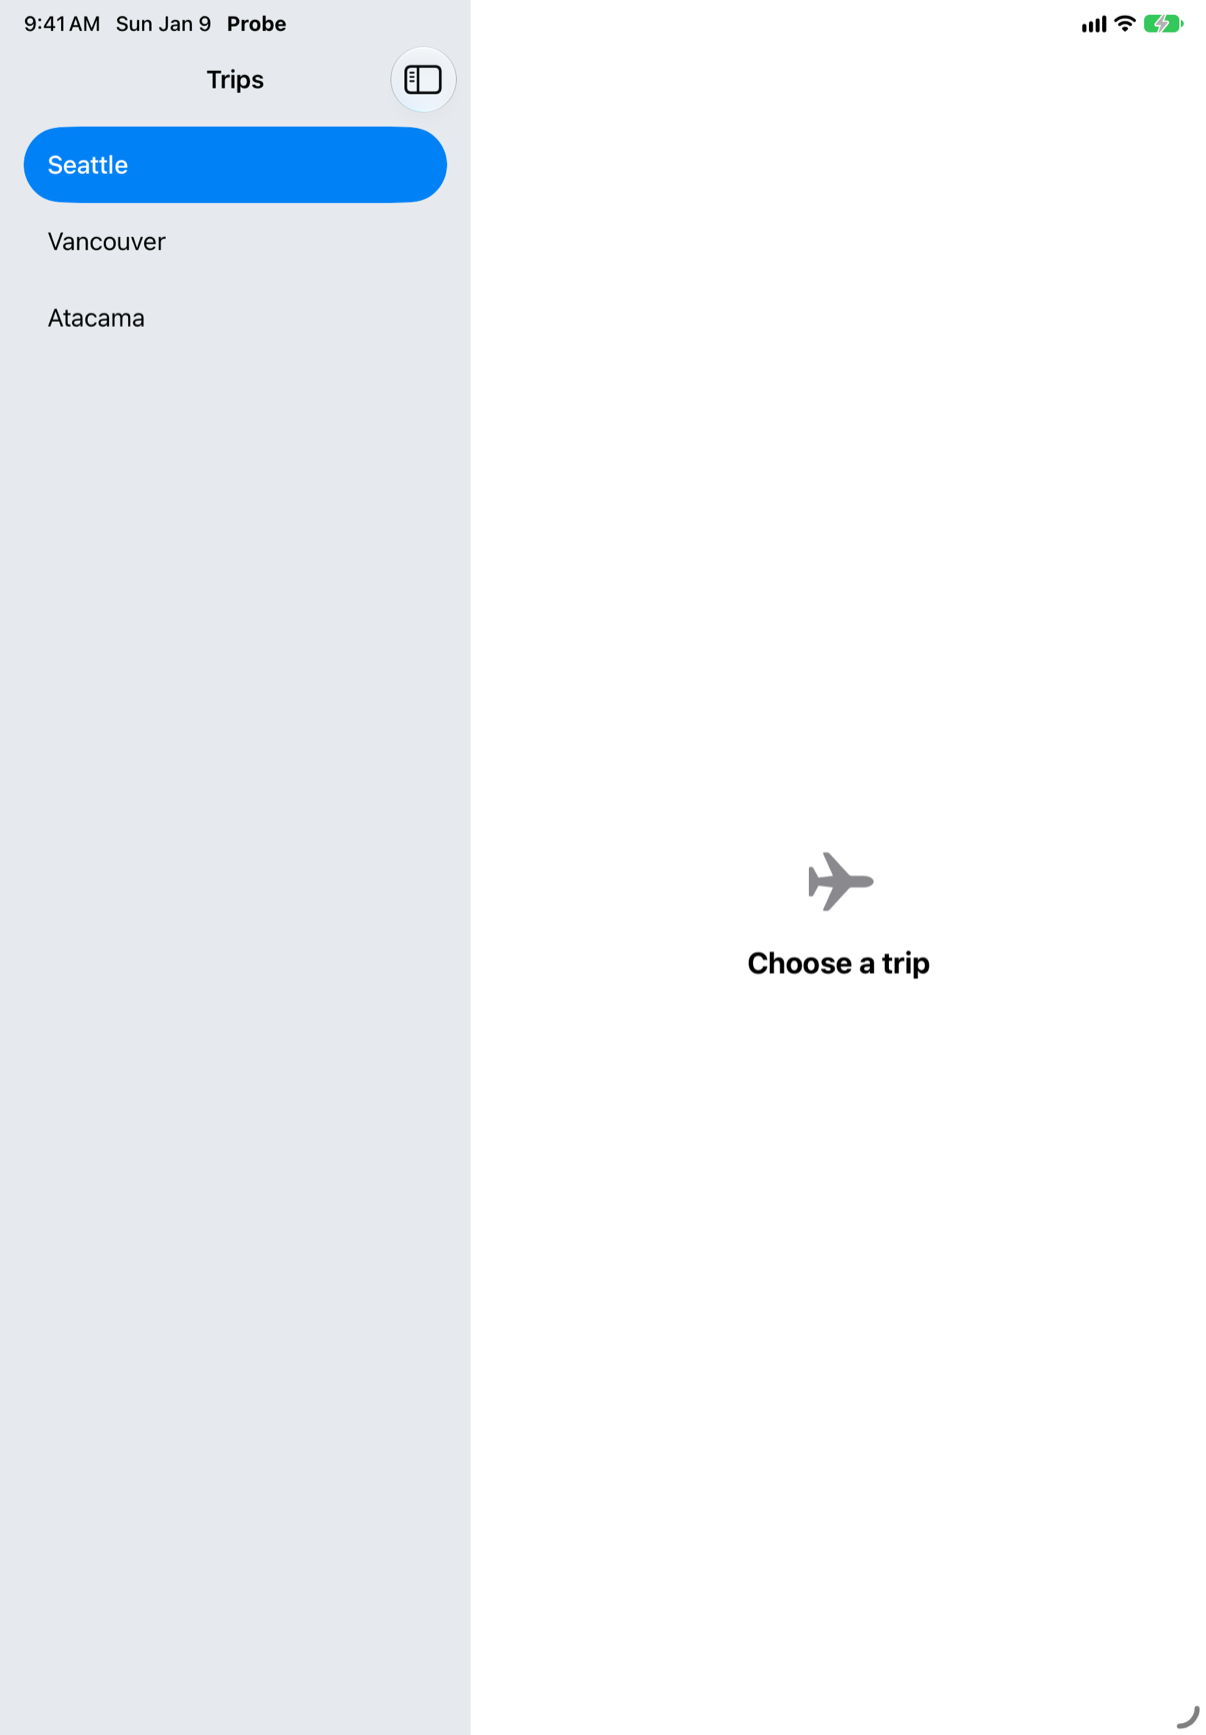
Nothing opens. SwiftUI logs that no destination is "visible from the location of the link": the row is in the sidebar column, the destination in the detail column. Give the sidebar's List a selection and let the detail read it, as Trips does.
Trick question · SizeViewThatFits { Text("Short"); Text("A much longer label that would also have fitted") }. Which one is shown?
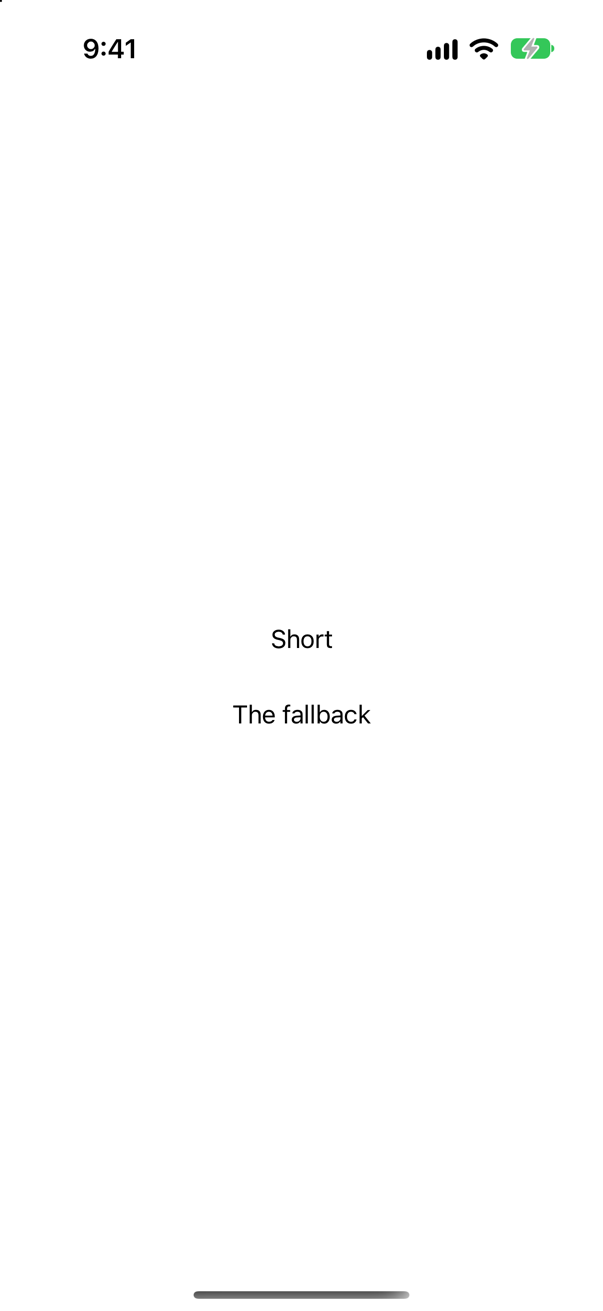
"Short". ViewThatFits shows the first child that fits — not the biggest, not the best. So list the children from most to least generous. (The second one in the picture skipped a first child that was too long.)
Edge cases and tricky questions
20 questions of the kind an interviewer uses to find out whether you really know this — the corners, the traps, and the things that changed recently. Each has its source. Wherever the answer is what some code does, that code was compiled and run, and what you see under “Show the answer” is what it really did. Say your answer aloud before you open it.
Split views and adapting to screen size
The last lesson's pattern — value links, a destination, a NavigationStack — moved into a NavigationSplitView on an iPad. Where can the destination go so that both a sidebar row and a Next link inside the detail work?
Show the answer
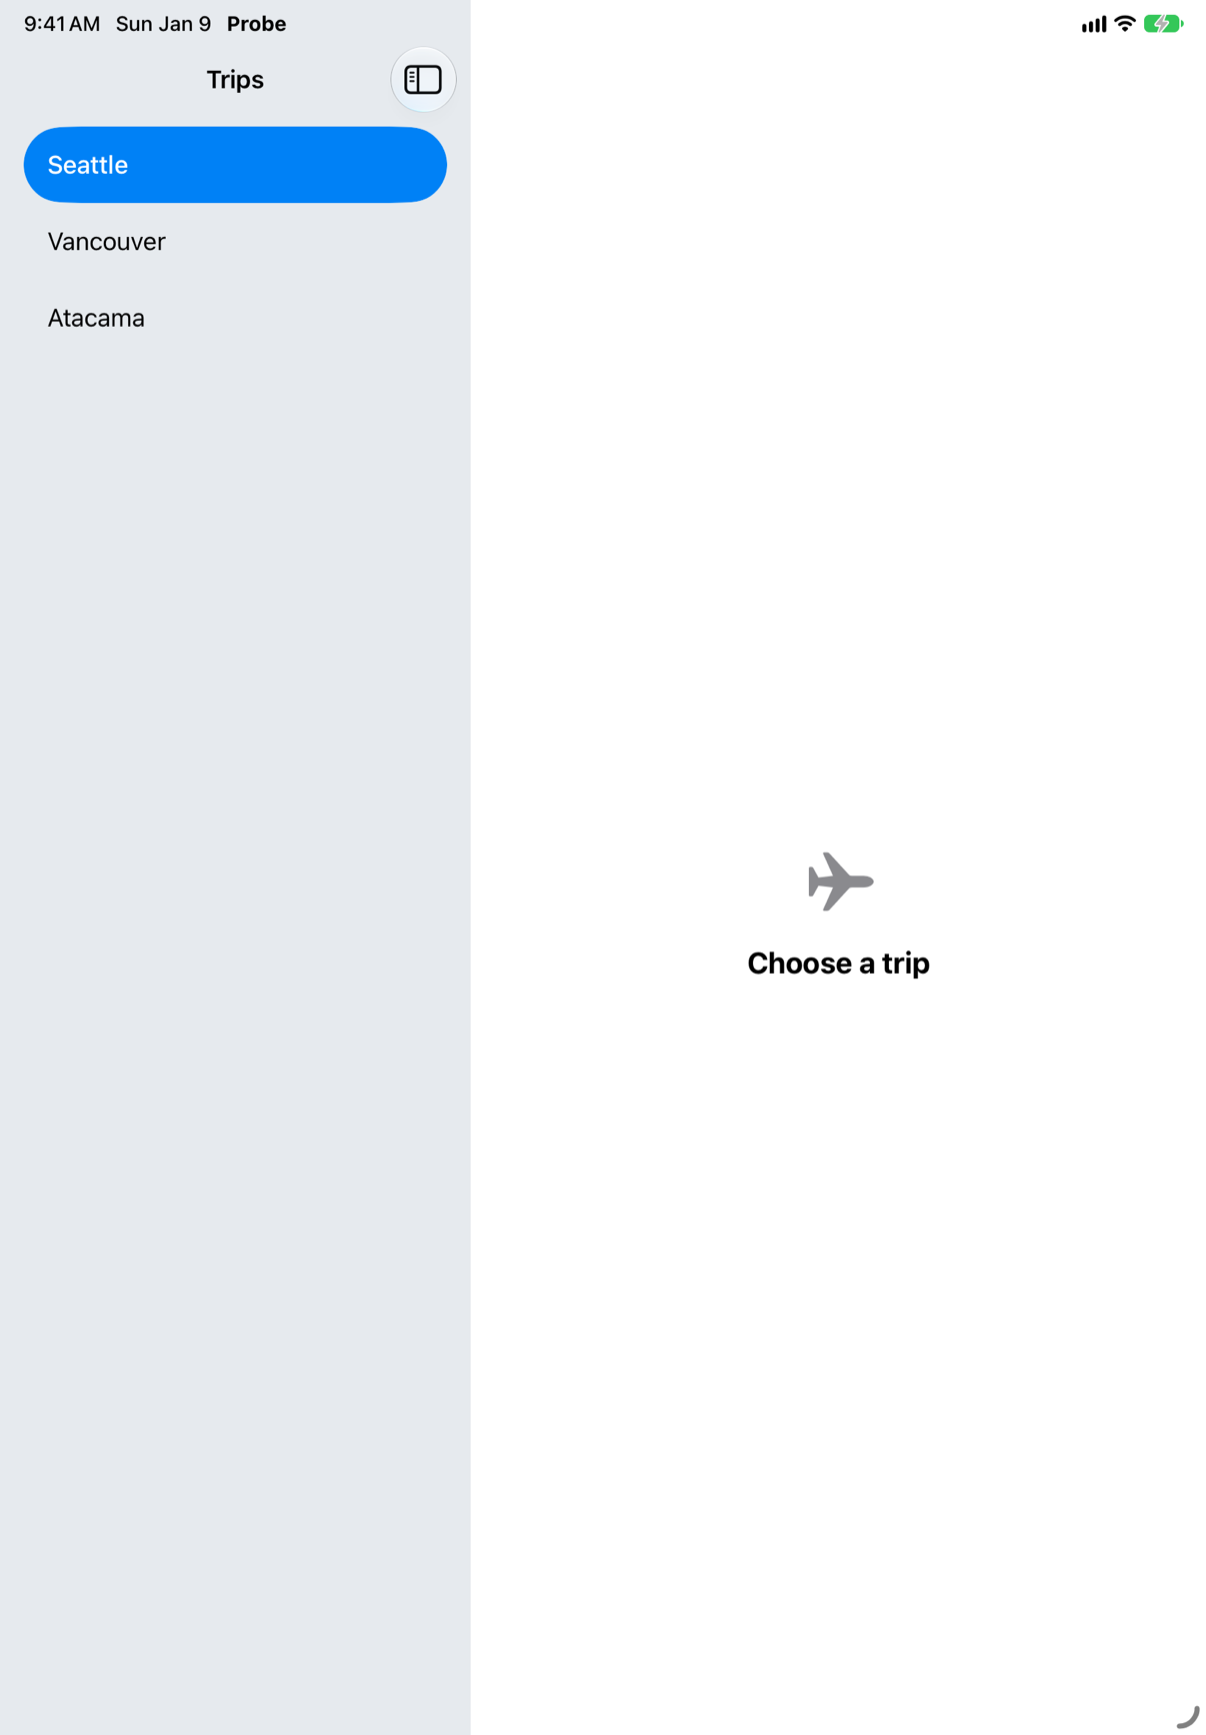
Neither of the two obvious places works for both. With the destination inside the detail column's stack — the code in the question — a tap on a sidebar row does nothing, and SwiftUI says why:
SwiftUI wrote this to the log while the app ran
A NavigationLink is presenting a value of type “String” but there is no matching navigationDestination declaration visible from the location of the link. The link cannot be activated.

Note: Links search for destinations in any surrounding NavigationStack, then within the same column of a NavigationSplitView.
The message's last line is the rule: links search "in any surrounding NavigationStack, then within the same column of a NavigationSplitView." The row is in the sidebar column, and the destination is in the detail column. (An iPhone, where the same code collapses into one stack, logged the same message.) Move the destination onto the sidebar's list, and the rows work — but now the Next link inside the detail cannot see it, and logs the same message when tapped:
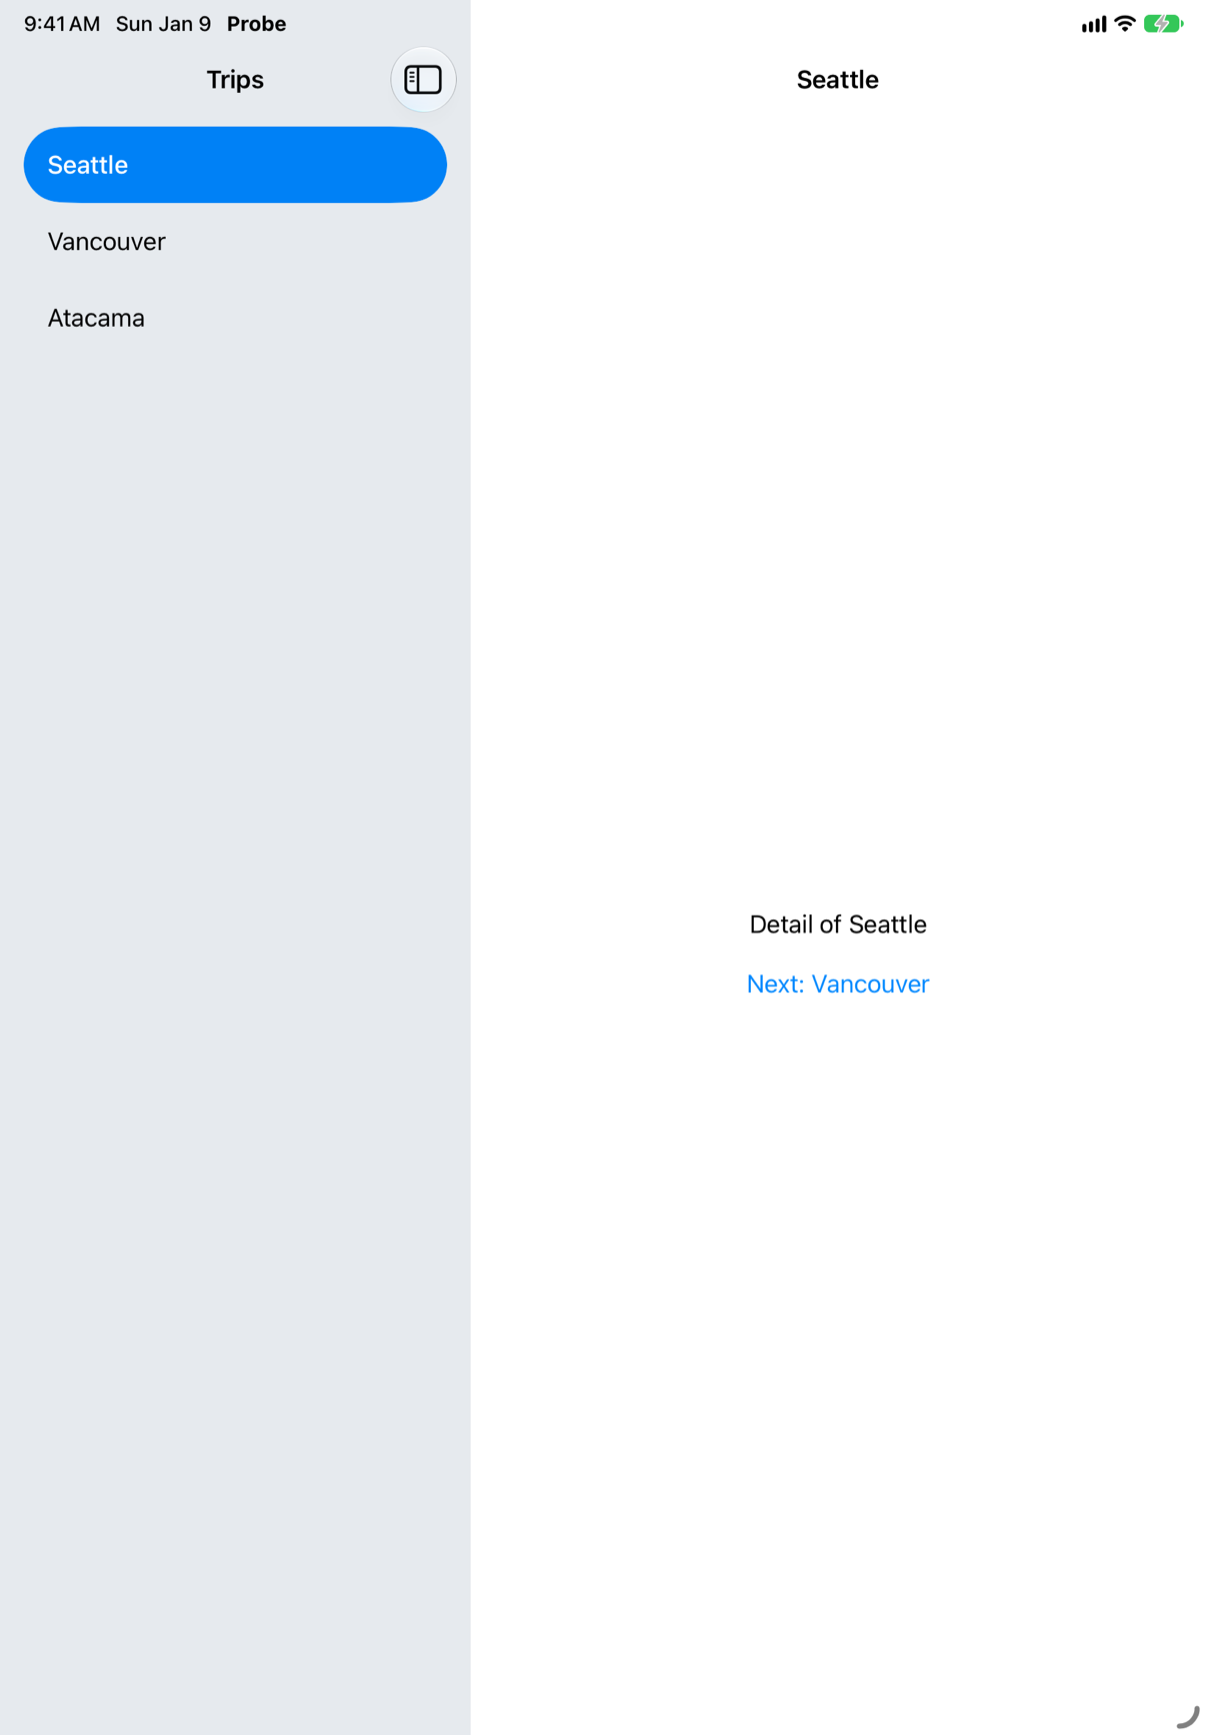
The arrangement that works both ways is the one Apple's page for NavigationSplitView begins with: the sidebar's List has a selection, so that "when people make a selection, the detail view updates accordingly", and the detail column's own NavigationStack handles what is pushed inside it:

Seattle opened, Next pushed Vancouver beside the list, and nothing was logged. That is this lesson's Trips.
Where this comes from: NavigationSplitView · navigationDestination(for:destination:) · WWDC22: The SwiftUI cookbook for navigation — The log line is SwiftUI's own, read from the simulator. Apple, NavigationSplitView: "the link must present a data type for which the stack has a corresponding navigationDestination(for:destination:) modifier."
On an iPad, Seattle is chosen and its Next link has pushed Vancouver in the detail column. Now Atacama is chosen in the sidebar. Is Vancouver still on the detail stack? (No code of yours resets the path.)
Show the answer
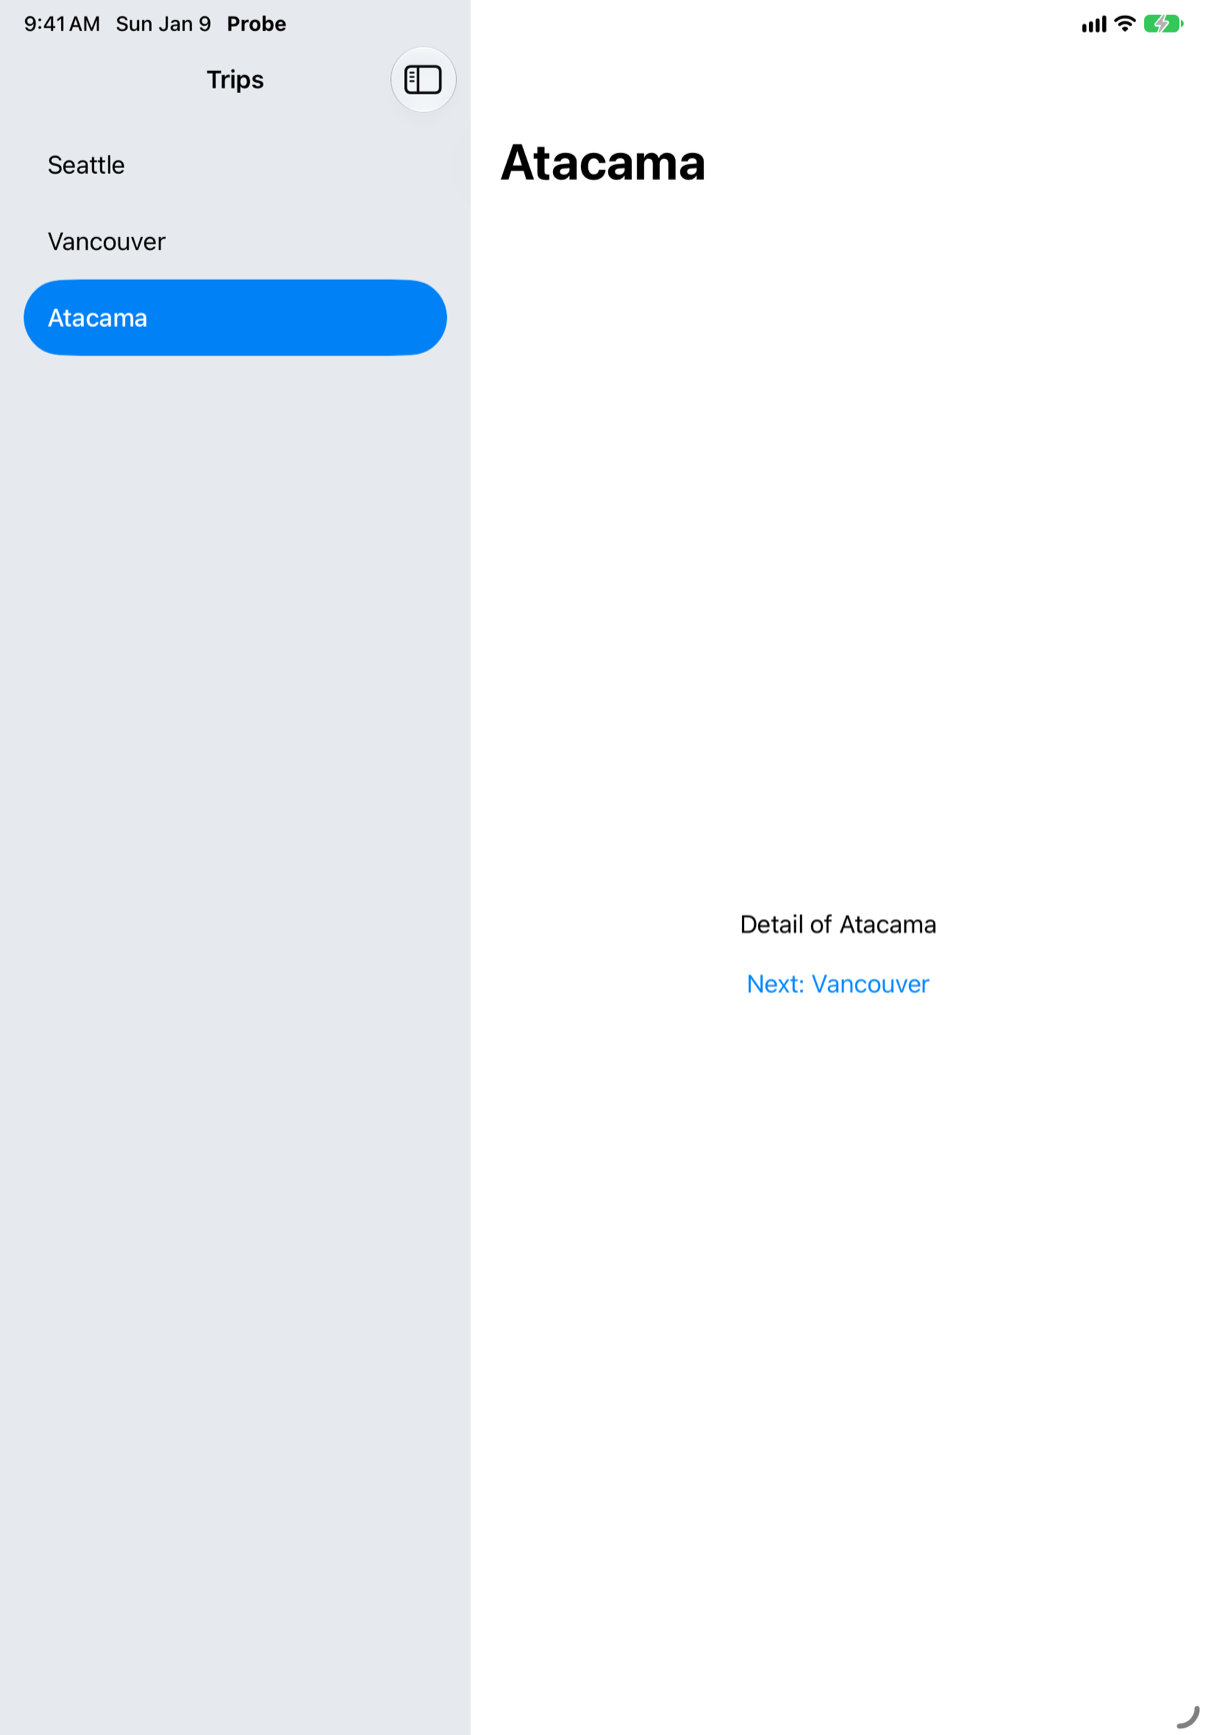
No — SwiftUI emptied the path itself. The console, for the push:
path: ["Vancouver"]and then for the new choice in the sidebar:
path: []
selection: Atacama
Apple's page describes it: a link in an earlier column "sets the view that the stack displays over its root view" — the stack starts again from the new choice, instead of leaving the last trip's pages piled on top of it.
So code that also clears the path when the selection changes is harmless, and redundant. What still needs your code is the other direction: closing the detail on an iPhone means clearing the selection, as this lesson's All trips does.
Where this comes from: NavigationSplitView — Apple, NavigationSplitView: "Tapping or clicking a NavigationLink that appears in an earlier column sets the view that the stack displays over its root view."
What are the horizontal and vertical size classes of an iPhone 17 held upright, an iPhone 17 held sideways, and an iPad Air?
Show the answer

| Horizontal | Vertical | |
|---|---|---|
| iPhone 17, upright | compact | regular |
| iPhone 17, sideways | compact | compact |
| iPad Air 11-inch, upright | regular | regular |
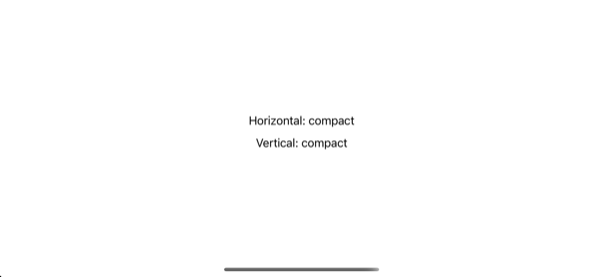

Two surprises. Sideways, this iPhone is still compact wide, though it is wider than it is tall. And it is compact tall, which is what makes a sheet fill the screen (lesson 23). Apple lists what sets the class: "The current device type. The orientation of the device. The appearance of Slide Over and Split View on iPad." — so an iPad app sharing the screen can be compact wide as well.
That is the argument for asking the size class and not the device: the answer can change while the app runs, on one device, and the size class changes with it.
Where this comes from: UserInterfaceSizeClass · horizontalSizeClass — Apple, UserInterfaceSizeClass: "be prepared to handle size class changes while your app runs, because factors like device orientation can change at runtime."
A two-column NavigationSplitView on an iPhone 17 rotated to landscape — room, you would think, for two columns. What does it show?
Show the answer
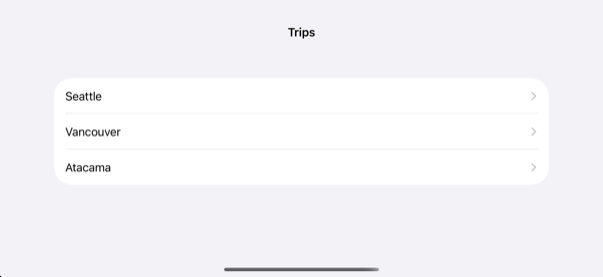
One column — the list. The split view goes by the horizontal size class, not by points, and this iPhone sideways is compact wide (the previous question). Apple: "At narrow size classes, such as on iPhone or Apple Watch, a navigation split view collapses into a single stack."
So you describe the columns once, and the system shows as many as the kind of space allows — never an iPad layout squeezed onto a phone.
Where this comes from: NavigationSplitView · UserInterfaceSizeClass — Measured on an iPhone 17 simulator, rotated to landscape.
Two ViewThatFits. In the first, a short text comes before a longer one that would also fit. In the second, the first child is far too long, and is told not to wrap. What does each show?
Show the answer
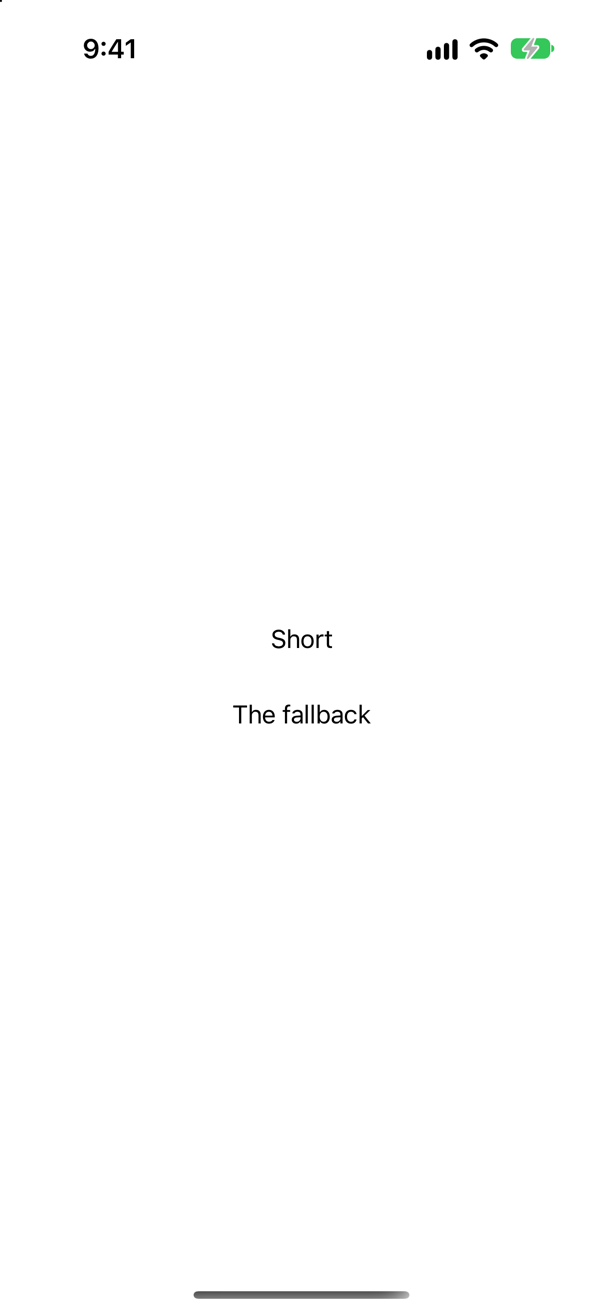
"Short", and "The fallback". ViewThatFits goes through its children in order and shows the first whose ideal size fits the space — not the largest one that fits, not the best. So the order is the design: the most generous layout first, the most compact last.
In the second, the long text has .fixedSize(), so it asks for its whole width on one line, does not fit, and is passed over. Without fixedSize, a Text can wrap to fit almost any width, and would have been chosen: ViewThatFits measures what a child wants, and a Text that may wrap wants surprisingly little.
Where this comes from: ViewThatFits — Apple, ViewThatFits: it "evaluates its child views in the order you provide them … and selects the first child whose ideal size on the constrained axes fits within the proposed size."
A three-column split view — countries, the cities of the chosen country, the chosen city — runs on an iPad held upright. When it opens, where are the countries? And if the code asks for all three columns with columnVisibility: .all?
Show the answer
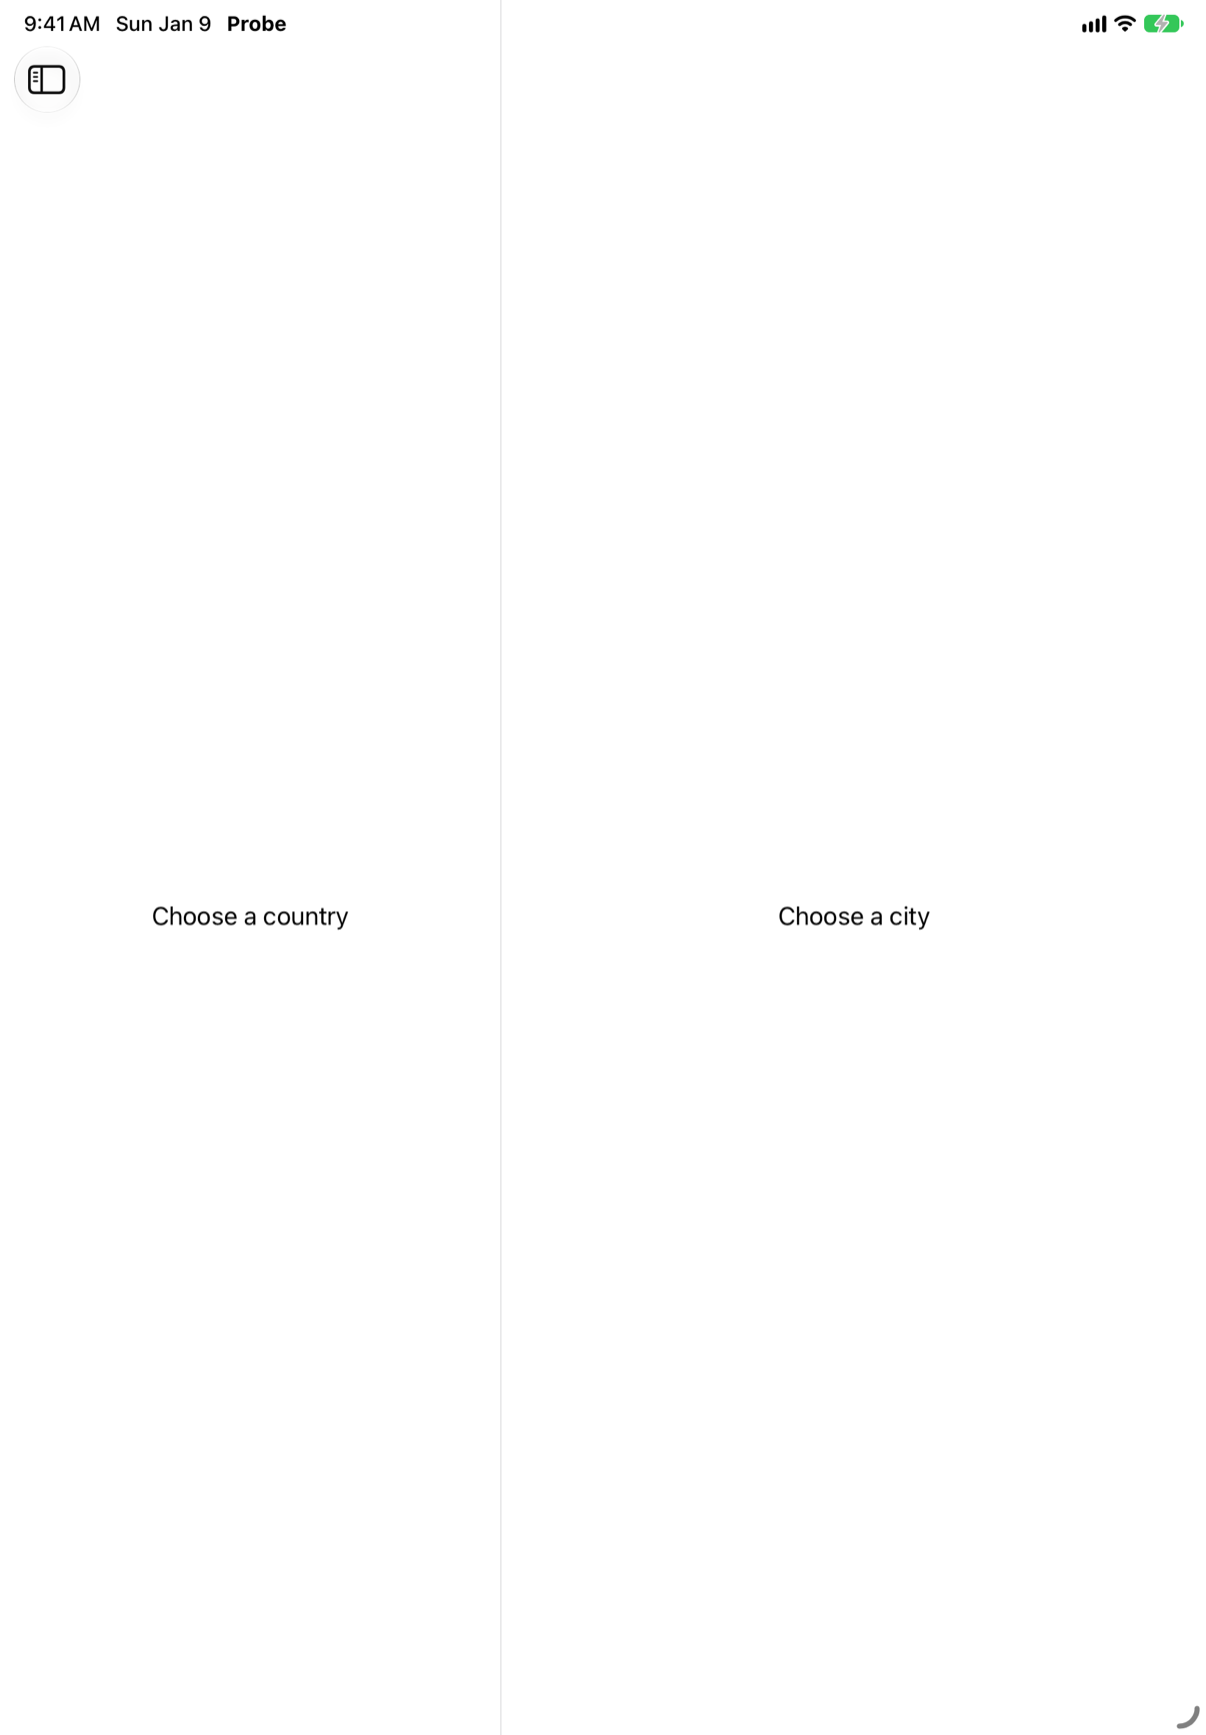
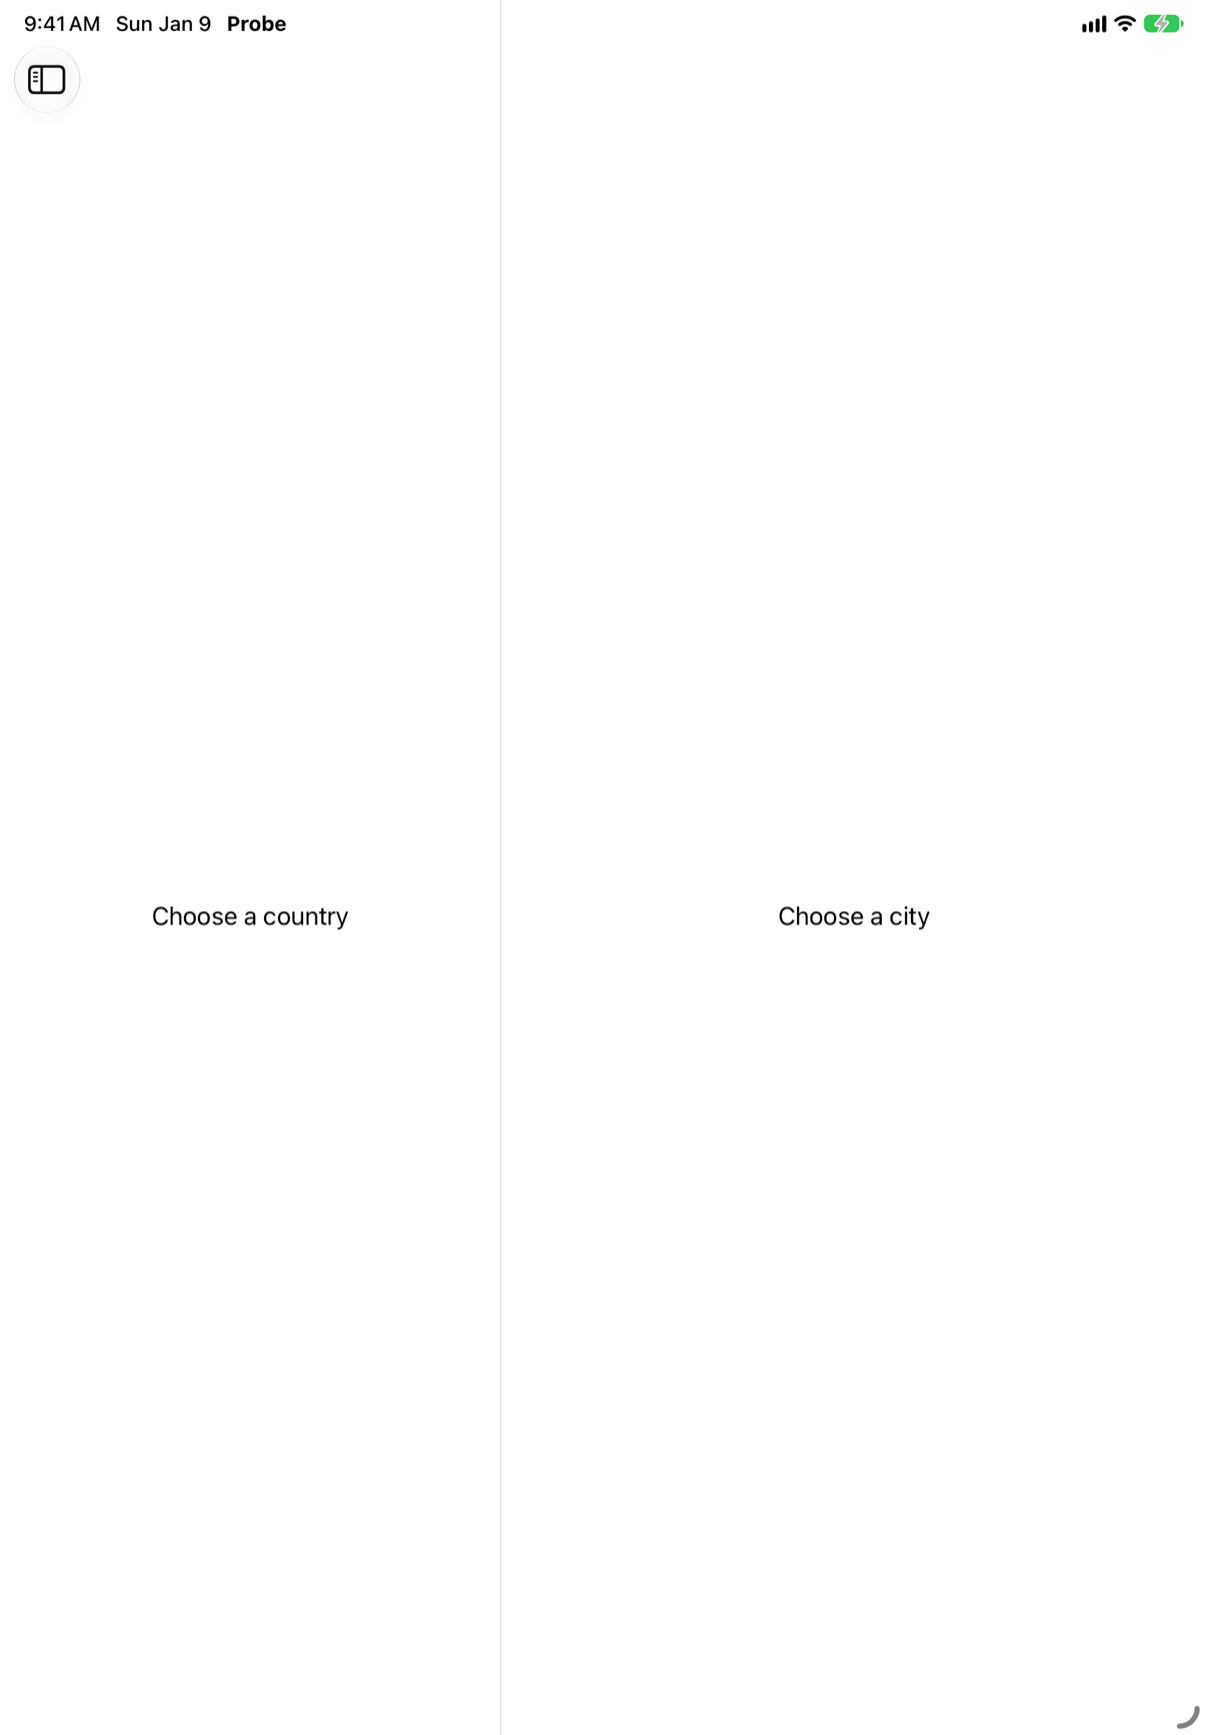
Out of sight. Held upright, the iPad shows the second and third columns — "Choose a country", "Choose a city" — and the first sits behind the one button on the screen, Show Sidebar. A tap on it slides the countries in over the other two:

Held sideways, there is room for all three at once:
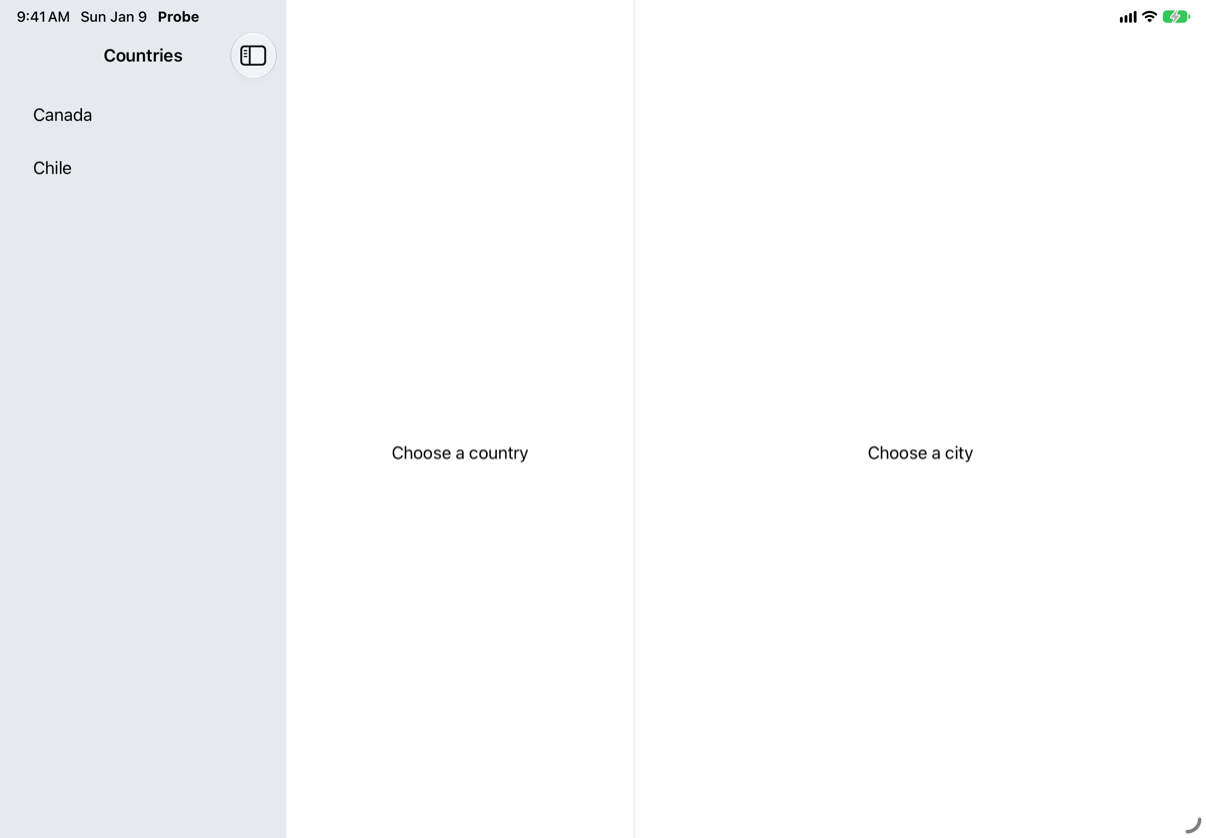
Asking for all three does not change that:
The console
columns: doubleColumnSwiftUI wrote back to the binding: the code asked for .all, and the split view set it to .doubleColumn, the first column hidden. Apple's page for the type warns: "Some platforms don’t respect every option." A columnVisibility binding is a request, and the binding tells you what was granted.
So on an iPad held upright, the first thing a user of a three-column app sees has no list in it. Make the middle and last columns say what to do — as "Choose a country" does — or start with two columns.
Where this comes from: NavigationSplitView · NavigationSplitViewVisibility — Measured on an iPad Air 11-inch (M4) simulator: upright and sideways, and with columnVisibility set to .all.
On an iPad — regular width — a view inside a sheet reads horizontalSizeClass. What does it get?
Show the answer
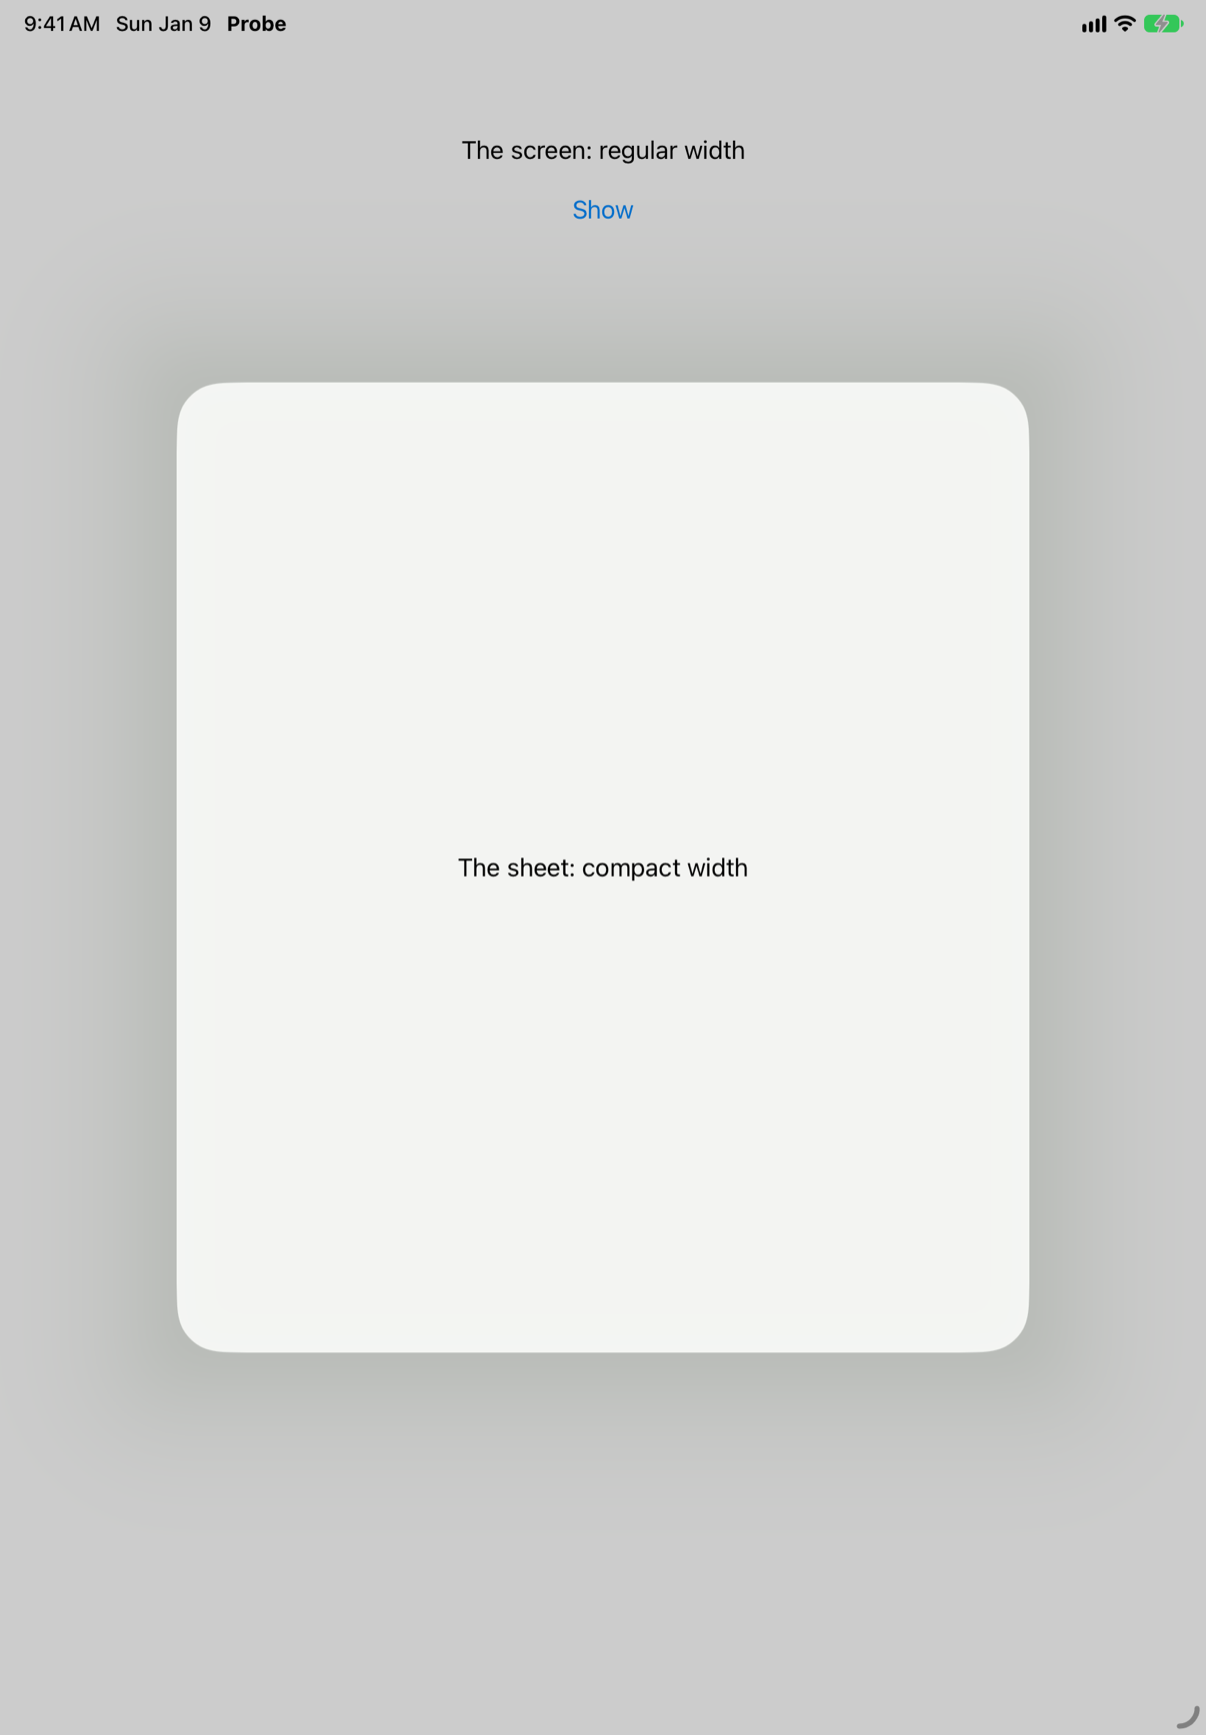
Compact. The screen behind is regular wide, and the sheet — a card in the middle of it — is compact wide. Apple's description is exact: the value "tells you about the amount of horizontal space available to the view that reads it" — the view's space, not the device's.
That is the size class doing its job. The planner's two fields side by side would be cramped in that card; a layout keyed to the size class puts them one above the other there without being told. Code that asks "is this an iPad?" would lay the sheet out as if it had the whole screen.
Where this comes from: horizontalSizeClass · sheet(isPresented:onDismiss:content:) — Measured on an iPad Air 11-inch (M4) simulator.
On an iPad, a split view has a view in its sidebar and another in its detail column, and each reads horizontalSizeClass. What does each one get?
Show the answer
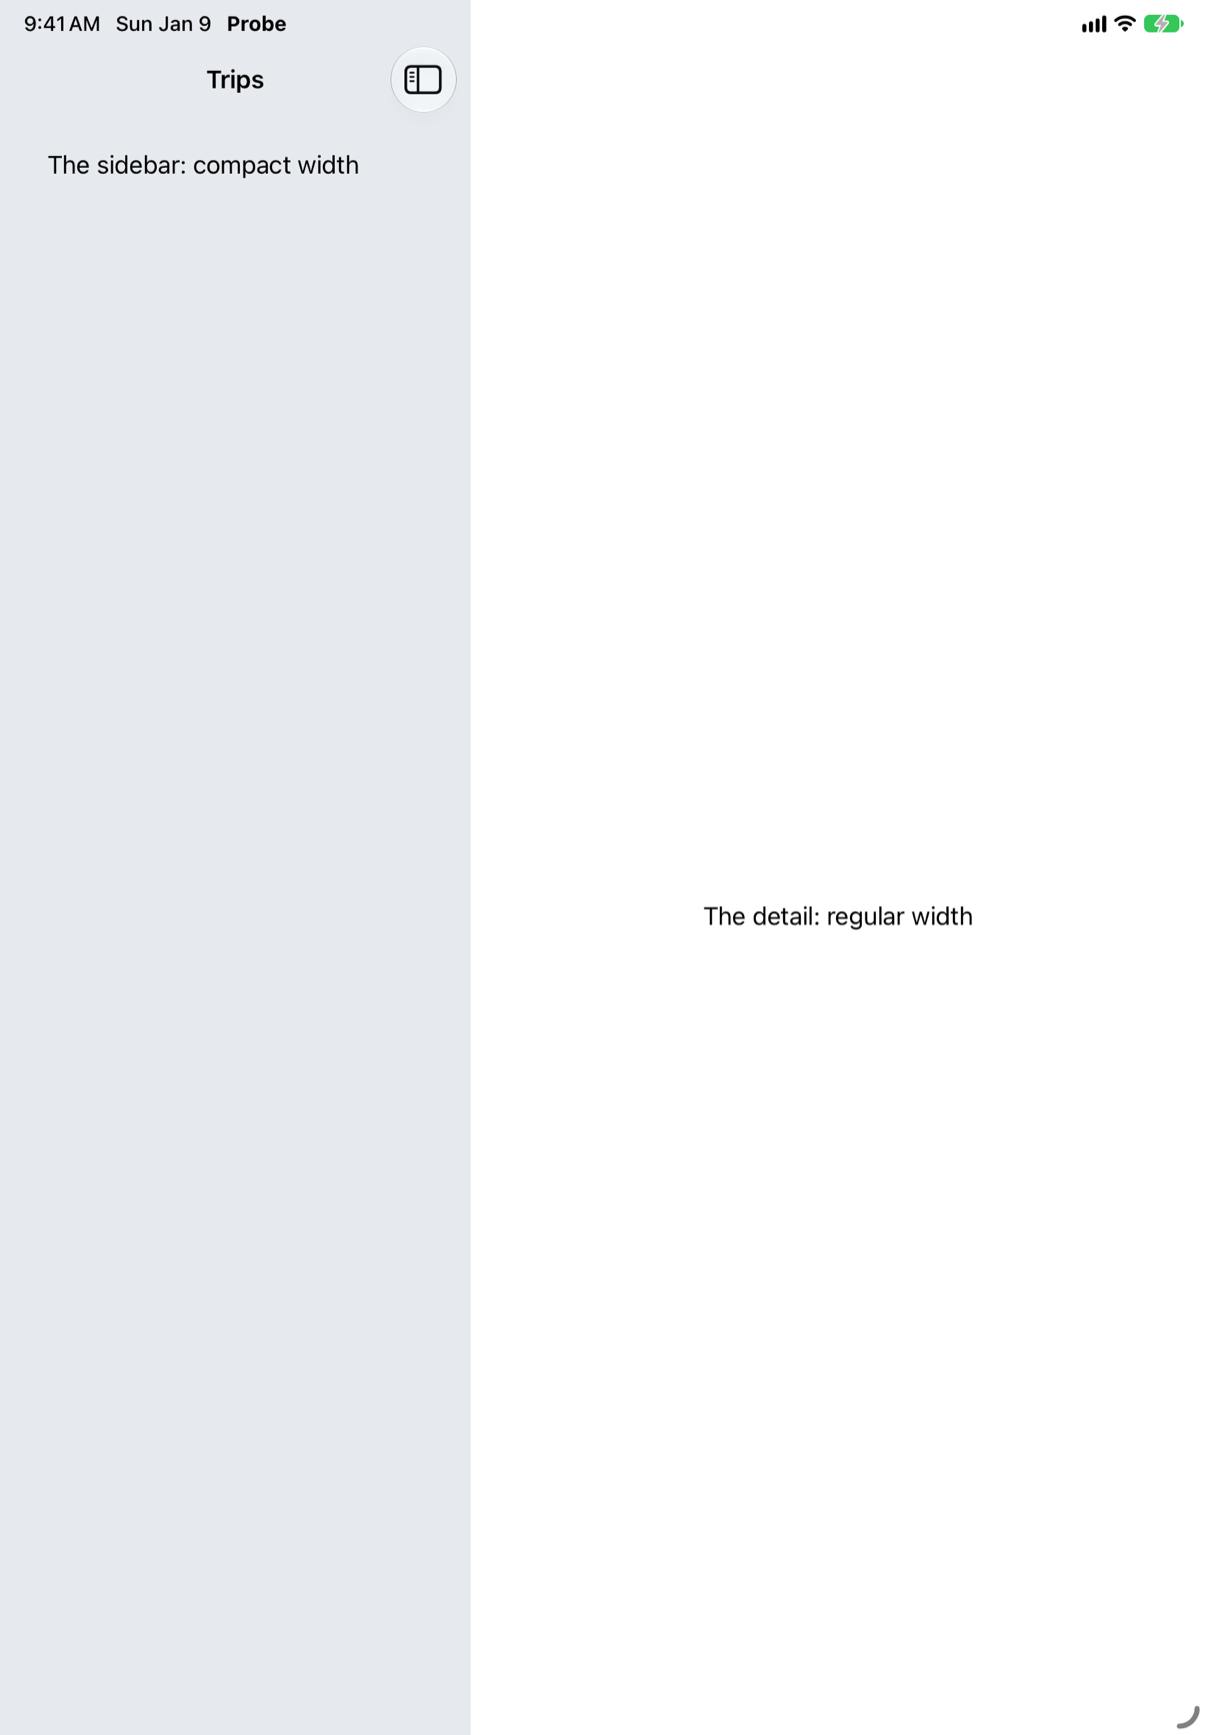
The sidebar is compact; the detail is regular. Each column is a space of its own, and each is described as what it is: the sidebar is a narrow strip, however large the iPad.
So a row that changes its layout at regular width never gets the chance in a sidebar — on any iPad. Design sidebar rows for a narrow space, and keep the wide layouts for the detail column, where the width is real.
Where this comes from: horizontalSizeClass · NavigationSplitView — Measured on an iPad Air 11-inch (M4) simulator.
On an iPhone, a split view's selection starts out already set: @State private var selection: String? = "Vancouver". What is on the screen when the app opens?
Show the answer

Vancouver's detail, with a back button to the list. A collapsed split view, in Apple's words, "shows the last column that displays useful information" — and with a selection already made, that is the detail. The list is one step back.
So setting the selection is how an app opens on one particular item: a trip restored from last time, or one named by a link. It is the same line on both devices — "Programmatic changes that you make to the selection property also affect both the list appearance and the presented detail view" — and the same code on an iPad opens with the list, Vancouver chosen in it, beside Vancouver's detail:

Where this comes from: NavigationSplitView — Measured on an iPhone 17 simulator.
On an iPad held upright, a two-column split view shows the list beside the detail. What does adding .navigationSplitViewStyle(.prominentDetail) change?
Show the answer

The list goes behind a button. With .prominentDetail, the detail keeps the whole width, and the list waits behind Show Sidebar. Without the modifier, the same iPad shows both:
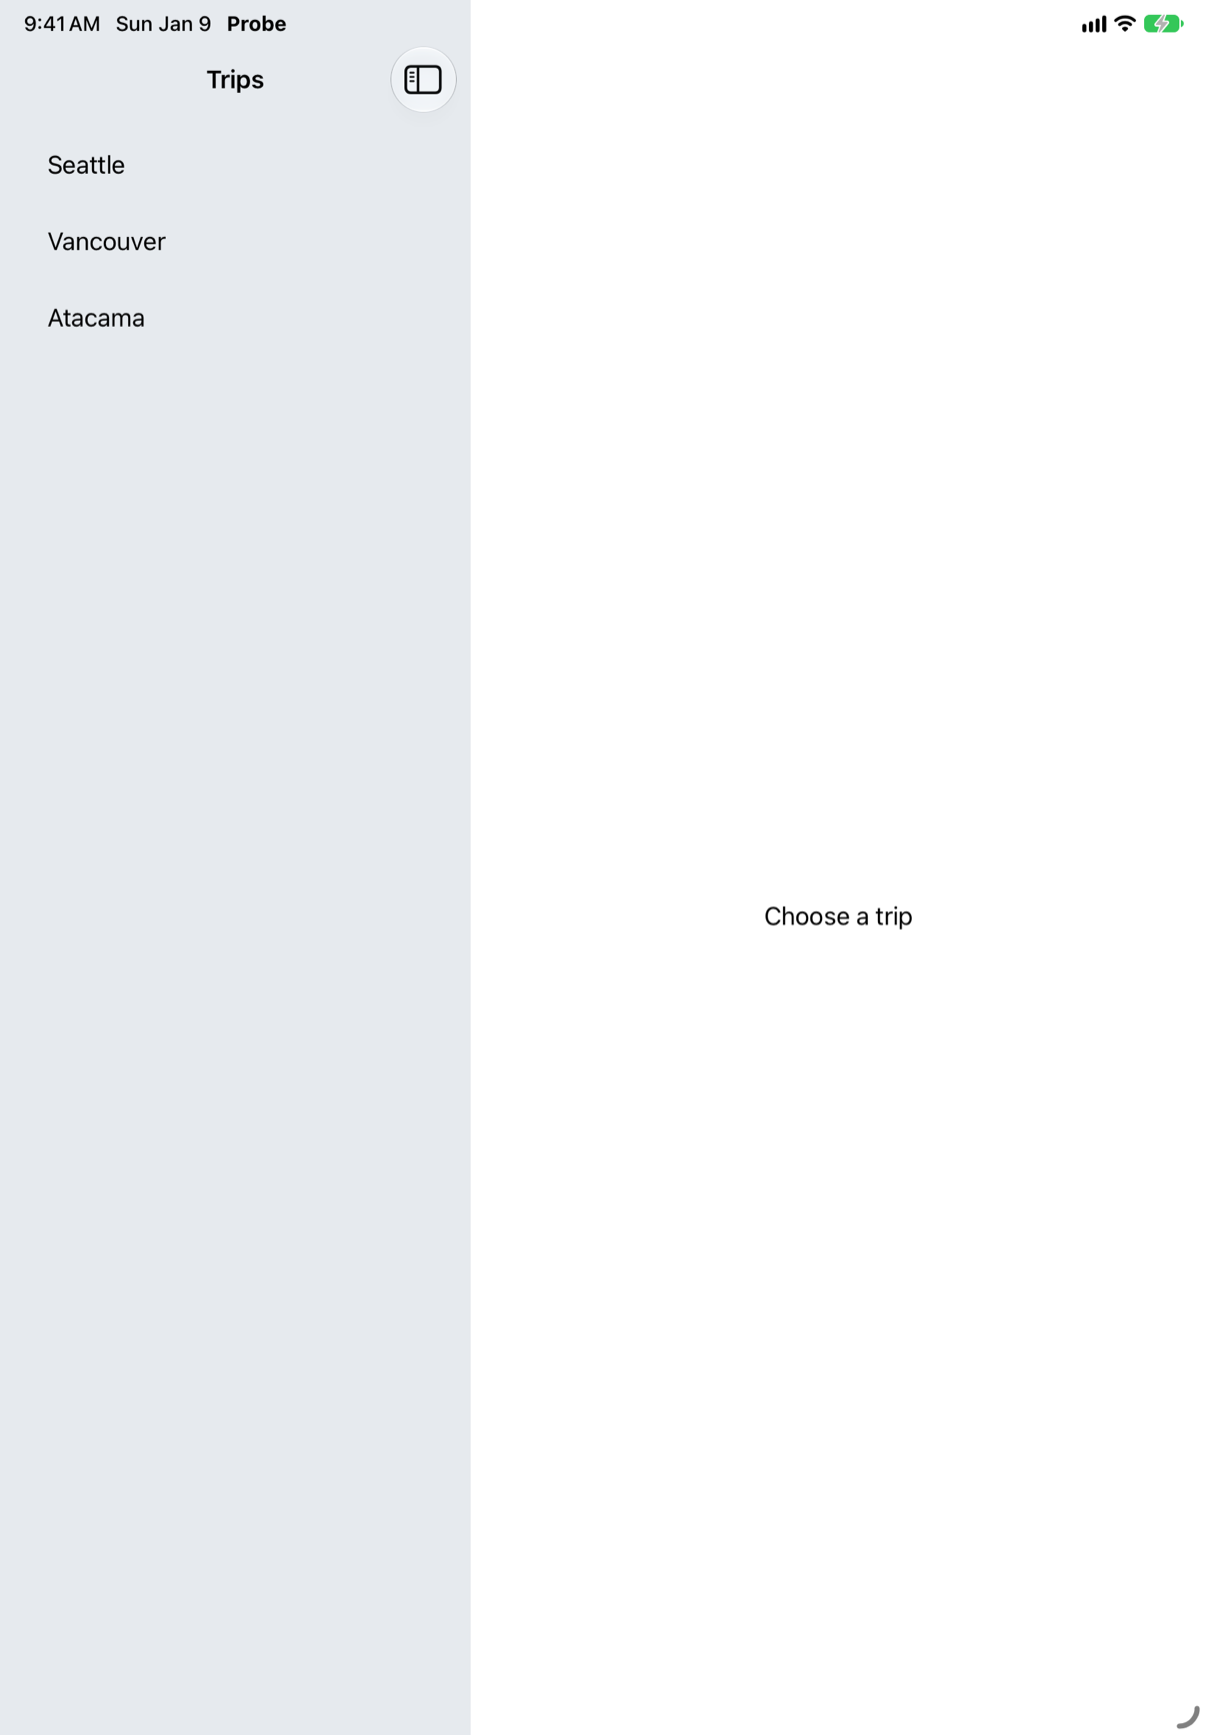
Apple describes the two styles by what happens to the detail: prominentDetail "attempts to maintain the size of the detail content when hiding or showing the leading columns"; balanced "reduces the size of the detail content to make room when showing the leading column or columns."
Choose by what the screen is for. A detail people look at — a photo, a map, a long text — deserves to stay prominent. A detail people move through quickly from the list, as in Mail, is better with the list in view.
Where this comes from: navigationSplitViewStyle(_:) · NavigationSplitView — Measured on an iPad Air 11-inch (M4) simulator held upright.
Sheets, alerts, and popovers
A row's button sets chosen = city, then isShown = true. The .sheet(isPresented:) shows Text("Editing \(chosen)"). The user taps Edit Vancouver. What does the sheet say — and why?
Show the answer

"Editing nothing" — a well-known SwiftUI bug, still there in iOS 27. The sheet's content closure was made the last time body ran, and it holds chosen as it was then. Setting chosen did not make body run again, because body itself never reads chosen — only the closure does. Setting isShown then presented the sheet with the old closure. (Lesson 22's edge cases met the same thing in a navigationDestination.)
The fix is the form made for this — the sheet is handed the item:

"Editing Vancouver." With .sheet(item:) there is one piece of state instead of two, the sheet cannot be shown without its item, and the item arrives as the closure's argument. Use it whenever a sheet is about one particular thing.
Where this comes from: sheet(item:onDismiss:content:) · sheet(isPresented:onDismiss:content:) — Measured on iOS 27: the sheet read the value from before the button's action.
One view has two .sheet modifiers, each with its own Boolean. Does the second one work? (In early SwiftUI it famously did not.)
Show the answer

Both work. The first sheet opened and closed, then the second opened. In SwiftUI's first year only the last .sheet on a view was honored, and "put each sheet on a different view" became folklore that still turns up in code reviews.
There is a better reason to prefer one modifier today: two Booleans can both be true at once. A single .sheet(item:) holding an enum of the sheets a screen can show makes "two at once" impossible to write.
Where this comes from: sheet(isPresented:onDismiss:content:) · sheet(item:onDismiss:content:) — Measured on iOS 27.
A sheet must not close until the user has decided. What stops a downward drag — and does a full-screen cover need the same?
Show the answer

.interactiveDismissDisabled(), on the sheet's content. The same drag on an ordinary sheet:

closed it, back to the Show button. With the modifier, the sheet stayed. Apple: "You typically do this to prevent the user from dismissing a presentation before providing needed data or completing a required action." It takes a Boolean, so it can lift once the form is complete: .interactiveDismissDisabled(!agreed).
A full-screen cover does not need it — it cannot be dragged away at all:

Still there after the same drag. Which is also its warning: a cover must offer its own way out, or the user is stuck in it.
Where this comes from: interactiveDismissDisabled(_:) · fullScreenCover(isPresented:onDismiss:content:) — Apple, interactiveDismissDisabled(_:): "a user can dismiss a sheet by dragging it down".
A sheet holds a NavigationStack. Its second screen has a Close button that calls @Environment(\.dismiss). The user taps Close. What closes?
Show the answer
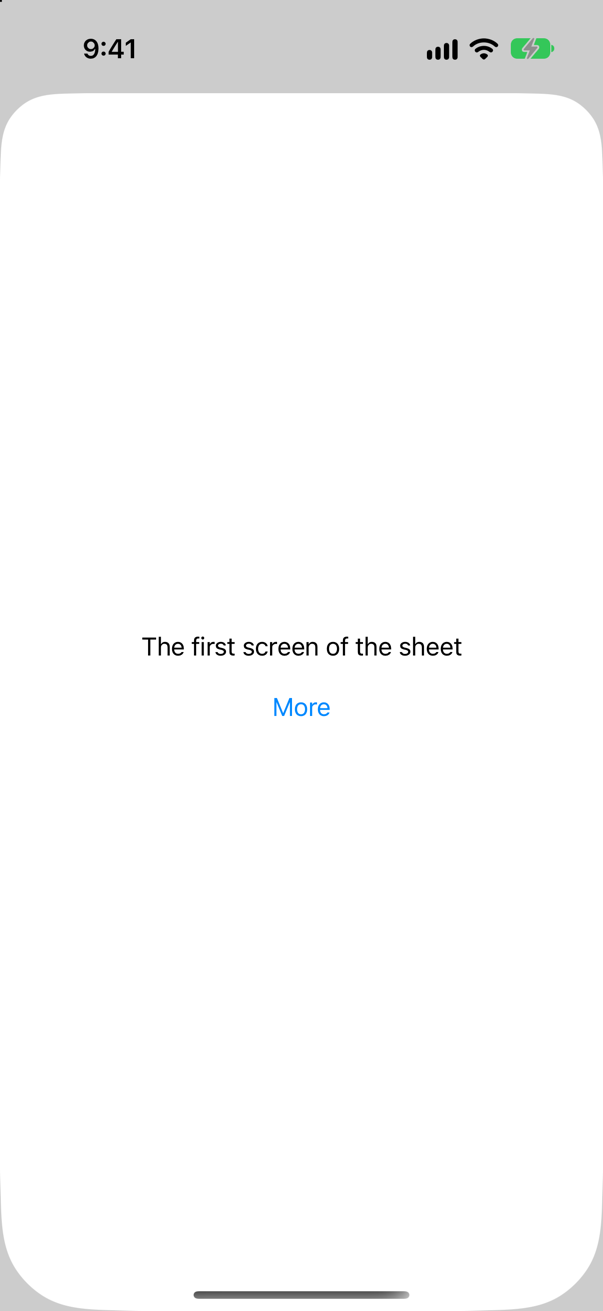
Only the second screen. The sheet stays, showing its first screen. Apple lists what dismiss does — "Dismiss a modal presentation, like a sheet or a popover", "Pop the current view from a NavigationStack" — and adds: "The specific behavior of the action depends on where you call it from." Read in a pushed screen, it is that push.
So closing the whole sheet from deep inside needs the sheet's own state: pass its Boolean (or the item binding) down, and set it to false. Interviewers like this as the follow-up to lesson 19's dismiss card: what does it dismiss?
Where this comes from: DismissAction · sheet(isPresented:onDismiss:content:) — Measured on iOS 27: dismiss() in a pushed screen popped it and left the sheet open.
A sheet with .presentationDetents([.medium, .large]) is shown on an iPhone held sideways. How much of the screen does it take?
Show the answer
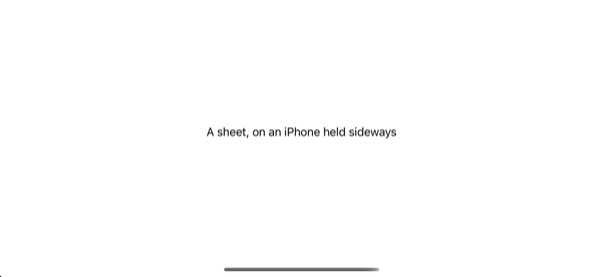
All of it. Apple: "In vertically compact environments, such as iPhone in landscape orientation, a sheet presentation automatically adapts to appear as a full-screen cover." A phone held sideways is compact tall (lesson 23 measured it), so the detents are set aside.
Two consequences. A sheet you expect people to swipe down has no visible way out when sideways — give it a Cancel or a Done. And the same page names the way to override the adaptation, presentationCompactAdaptation(_:), for a sheet that must stay a sheet.
Where this comes from: sheet(isPresented:onDismiss:content:) · presentationCompactAdaptation(_:) — Apple, sheet(isPresented:onDismiss:content:): "Use the presentationCompactAdaptation(_:) or presentationCompactAdaptation(horizontal:vertical:) modifier to override this behavior."
.popover(isPresented:) — a small bubble on an iPad. What does it become on an iPhone, and how do you keep it a bubble?
Show the answer

A sheet. Apple: "On iPhone, popovers adapt into sheets." To keep the bubble, say so on its content:

The bubble, pointing at its button. Keep it for small, quick content — a hint, a few choices. Anything with a form or a list is better off as the sheet the system chose.
Where this comes from: popover(isPresented:attachmentAnchor:arrowEdge:content:) · presentationCompactAdaptation(_:) — Measured on an iPhone 17 simulator with iOS 27.
A confirmationDialog with one destructive button, on an iPhone. Where does it appear, and how does the user say no?
Show the answer

In a bubble anchored to the button that opened it, with no Cancel button at all — the buttons on the screen were Delete Seattle and the dialog's Delete. A tap anywhere outside the bubble is the no.
Apple's reference still describes this as the iPad's way: "In regular size classes in iOS, the system renders confirmation dialogs as a popover that the user dismisses by tapping anywhere outside the popover, rather than displaying the standard dismiss action." On iOS 27 an iPhone, compact wide, did the same.
That is why the API is written in roles, not positions: .destructive for what cannot be undone, .cancel for the safe way out if you add one — "If you provide a button with a role of cancel, that button takes the place of the default dismiss action." The system decides how each looks and where it goes.
Where this comes from: confirmationDialog(_:isPresented:titleVisibility:actions:) — Measured on an iPhone 17 simulator with iOS 27.
An alert has a destructive Delete and a Cancel. The user taps Delete. What must your code do to close the alert?
Show the answer
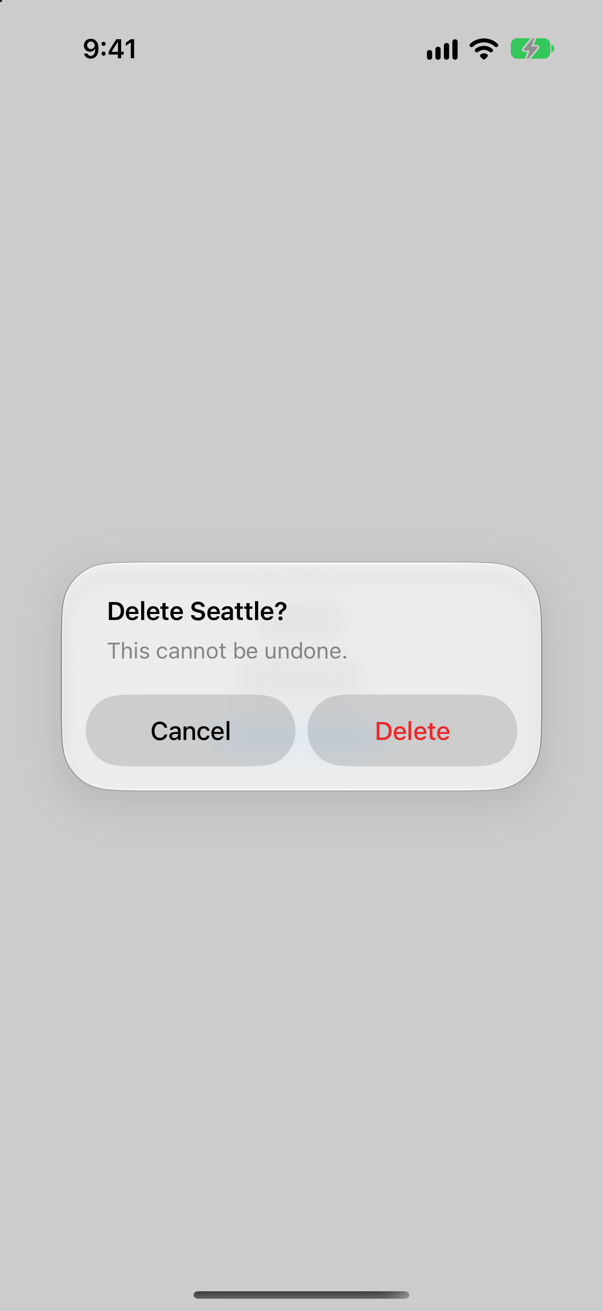
Nothing. Every button in an alert closes it after its action runs, and SwiftUI sets isAsking back to false. The tap on Delete removed Seattle, and the alert went:

Apple: "All actions in an alert dismiss the alert after the action runs." Roles do the styling — .destructive in red, .cancel as the safe choice. Write no buttons at all and "the system includes a standard “OK” action"; but "No default cancel action is provided", so a question that can be refused needs its Cancel written out.
What you cannot do is keep an alert open after a tap. Anything that takes more than one step belongs in a sheet.
Where this comes from: alert(_:isPresented:actions:message:) — Measured on iOS 27.
A view declares @Environment(\.dismiss) private var dismiss, and the sheet it presents has a Close button that calls that dismiss(). The user taps Close. What happens?
Show the answer
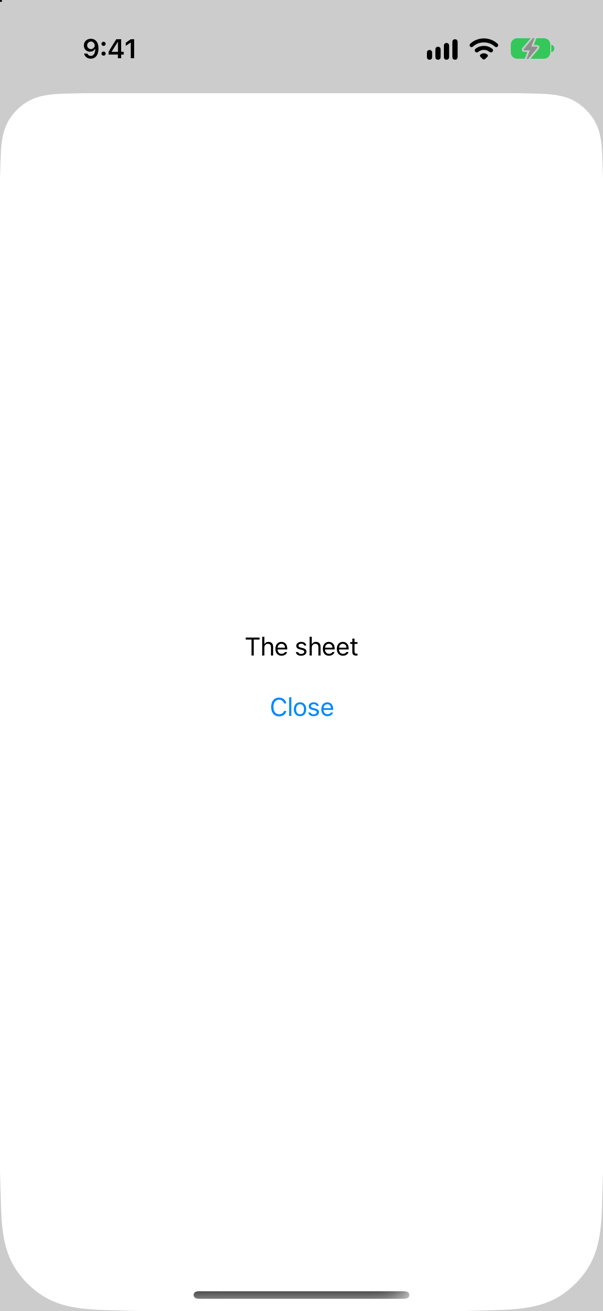
Nothing — the sheet stays. The dismiss was read by the view that presents the sheet, so it is that view's action, and that view is not presented by anything. Apple's page for DismissAction describes this exact mistake: "the sheet fails to dismiss because the action applies to the environment where you declared it" — and "The dismiss action has no effect on a view that isn't currently presented."
Read it inside the sheet, in a view of its own:

Close now closes the sheet, back to the Show button. It is an easy mistake to make when a sheet's content starts as a few lines in the presenting view's closure — and the reason editors such as this lesson's TripEditor are views of their own.
Where this comes from: DismissAction — Measured on iOS 27: the action read outside the sheet did nothing.
A sheet is shown with .sheet(item: $editing, onDismiss:). A button inside it sets editing to a different trip while the sheet is up. What happens on the screen — and does onDismiss run?
Show the answer
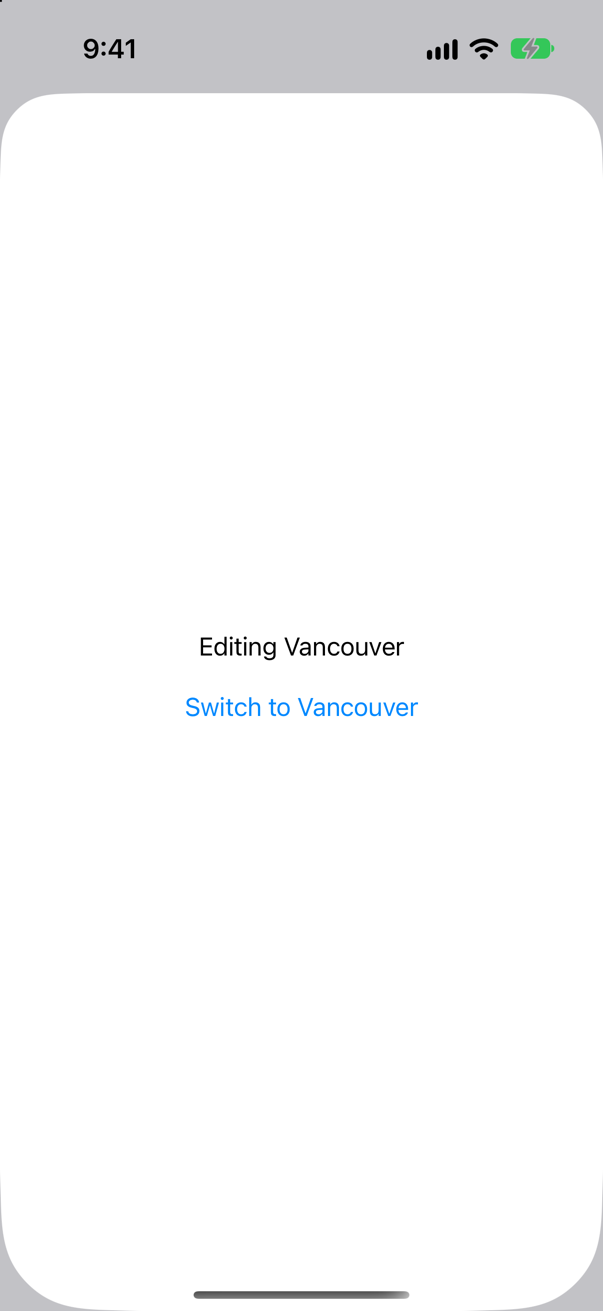
The sheet goes down and a new one comes up, for Vancouver — and onDismiss runs in between. The console while Seattle's sheet was up:
appeared: Seattleand after the switch:
dismissed
appeared: Vancouver
Apple's page says so in one line: "If item changes, the system dismisses the sheet and replaces it with a new one using the same process." onAppear ran again: a new sheet, with a new view in it.
So an editor that should step from one trip to the next without sliding away keeps which trip it shows in its own state, inside one sheet — and code in onDismiss must expect to run when the item merely changed.
Where this comes from: sheet(item:onDismiss:content:) — Apple, sheet(item:onDismiss:content:): "If item changes, the system dismisses the sheet and replaces it with a new one using the same process."